
1 Shares
#walkthroughs
Landscape Photography in the Outer Hebrides of Scotland
Torridon, Glencoe, and the Isle of Skye have drawn landscape photographers and artists over the centuries. The highlands of Scotland are extensive and uninterruptedly breathtaking – a Big Country indeed. This is the internationally perceived face of Scotland – a meticulously sculpted land of peaks, glens, lakes, and shorelines. And rain or mist to make or break the scene dependent on your disposition.
But distant from the western shore, an extensive string of pearls awaits the more intrepid traveler. The Outer Hebrides stretch for 140 miles – a sliver of land 40 miles away resting on the horizon. They are comprised of the joint isles of Harris and Lewis, North Uist, Benbecula, South Uist, and Barra.
Here is a different Scottish landscape. Pure and wild, beaches to melt a heart, rolling hills and lakes, abandoned homesteads left furnished some 70 years ago – a unique landscape tied to culture. Time slows down out here. The clock ticks to a different beat. There is a softness to the landscape that sways with this rhythm.
Tarbert is a port town, a docking place for the ferry from Skye but a taste of other times hangs in the air. Terraced cottages line the side of the hill. We rented a cottage for four nights and set off to dip our toes into the landscapes of Harris and Lewis. Not an hour and a half after stepping off the ferry we walked the length of Seilebost beach.
A little travel weary – but the landscape just soaked us up and soothed us in. I took some initial photographs on the beach into blue hour – just to let the camera out of the bag as the light was dull and dimming. We drove back to Tarbert in the dark. We had indeed arrived.
At dawn the following morning we sat in the sandy car park at Rosamol as the skies provided a free car wash. There were two other cars and a camper van – each seemingly daring the other to take to the beach first. The rain eased and we walked the wet sandy track to the wide beach. The hills of Harris dipped in and out of clouds. The light was a dirty grey and the photographs taken that morning were a reflection of the weather. But the hills and islands encroaching the beach were akin to an amphitheater and made an instant impression that would draw us back to this beach.
The eastern shore of Harris is pockmarked with tiny lochs that meet the sound of the Minch, the strait that divides the isles from the highlands. The western shore could not be more different – the lauded beaches that deservedly act as a magnet for landscape photographers and artists. The beaches lend themselves to the creation of dreamlike impressions that longer exposures serve best. I fully expected my wide-angled lens would live on my camera body for the trip but found that longer focal lengths better served my purposes.
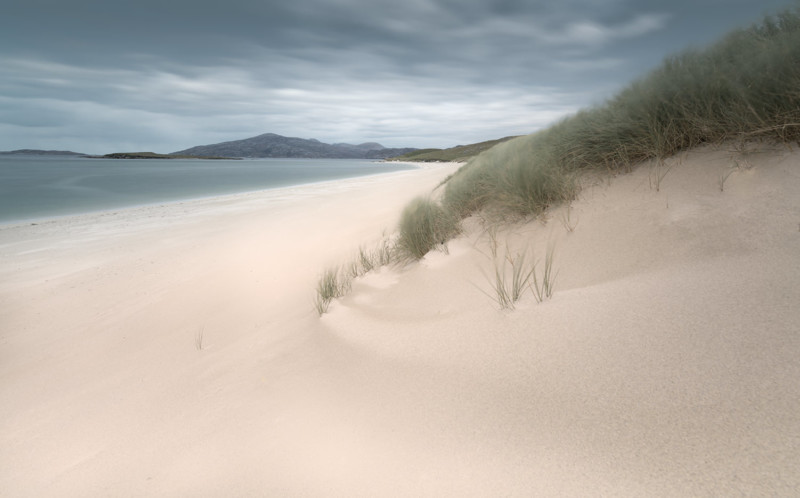
All of the beaches along the western shore deserve a dedicated visit. Horgabost beach is compact and suffers from occasional drifts of dead seaweed as was the case when an unexpected burst of evening light necessitated an impromptu visit. The beach was not an option so I hurriedly ran atop the dunes and shot to exclude it – a 6-second exposure to soften the marram grass as it merged with the Atlantic.
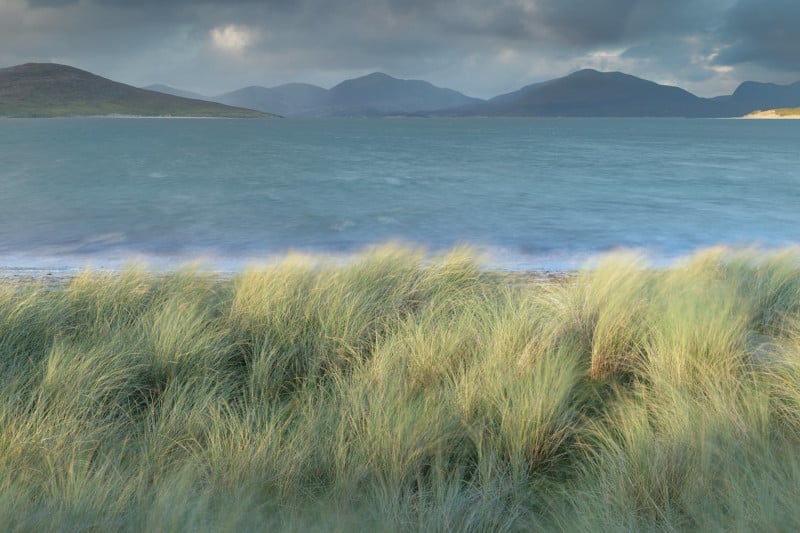 Horgabost beach
The following day we took the spectacular single-track road to Huisinis beach and witnessed golden eagles and a large migration of redwings on the route.
 Huisinis beach
This is another compact beach good enough to shoot independently but the jewel of the area is Tragh Mheallan. The beach requires a good 45-minute walk with an incline along a well-marked cliff path.
An otter greeted me along the cliff walk. A white-tailed eagle flew overhead. The beach was enormous and empty. The marram grass held no human footprint but was indented by the tracks of deer. My composition was rushed as the light faded on an overcast afternoon. An enthralling location.
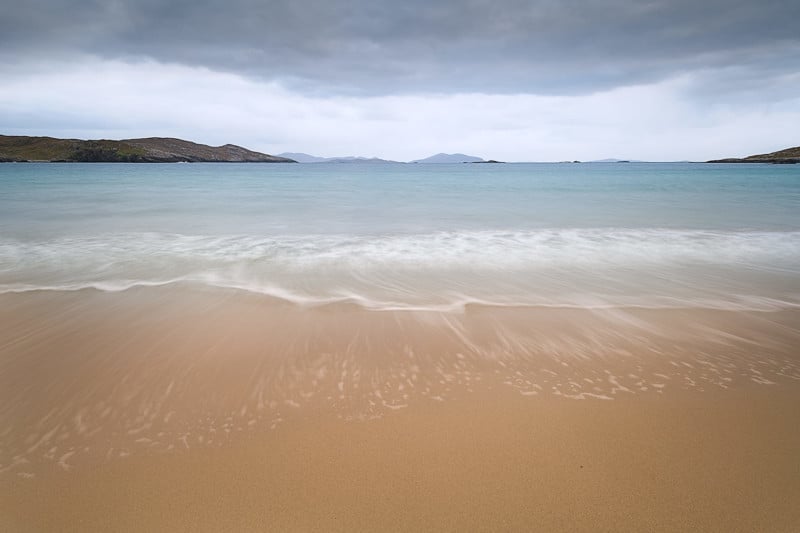
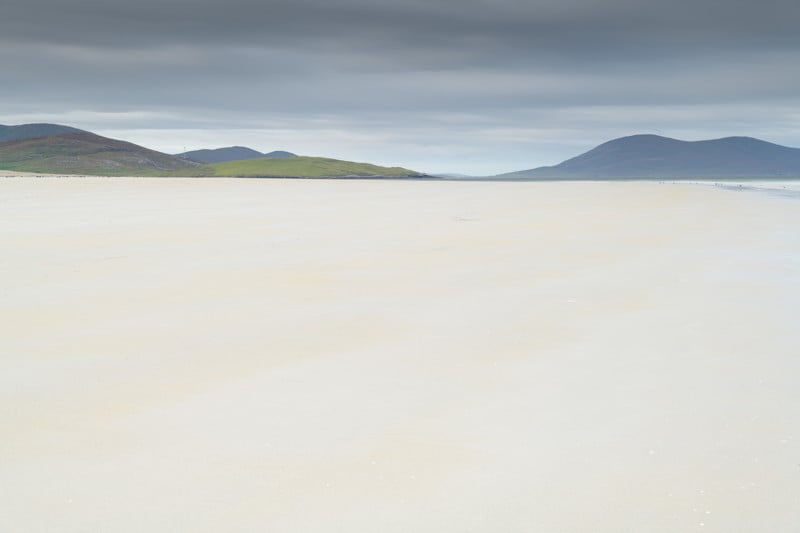
Luskentyre is the most popular beach in Harris – it is effectively a bay – Rosamol and Seilebost beaches at either side. I visited for two sunrises during our stay once on each side.
 Luskentyre beach
Rosamol should be your first choice as it was mine. The light on my dawn visit was dull. The dunes and distant mountains though impressive deserved better light. A beach tends to fare better in duller light and so my preferred images were abstract in nature and the compositions drew substantially on the sands. At Seilebost, the light was a slight improvement and I played with a layered composition of rocks, sea, sand, mountains, and sky.
And so we had spent 3 days exploring parts of Harris and had not yet ventured into Lewis – the largest part of the island. A trip to this island would not be complete without a visit to Callanais Standing Stones and that is where our final day took us. Out of the bag came the infrared camera for a noon shot of this archaeological wonder.
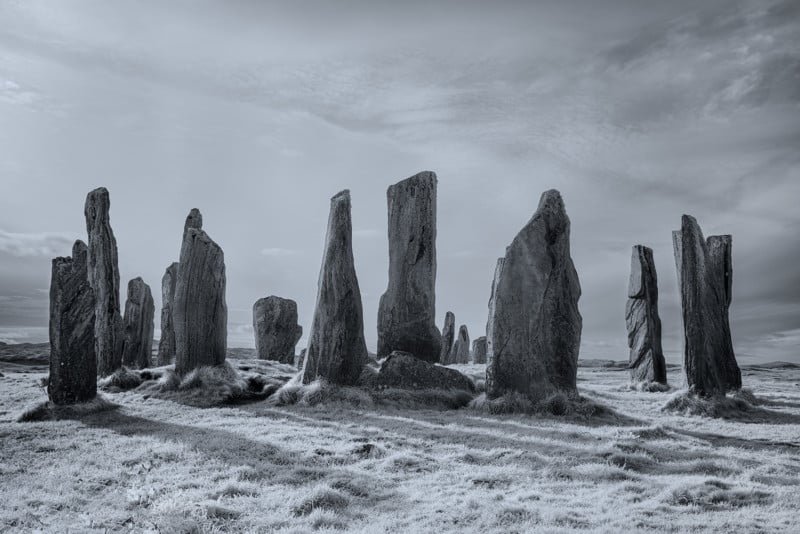 Callanais Standing Stones
The afternoon was drawing in but we pressed on further from home to the Mangarsta Sea Stacks.
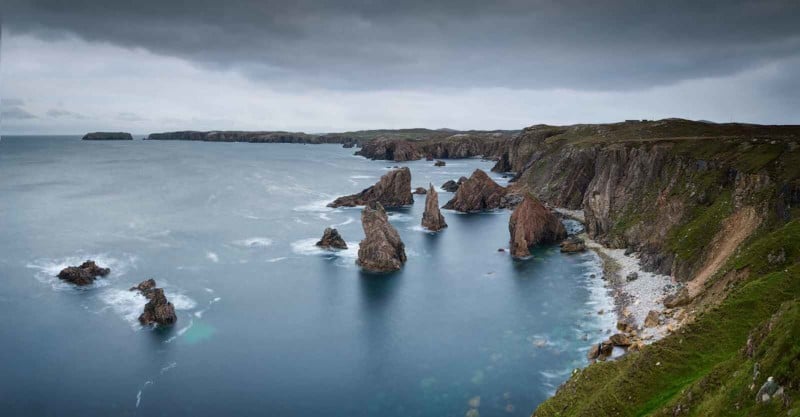 The Mangarsta Sea Stacks
The light was never going to be interesting but to view the scene and take an image for the sake of it was worth the effort. And so our short sojourn to the Outer Hebrides ended.
Here are two videos of my 2021 trip to Scotland showing my landscape photography outings in a vlog style:
About the author : Jimmy Mc Donnell is a landscape and wildlife photographer from Co Wicklow, Ireland with an enduring passion for capturing images that reflect the beauty of the natural world. The opinions expressed in this article are solely those of the author. You can find more of Mc Donnell's work on his website and YouTube. This article was also published here.
#inspiration #spotlight #travel #walkthroughs #jimmymcdonnell #landscape #landscapephotography #outerhebrides #scotland #travelphotography
1 Shares
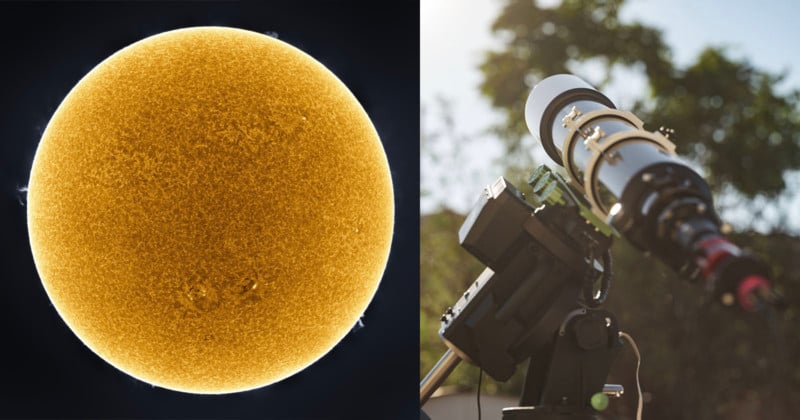
A Closer Look: How I Created a 248MP Photo of the Sun
A big ball of light hovers above our heads everyday. It is always there and most people take very little time to notice it. While we are not suggesting that you spend time staring at it and going blind in the process, science has allowed us the ability to look directly at the sun in the safest ways.
As consumer technology has become more affordable, the average person can peer into the multiple layers of the sun using dedicated equipment that can be purchased at any good telescope retailer.
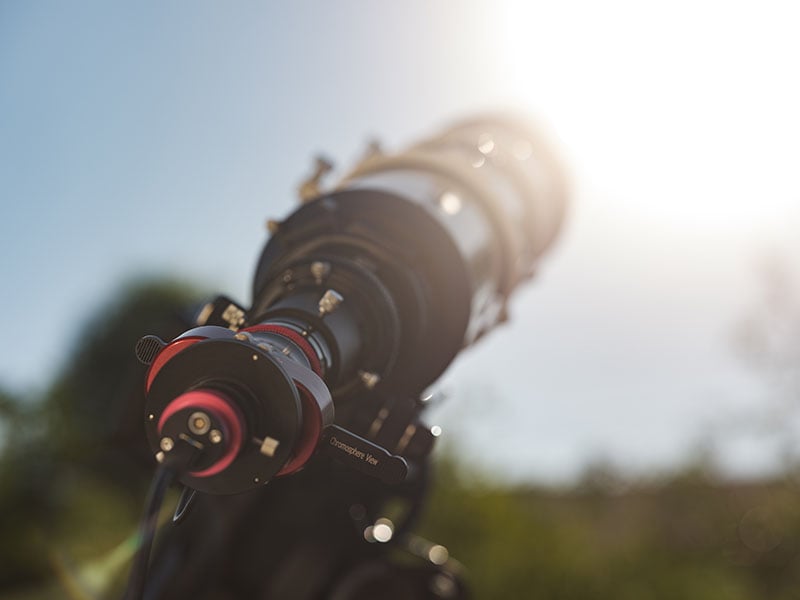
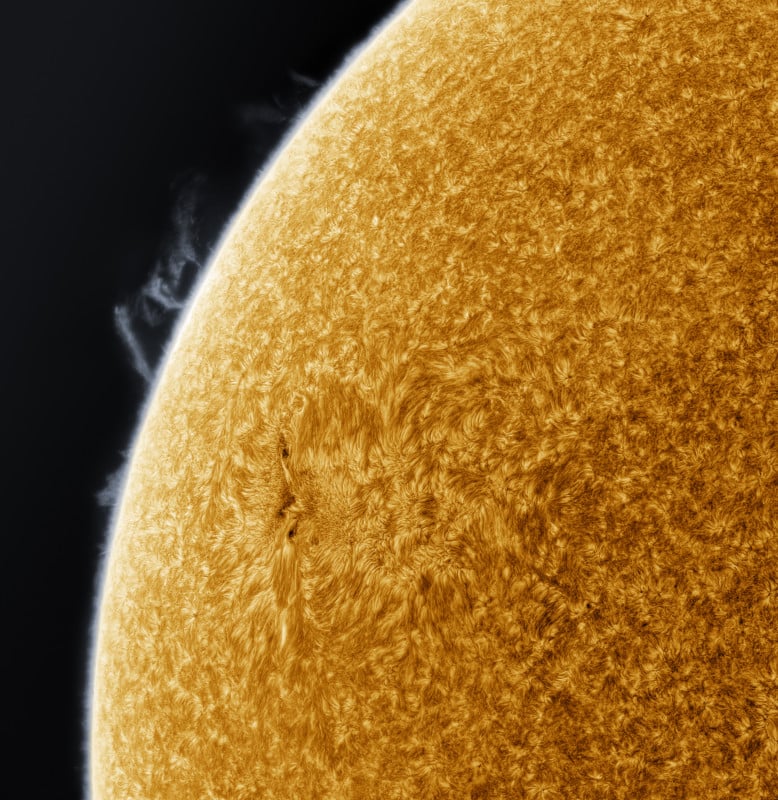
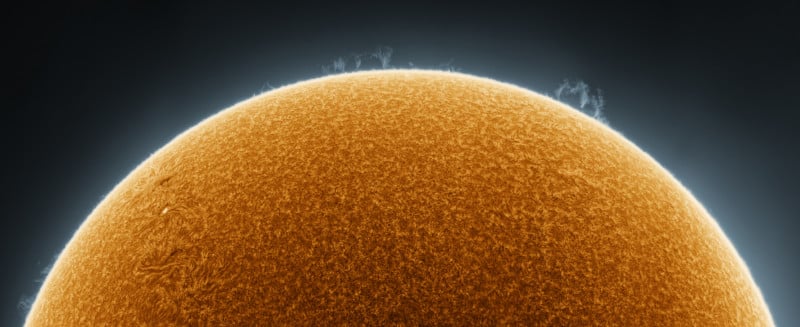
In this article, we will be focusing specifically on a layer known as the Chromosphere: an area of the sun that is visible within the orange to red spectrum. Using a specialized filter, this device blocks out all unwanted light while passing the specific bandpass we are looking at.
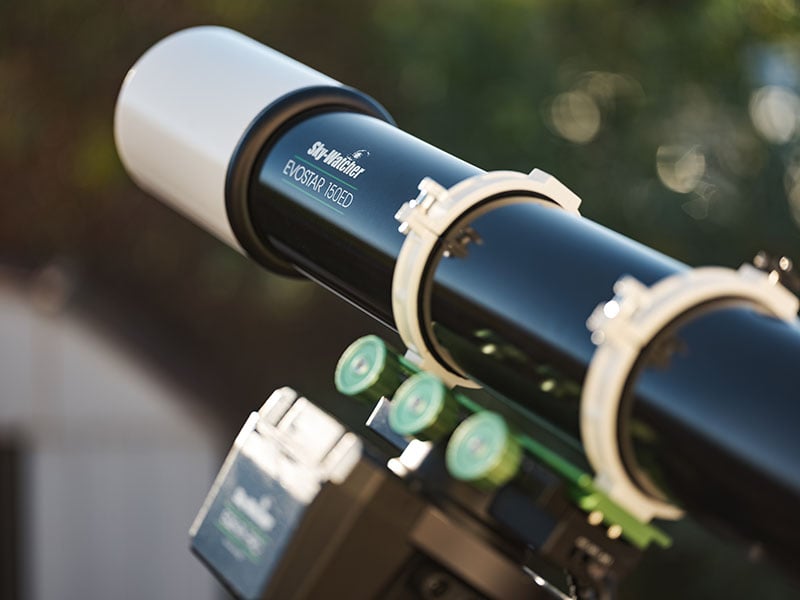
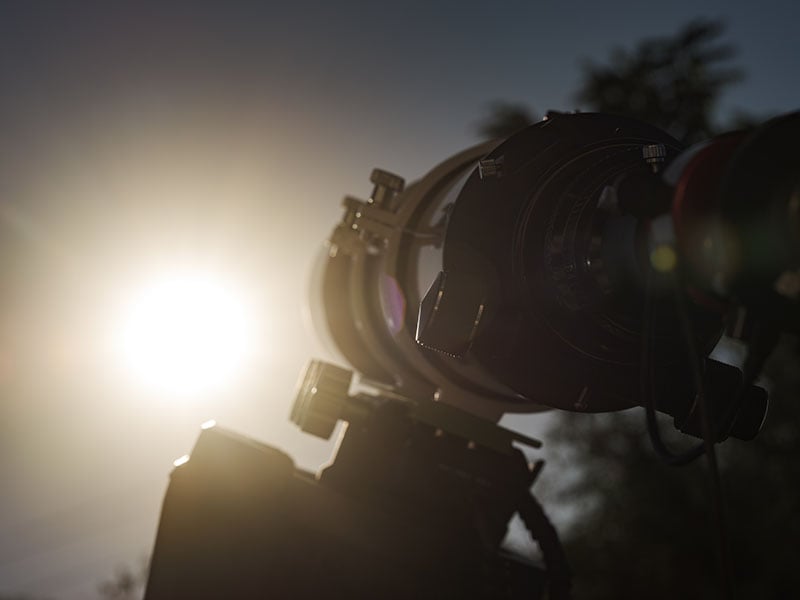
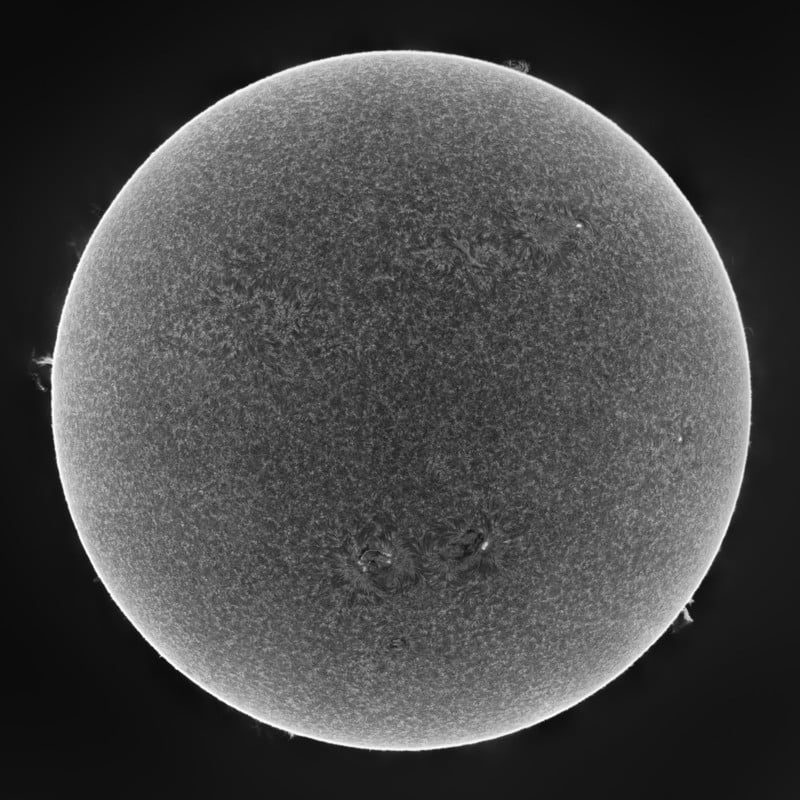
This full-disc image of our sun is created using a large refracting telescope and a high-speed CMOS monochrome camera.
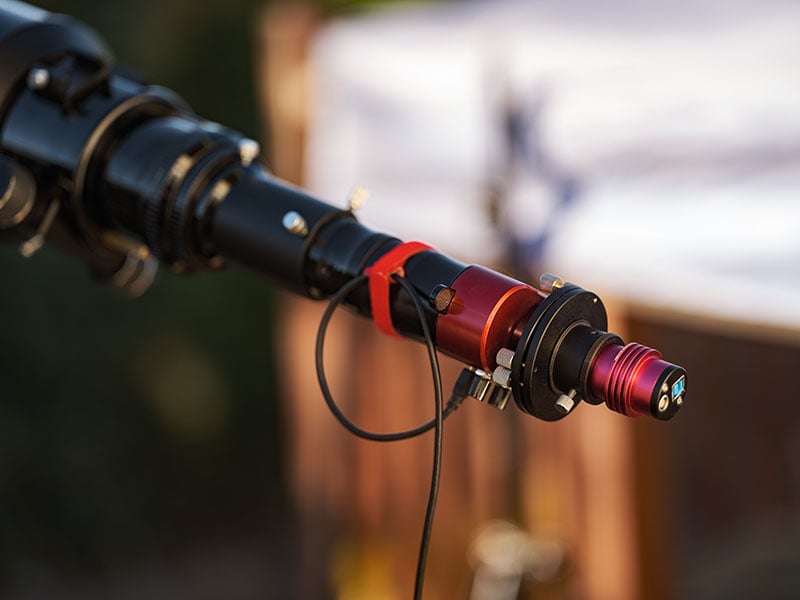
A special type of filter known as an etalon is used in conjunction with a blocking filter. Since the layer of the sun is what we want to observe, the blocking filter is designed to let in light at 656nm wavelength. In this case, a Daystar Gemini is used which also has a 4.2x telecentric Barlow built-in.
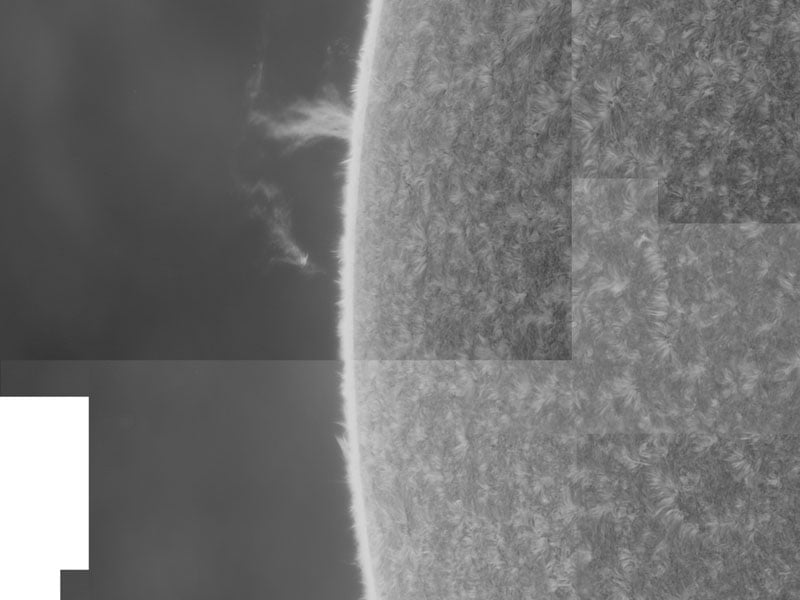
The camera in question is made by QHYCCD, a company that specializes in making cameras for the astrophotography market. This particular camera, the QHY5III-174M has a smaller sensor compared to what we are used to. At only 2.35-megapixels, a final image is built of 90 panels to create a mosaic of sorts, making a complete image of our star.
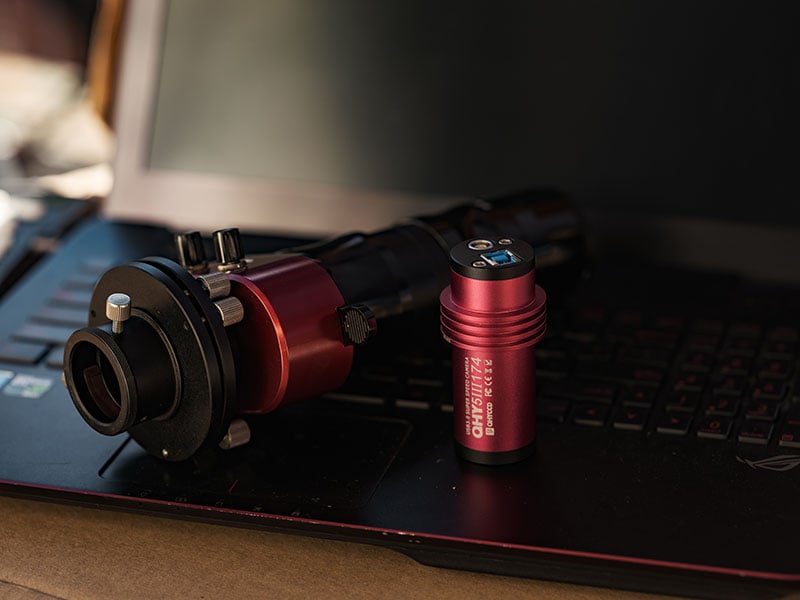
Each panel or image is made up of a high-speed video capture of 1000 frames, which is later stacked together to create a highly detailed image with smoother gradients and less noise.
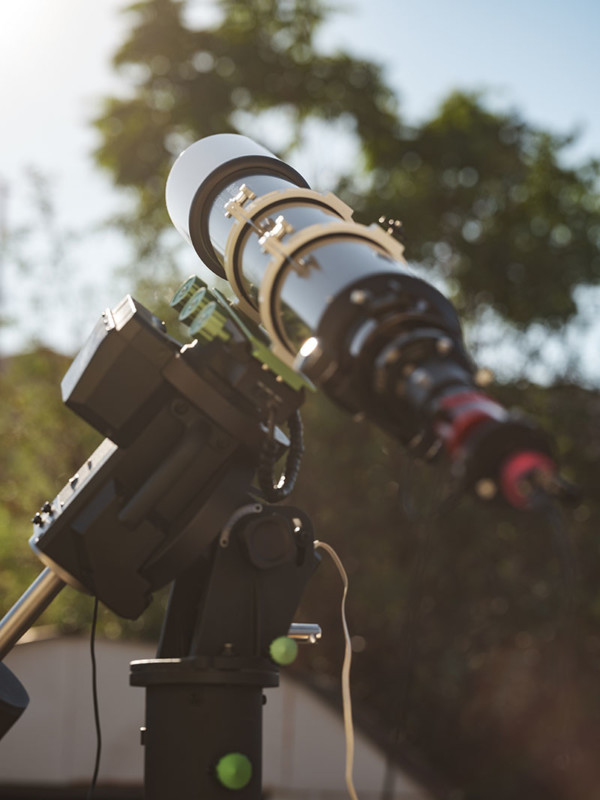
Since the camera has such a small sensor, a tracking mount was used with the assistance of a controller to pan across the sun, taking captures at various steps. Since the sun is actually in constant motion, the time taken to capture each panel has to be under a certain time frame. This sequence took approximately 25 minutes to complete to ensure that the surface did not change too much when creating the final image.
Astrophotographers often employ a technique during the initial phase to sort out what is signal and what is noise. The basic idea is that an image with a lot of noise when combined with other images from the same framing, will result in a better image.
Once these images have been stacked, a process is then applied which helps sharpen the image. Using a specific technique known as deconvolution, a software called IMPPG allows details to be pulled back in. This is much like the pre-programmed settings found in almost all DSLR and mirrorless cameras. Astronomy cameras have these pre-processing steps removed to allow the user more control over the image at the cost of time spent processing.
Next is the long task of aligning each image. While there are many software options to make this process faster or automated, images such as these do not always line up correctly. Often, two images do not contain any specific features for the software to create alignment points and fail at creating stitched images without some type of distortion or misalignment.
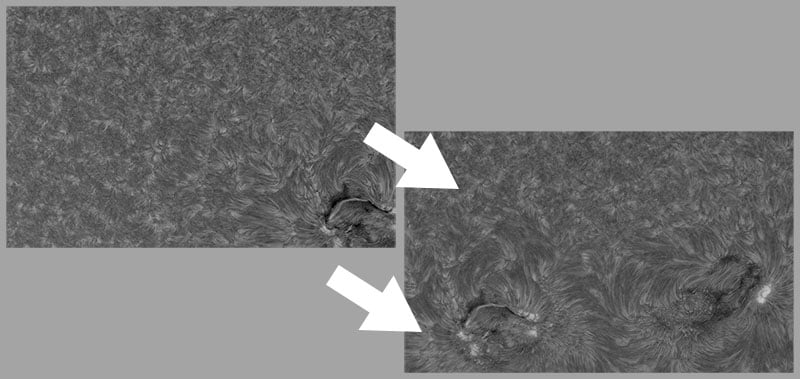
After each frame has been individually aligned, the images are then blended together to make a seamless image. Photoshop Auto-Blend is able to handle this particular task extremely well, even if the two adjacent frames have different varying levels.
Once each panel had been aligned and blended, a few other tricks were also used to enhance the details further. Applying HDR Toning, details begin to pop out. The HDR image is blended together with the previous result, to make a smoother transition. Varying hotspots and dark patches are also removed to create a more uniform image using the Camera Raw functions within Photoshop.

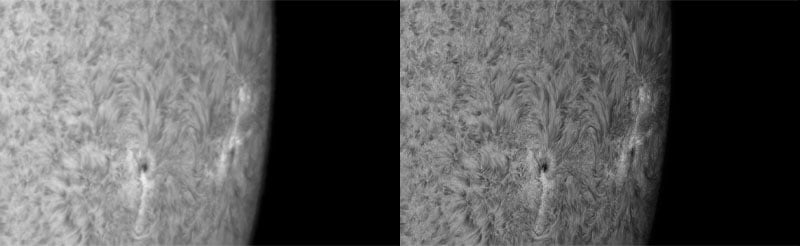
 Processed Mono Invert
 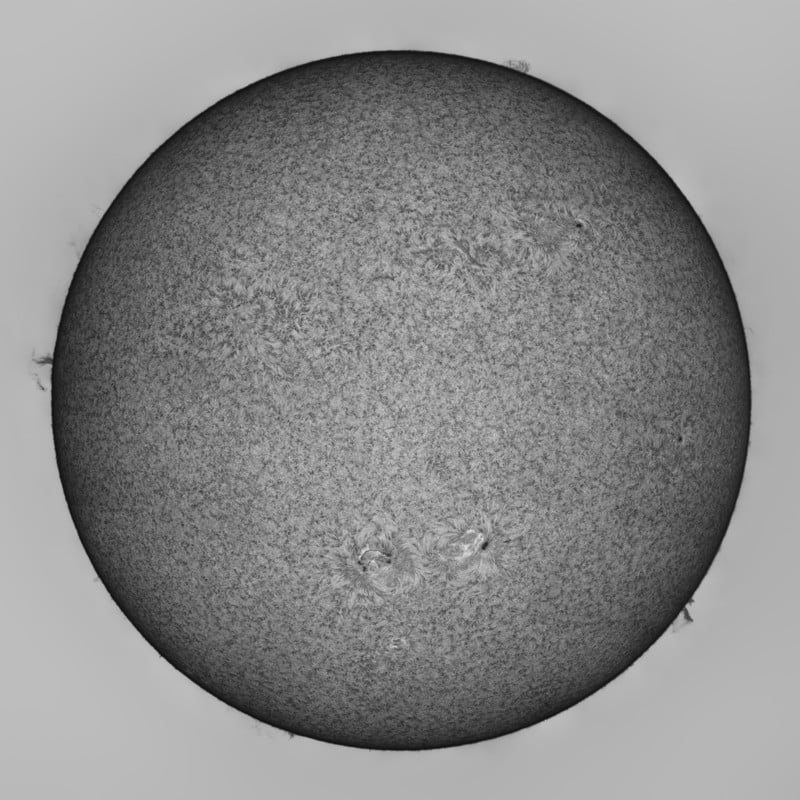 Processed False Mono Positive
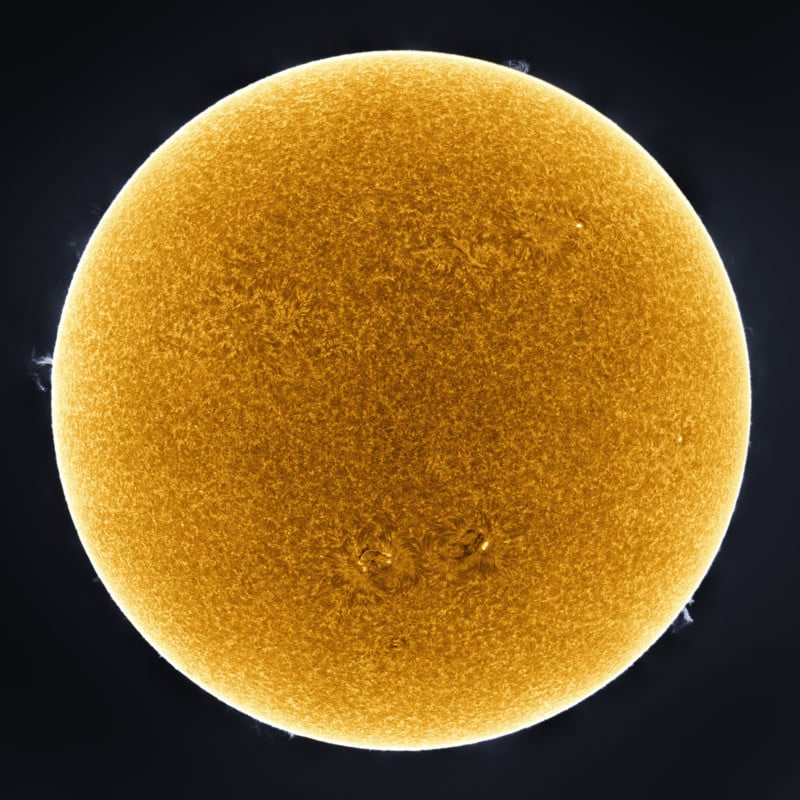
Once the final image is achieved, a false-color is applied to the image. Since our sun is not actually yellow, a curves adjustment is used to give the coloration that most people would associate with the sun during sunset.
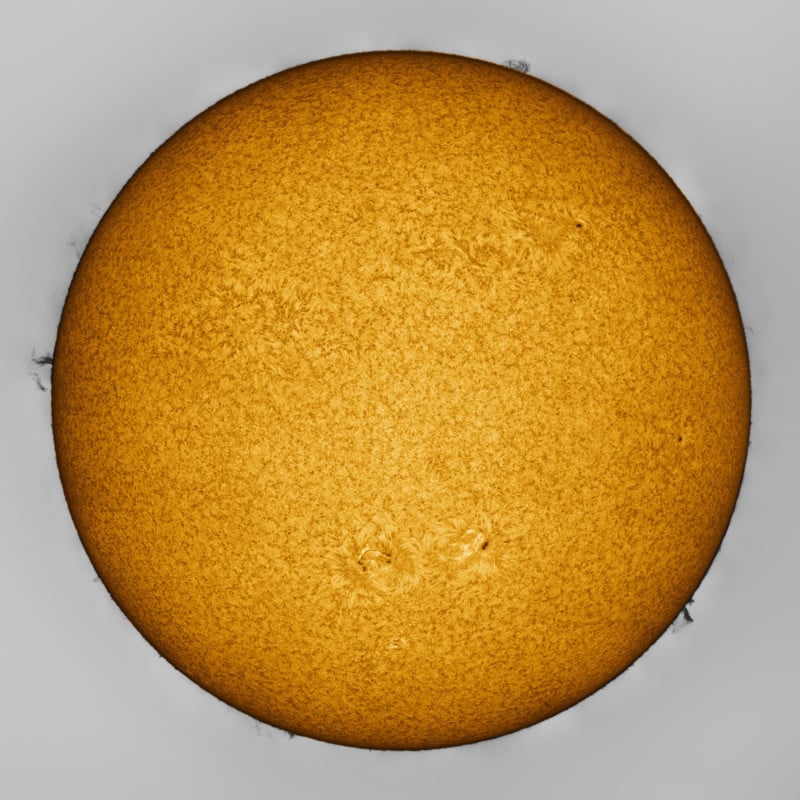 Processed False Color Positive
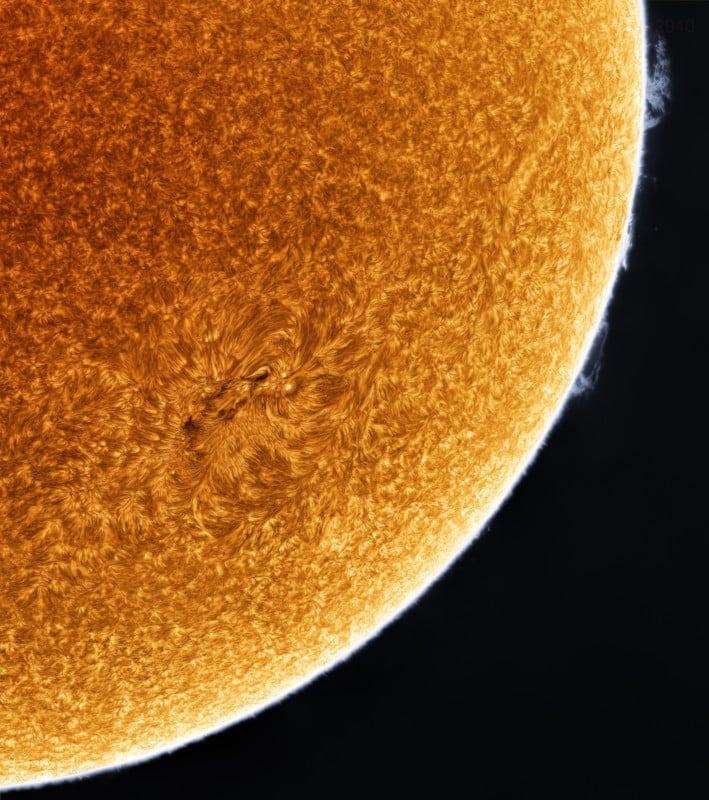
The final image created is a giant 248-megapixel image that freezes the sun at that moment of capture, never to be seen again in the exact same way.
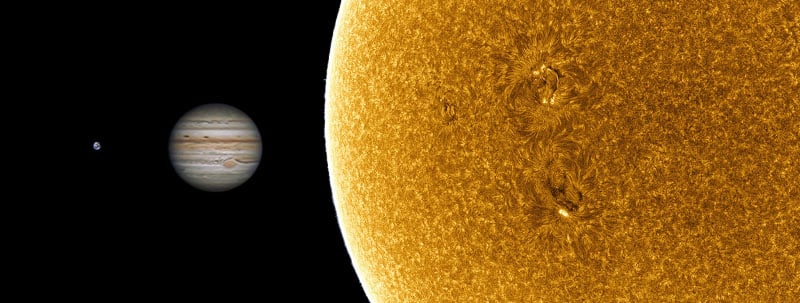
While a smaller telescope can be used to create these images, larger telescopes have the added benefit of being able to get more details than would with a smaller counterpart. At 1200mm focal length, plus the added 4.2x magnification, the smallest minor details become monstrously big. Each feature can be the size of the Earth and the larger ones would swallow Jupiter whole several times over.
About the author: Simon Tang is an accomplished astrophotographer whose work has been widely recognized, including by the Royal Observatory in its Astronomy Photographer of the Year competition (under the name Siu Fone Tang). Tang regularly shares his astrophotography images on his Instagram.
#editorial #inspiration #walkthroughs #248megapixel #astrophotography #cmossensor #editing #falsecolor #howto #monochromecamera #qhyccd #simontang #sol #solar #star #sun
1 Shares