
2 Likes
#docker
4 reasons why you should use Docker containers on your PC

I use Docker containers exclusively on my servers, but have yet to explore using them on my desktop computer or a Raspberry Pi. I do use Flatpaks quite a bit, and there seems to be a case for Docker containers being lighter than Flatpaks even (not sure about this yet).
But certainly, Docker containers are ultra-lightweight (just think also how quickly they spin up).
And yes, they do isolate their environment and prevent any chance of conflicting packages.
If you use Docker containers on your desktop, let me know which you are finding useful for a desktop environment.
See xda-developers.com/reasons-why…
#Blog, #containers, #docker, #technology
One person like that
11 Must-Have Docker Tools To Simplify Your Workflow And Why CLI Is Good

Docker is a popular tool for creating, deploying, and managing containerised applications, but managing containers, images, and configurations can become complex over time.
Here’s a detailed guide to some essential Docker tools that simplify your work, whether you’re a beginner or experienced. These tools help you monitor, troubleshoot, and manage Docker more effectively.
I do monitor and work with three different docker based servers, and activating the VPN, then opening Portainer or whatever to work on each one, can all take time. So I’m testing some of the CLI based tools listed in the linked article.
The reason is I can open a terminal window and just type ‘ssh het’ or whatever the shortcut is which I use, and instantly that opens a public private key based session into that server. I can quickly run (or keep open) the CLI app to monitor my containers. I could have three terminal windows open, one for each server, at the same time if I wish.
It is why terminal windows and apps can be super useful and lightweight for many occasions.
See tecmint.com/docker-tools
#Blog, #docker, #servers, #technology
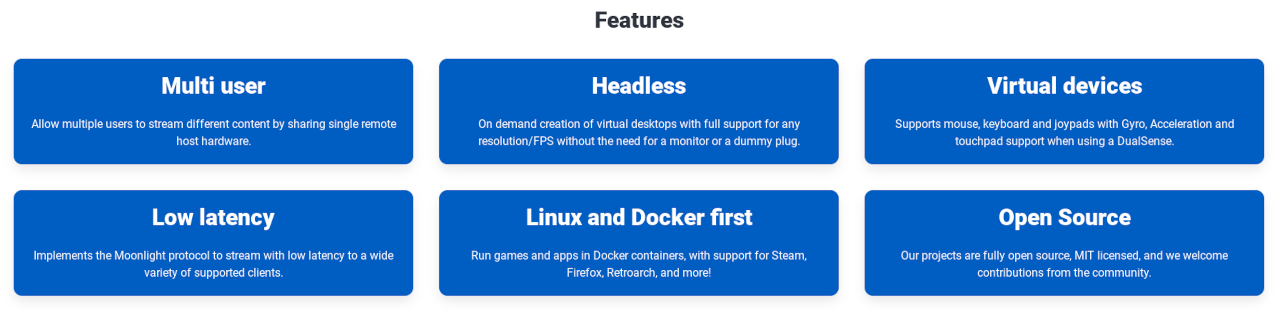
5 of the coolest things you can run on Docker

These are some refreshingly different things to consider running on Docker.
Covered in the linked article are:
- game servers for popular multiplayer titles
- Kasm Workspaces
- LLMs and image generators (Generative AI)
- emulate retro games inside your browser
- macOS
See xda-developers.com/coolest-thi…
#Blog, #docker, #gaming, #technology
2 Likes
Installing Docker on Raspberry Pi OS

When you combine Docker with the compact, affordable Raspberry Pi, you’ve got a powerful setup that’s perfect for both developers and hobbyists.
Whether you’re building a mini server, automating tasks, or just tinkering for fun, Docker has unlimited usage.
This guide will show you how to get Docker up and running on your Raspberry Pi in no time.
This is also a great way to experiment with Docker. I’d imagine that for anything that reads and writes data a lot, you’d certainly want to have a proper hard drive attached to your Pi. The great thing though with Docker containers, is that they are very portable, so I’ve easily ported them between different hosting providers when I’ve switched. This is way quicker than full installations.
See itsfoss.com/raspberry-pi-insta…
#Blog, #docker, #raspberrypi, #technology
#Docker now includes some tech that can build a complete software bill of materials (#sbom) including every version of every package installed onto an image. It does this by recording every package you install, along with all of their dependencies, and so on.
You can then use tools to inspect those images for known vulnerabilities.
Here’s the SBOM for the koehn/diaspora image (it’s as small as I could make it, as I remove lots of packages required for building Diaspora but not for running it, e.g., gcc).

3 Likes
Putting a Raspberry Pi inside a Docker Container

The Pi container emulates an entire Raspberry Pi from the ground up, allowing anyone that wants to deploy software on one to test it out without needing to do so on actual hardware. All of the configuration can be done from inside the container. When all the setup is completed and the desired software installed in the container, the container can be converted to an .img file that can be put on a microSD card and installed on real hardware, with support for the Pi models 3, 4, and 5.
This would be pretty useful if you want to distribute an application all ready to run on a Pi. Others may find it useful to just test out how a Pi works, or even for testing something dicey out without messing up your running Pi.
See hackaday.com/2024/08/30/puttin…
#Blog, #docker, #raspberrypi, #technology

One person like that
Added a BOM to the #Diaspora image, which enables an accurate scan with #Docker #Scout (listing the two critical issues only):
## Overview

                    │           Analyzed Image
────────────────────┼──────────────────────────────────────
  Target            │  registry://koehn/diaspora:0.9.0.0
    digest          │  cf02a209274c
    platform        │ linux/arm64
    vulnerabilities │    2C     4H    10M     4L
    size            │ 272 MB
    packages        │ 2342
                    │
  Base image        │  debian:bookworm-slim
                    │  5f7d5664eae4

## Packages and Vulnerabilities

   1C     0H     0M     0L  rvm 1.11.3.9
pkg:gem/rvm@1.11.3.9

    ✗ CRITICAL CVE-2017-1000037 [OWASP Top Ten 2017 Category A9 - Using Components with Known Vulnerabilities]
      https://scout.docker.com/v/CVE-2017-1000037
      Affected range : <=1.28.0
      Fixed version  : 1.29.0
      CVSS Score     : 9.8
      CVSS Vector    : CVSS:3.0/AV:N/AC:L/PR:N/UI:N/S:U/C:H/I:H/A:H


   1C     0H     0M     0L  @babel/traverse 7.20.13

pkg:npm/%40babel/traverse@7.20.13

    ✗ CRITICAL CVE-2023-45133 [Incomplete List of Disallowed Inputs]
      https://scout.docker.com/v/CVE-2023-45133
      Affected range : <7.23.2
      Fixed version  : 7.23.2
      CVSS Score     : 9.3
      CVSS Vector    : CVSS:3.1/AV:L/AC:L/PR:N/UI:N/S:C/C:H/I:H/A:H
The version of #rvm that you get when you install diaspora is quite old. NPM looks like it could use a bump as well.
2 Likes
3 Comments
3 Likes
2 Likes
Canonical bietet 12 Jahre LTS für Open-Source-Docker-Images
https://linuxnews.de/canonical-bietet-12-jahre-lts-fuer-jedes-open-source-docker-image/ #Canonical #Docker

7 Likes
3 Comments
I got a #Docker build of the new #Diaspora release pushed to koehn/diaspora:0.9.0.0 but I won’t have a chance to test it until tomorrow. It took just a few minor tweaks to get it built; beyond migrating diaspora.yaml to diaspora.toml I don’t think there are other changes needed. It will automatically run the database migration when you start it, so a database backup prior to upgrading is advised.
3 Likes
4 Comments

2 Likes
1 Shares
6 Really Good Docker Containers to use on your NAS
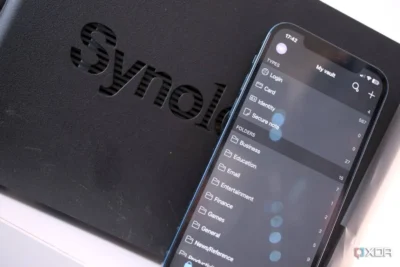
Docker containers are a great way to add functionality to your NAS outside the available app store. Whether you’re running a Synology enclosure or a DIY server, it’s possible to download and manage container images.
There are thousands of container images available for various services and apps. I’d suggest searching for frequently used services and see if there’s a container. Load it up on your NAS and have fun!
Those covered in the linked article are:
- Portainer
- Watchtower
- Flame Dashboard
- Jellyfin
- IT Tools
- Vaultwarden
See xda-developers.com/these-are-t…
#Blog, #docker, #selfhosting, #technology
One person like that
How to Change Docker’s Default Data Directory
. Title says Change Docker Data Location.")
I’m getting ready to do this on my home server as it’s main boot drive is a 128 GB SSD, and it is always around 80% full.
This article will guide you through the steps to relocate Docker’s storage path for images, volumes, containers, etc., ensuring that your projects continue smoothly without the hassle of disk space limitations.
See linuxiac.com/how-to-change-doc…
#Blog, #docker, #selfhosting, #technology
2 Likes
1 Comments
#Podman als Zwischenstufe von #Docker zu #Kubernetes.
Ich hatte allerdings gehofft, er geht etwas auf das Pod-Konzept ein. Aber egal, war trotzdem wieder sehr lehrreich.
Danke #GLT
#GLT2024 #Graz #ccc #Chaos #systemd #Container #GNU/Linux #PoweredByRSS
One person like that