10 Likes
4 Comments
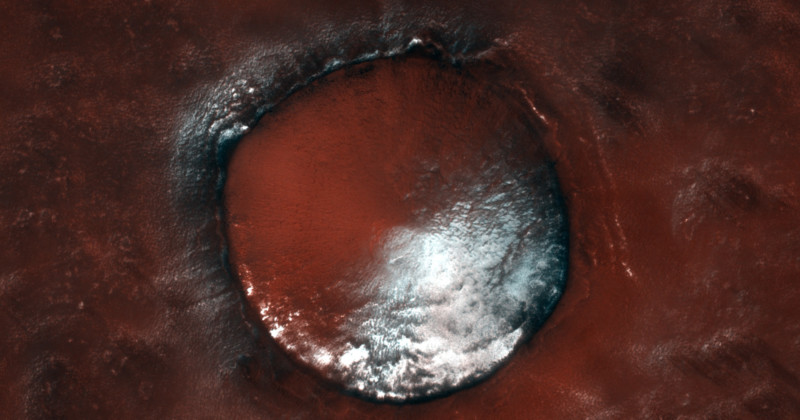
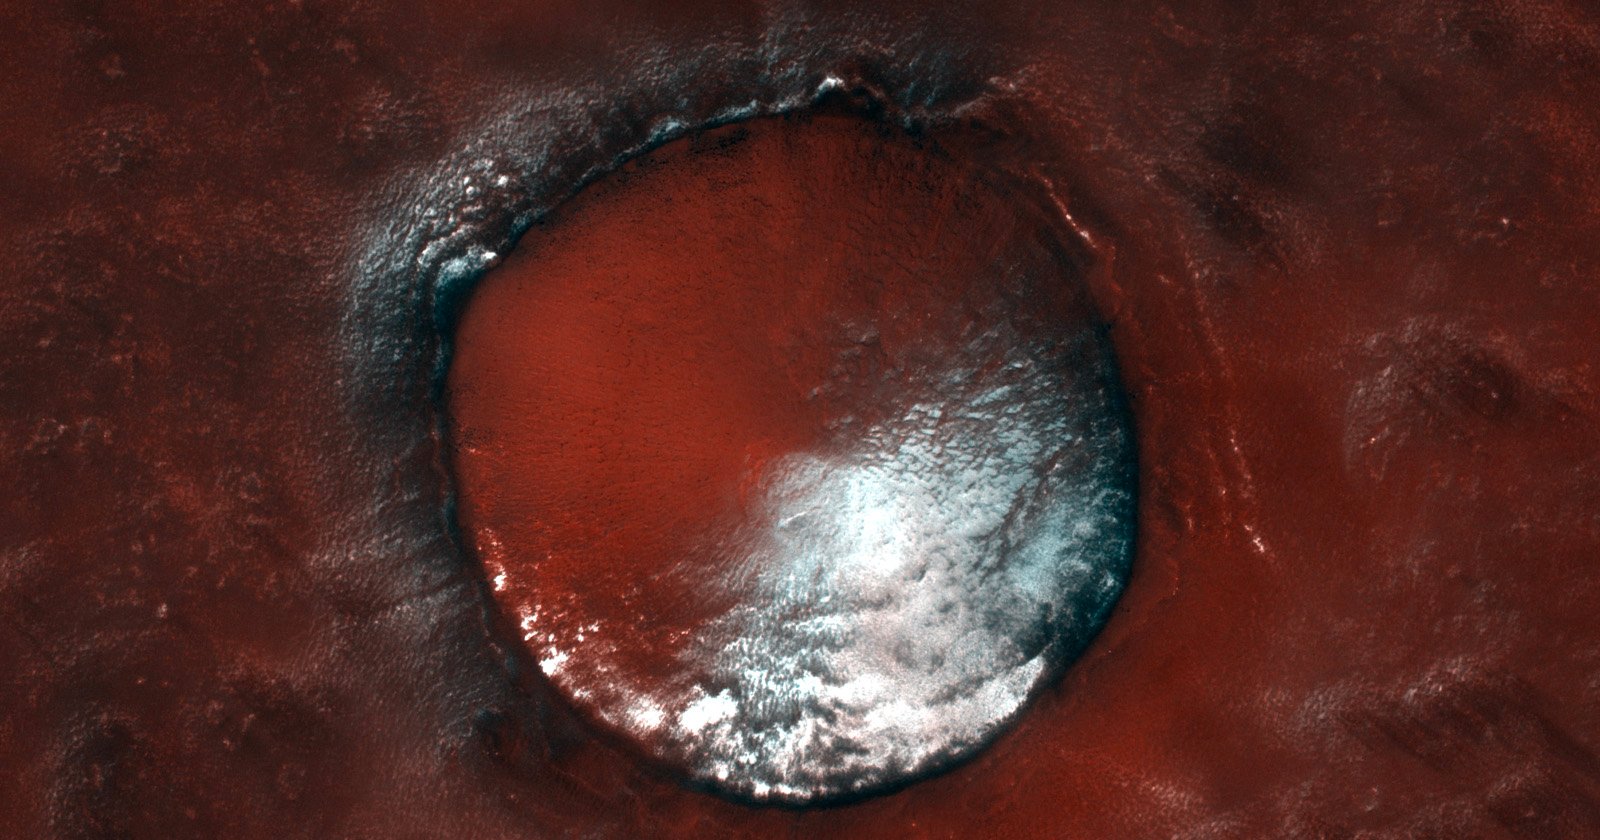
The European Space Agency (ESA) released a breathtaking new photo of a two-and-a-half-mile wide ice-covered crater on Mars affectionately nicknamed "Red Velvet."
Spotted by Digitaltrends , the image was captured by the Trace Gas Orbiter that snaps images of the surface of the red planet, examines the gases in the atmosphere, and acts as a communications link between landers and other devices on the surface and planet Earth. The orbiter is officially a collaboration between the ESA and Russian space agency Roscosmos and the photo, originally captured on July 5, 2021, shows a nearly four-kilometer-wide perspective of the surface and the ice dusted crater near the north polar region of Vastitas Borealis on Mars.
 ESA/Roscosmos/CaSSIS
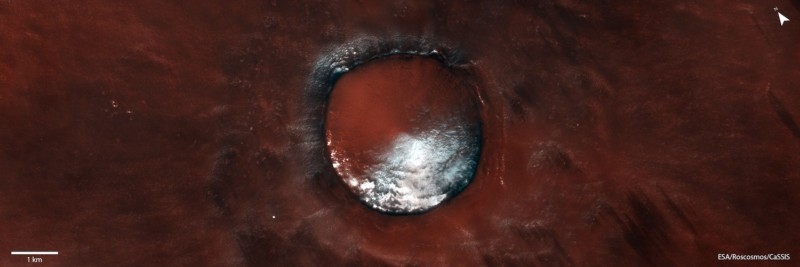
"Like a sprinkle of powdered sugar on a rich red velvet cake, this scene from the ESA/Roscosmos ExoMars Trace Gas Orbiter captures the contrasting colors of bright white water-ice against the rusty red martian soil," the ESA describes.
The ESA says the crater is partially filled with water ice more prevalent on the north-facing slopes since that region receives fewer hours of sunlight throughout the year with the dark sections on the crater edges likely containing volcanic materials like basalt, giving it a sort of scorched looking appearance.
The full resolution photo file of the crater, seen below, can be downloaded from the ESA website.
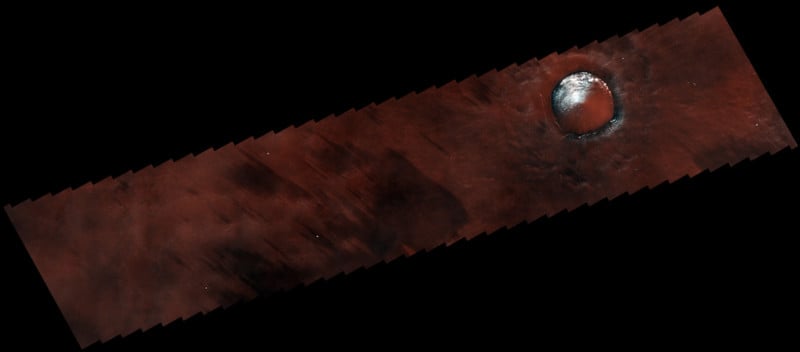 Raw output image
The presence of water on the planet is a big deal for space exploration, since bringing the precious liquid would be too heavy to carry all the way to the planet on a potential future manned mission. The presence of the ice means the liquid could be melted down and used for drinking water or fuel. The problem, according to the ESA, is that most of these deposits that have been found exist near the polar regions of the planet, and most missions want to land near the equatorial regions. Naturally, the next step is to seek out ice below the surface of the planet with missions like the upcoming Mars Ice Mapper, or the last option is to take the hydrated minerals from the soil and bake them to release any water they might contain.
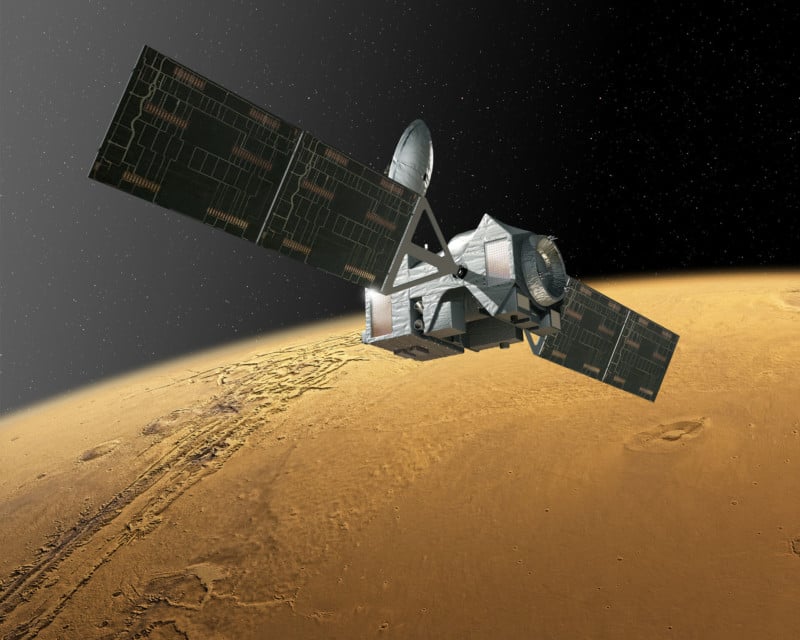
More stunning photos taken by Trace Gas Orbiter that it has captured since the beginning of its scientific mission in 2016, can be found by visiting the ESA's website.
Image credits: ESA/Roscosmos/CaSSIS
#news #spotlight #astrophotography #crater #digitaltrends #esa #mars #photograph #roscosmos #space #tracegasorbiter

Night skyscape of the tower at Ashton Under Lyne parish church.
Asterisms visible from clockwise the top right of the tower are Auriga, the Pleiades, Taurus (slightly clouded), Orion and Gemini (just).
Canon 5Dii | Canon EF 50mm | 30 sec @ f/1.4 | ISO 100
#mywork #myphoto #photography #astronomy #astrophotography #nightsky #church #stars #stevesimonsphotography #CC_BY-NC-ND_4-0

One of my favourite things in the night sky! 🤩
Taken in 2016 at a local astronomy club evening.
Canon EOS 5Dii | Canon EF 70-210mm f/4 | 60 sec at f/5.6 | ISO 400 | StarTracker
Spikes added in post.
#mywork #myphoto #astronomy #astrophotography #pleiades #space #nightsky #asterism #stevesimonsphotography
Gorgeous and awe-inspiring!


Here’s one of the most #colorful – and most #beloved – #double-stars in the #sky. The eye sees it as just one star, called #Albireo. #TomWildoner captured this #image of Albireo with a #camera attached to a 12-inch #telescope.
#albireo #beta #cygni #gold #blue #double #star #photo #photography #astrophotography
Astro filmmaker Seán Doran has used a set of 78,846 repaired, rescaled, and remastered AIA Angstrom 171 photos from NASA's Solar Dynamic Observatory to create a dramatic 48-minute timelapse video of the Sun as it moves over the course of a month.
The NASA Solar Dynamics Observatory (SDO) is a mission that the space agency has been using to observe the sun since it was launched on February 11, 2010. The observatory is part of the Living With a Star (LWS) program. According to NASA, the goal of the LWS program is to study the aspects of the Sun-Earth system that directly affect life and society on the planet. The SDO itself is used to understand the influence of the Sun on the Earth by studying the solar atmosphere in small scales of time and in many wavelengths simultaneously.
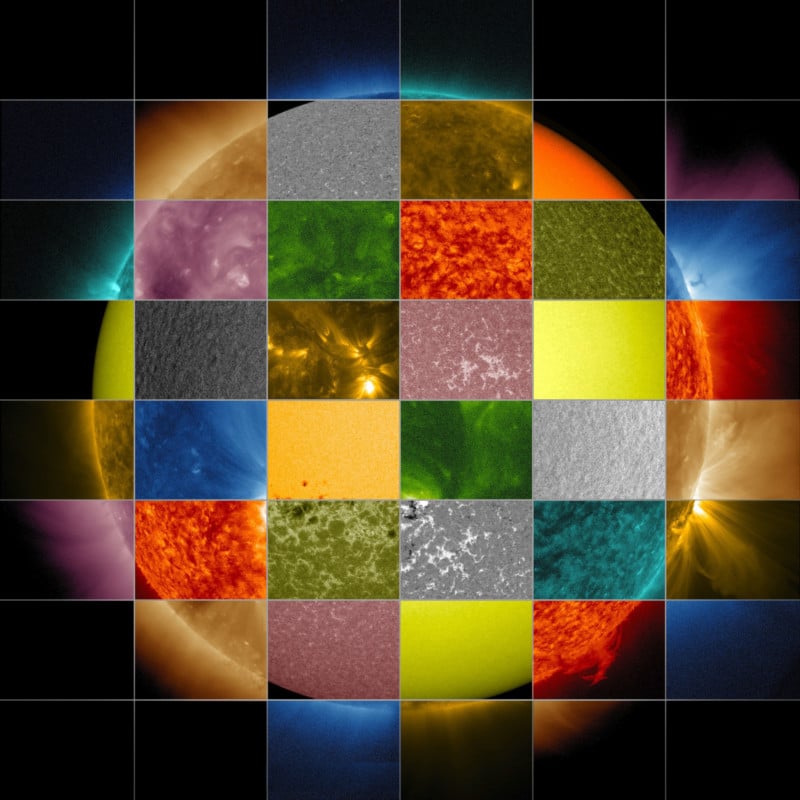
There are three instruments on the SDO that capture different wavelengths of light: Extreme Ultraviolet Variability Experiment (EVE), the Helioseismic and Magnetic Imager (HMI), and the Atmospheric Imaging Assembly (AIA). Below is a collage of solar images from the DO that shows how observations of the Sun in different wavelengths helps highlight different aspects of the Sun's surface and atmosphere:
NASA/SDO/Goddard Space Flight Center
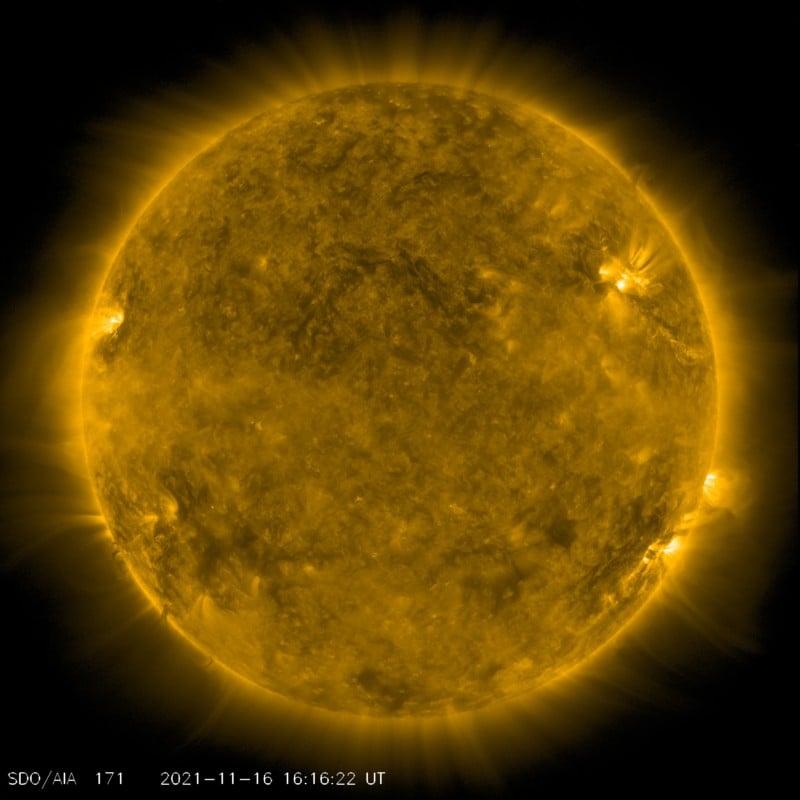
The third of these instruments, the AIA, has the full name of the AIA 171 Å (Angstrom), and it shows the quiet corona and coronal loops, typically colorized in gold. As explained by NASA:
The Sun emits light in all colors, but since yellow is the brightest wavelength from the Sun, that is the color we see with our naked eye. Specialized instruments can observe light far beyond the ranges visible to the naked eye. Different wavelengths convey information about different components of the Sun's surface and atmosphere.
The Solar Dynamics Observatory, or SDO, images 10 different wavelengths, measured in angstroms (Å), with its Atmospheric Imaging Assembly (AIA) instrument.
Below is the most recent photo (at the time of publication) captured by the AIA 171 Angstrom as an example:
As spotted by Laughing Squid, Doran used 78,846 frames taken by this particular instrument on the SDO during the month of August in 2014. After repairing, processing, and rescaling them to fit his desired look, he created about 22 minutes of footage at 60 frames per second. After slowing that down to half that for more traditional viewing, the finished video is 44 minutes long and shows a slow pan over the Sun that would normally take 31 days to see.
For more like this, Doran has a large library of stunning astro-focused videos that use NASA imagery on his YouTube Channel.
#culture #spotlight #aia #aiaangstrom171 #angstrom #astro #astrophotography #atmosphericimagingassembly #nasa #sdo #seandoran #solardynamicsobservatory #space #sun #timelapse
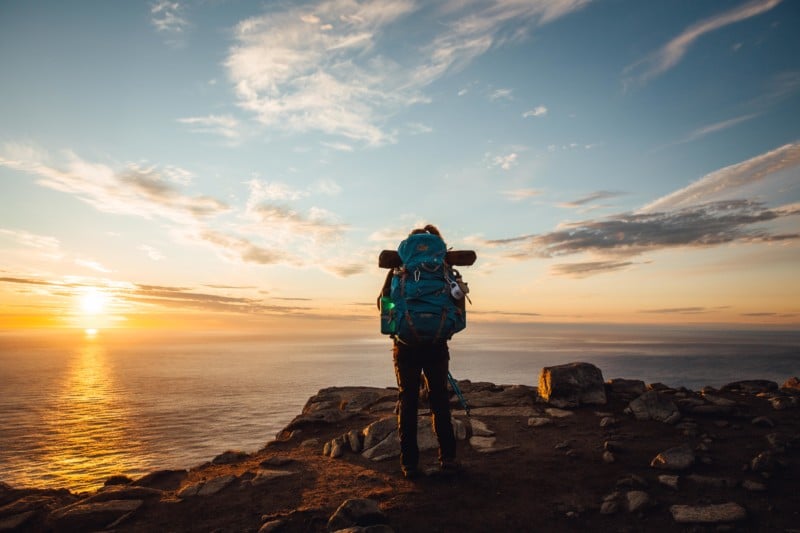
Photographer Florian Kuhnt was hiking with a friend in northern Norway in order to capture the northern lights. On his last night, he was about to pack up his camera when he noticed a bright light in the sky, what he would later realize was a NASA rocket.
Kuhnt, who studies aerospace engineering in Hamburg, Germany, and does landscape and outdoor photography part-time, tells PetaPixel that he was in the Lofoten region of Norway in order to specifically photograph the northern lights.
"The plan was to hike up Ryten to capture the sunset and northern lights over the Kvalvika beach, camp there for one night, hike down the next morning to the beach, and then back to the car," he says. "Around 5.5 miles round trip."
The two reached the summit in the early evening and started to take a few photos. They eventually came down a bit from the true summit because the high winds made it impossible to set up a tent.
"After setting up the tent we stayed outside in the cold to wait for northern lights. At that time I had already set up my camera and took a few pictures of our tent under the stars," he continues.
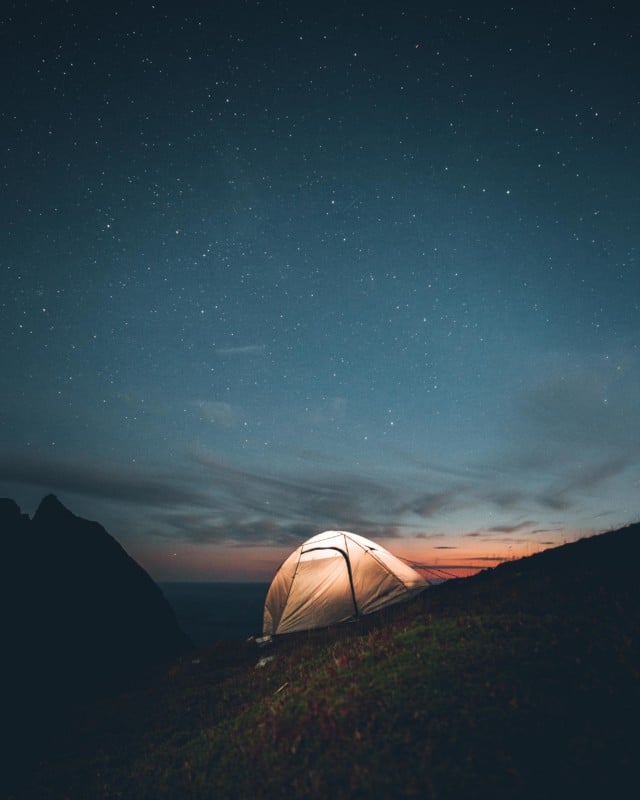
The northern lights are somewhat predictable, but their strength is affected by the time of year and even then varies from night to night.
"Almost two hours later, the first northern lights appeared but were really, really faint," he says. "So I patiently waited for more while my friend went into the tent to prepare everything for the night."
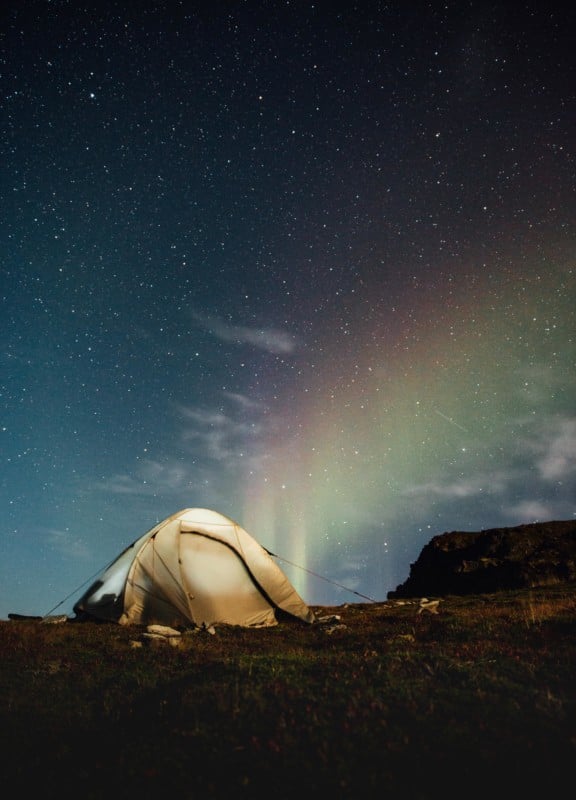
Kuhnt says that after another hour, he was fighting the cold and wasn't seeing the strength of the northern lights increasing by much. Ready to call it for the night, he started to pack up his gear and get to sleep. But as he started to break down his camera and tripod, he saw something in the sky.
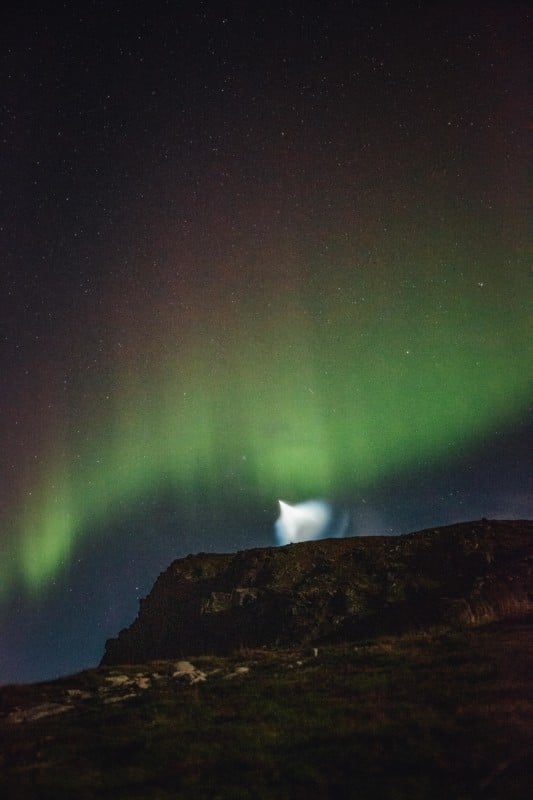
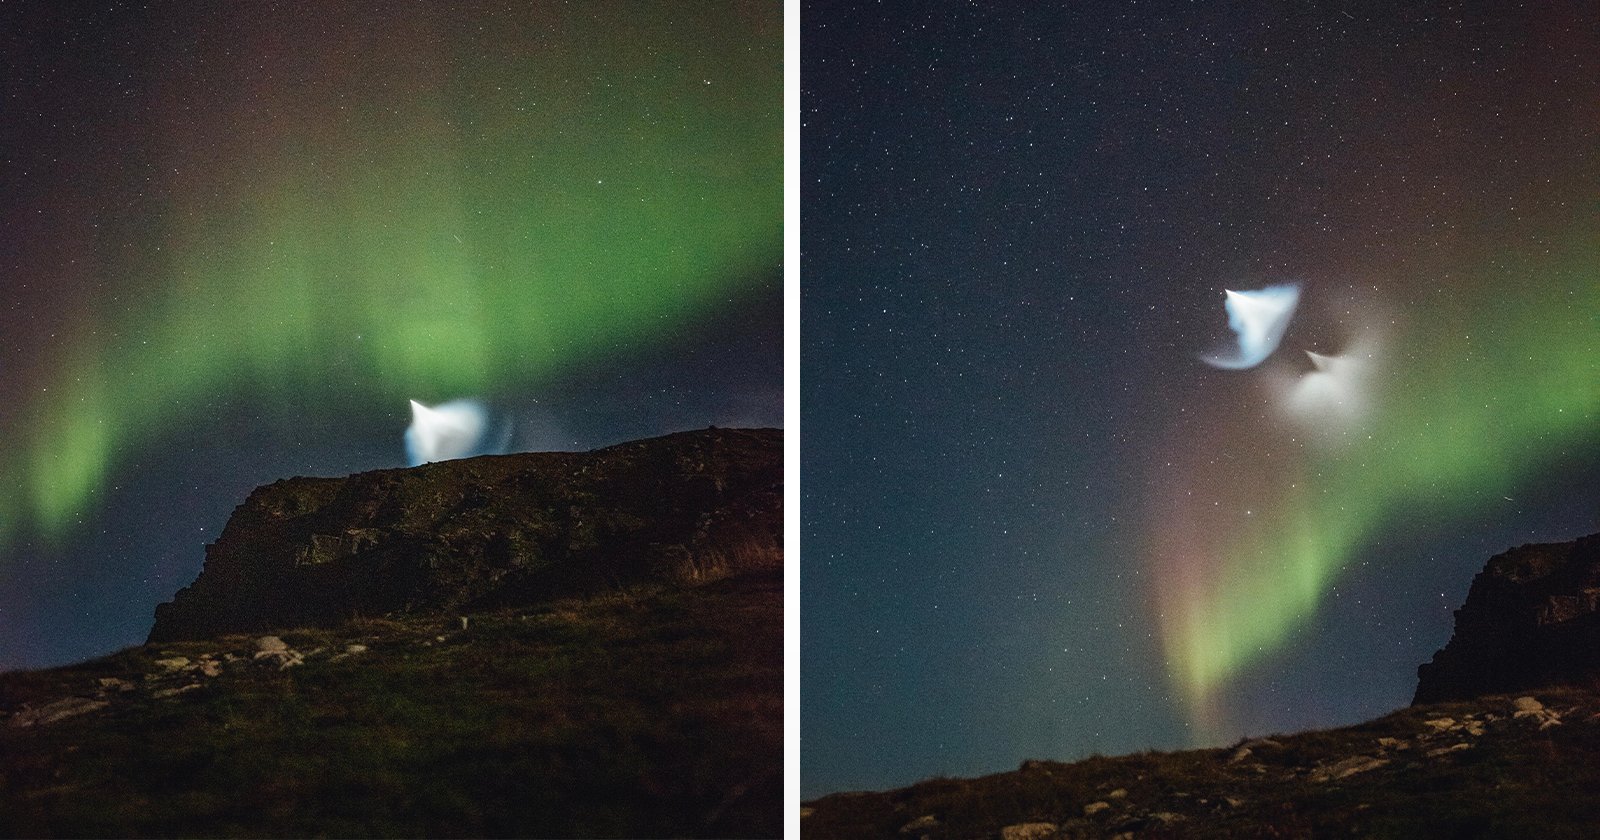
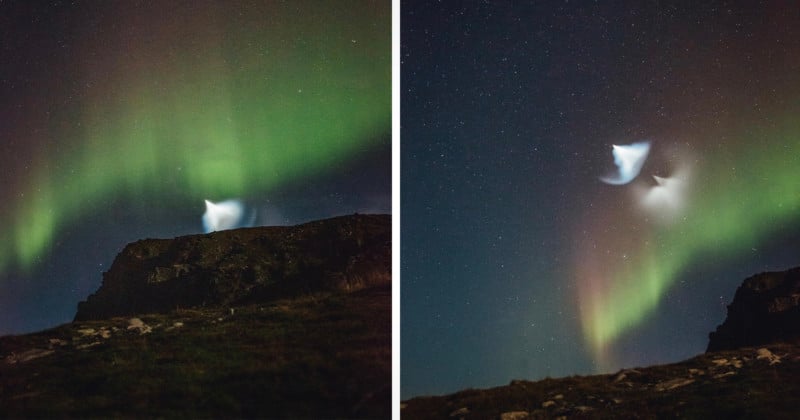
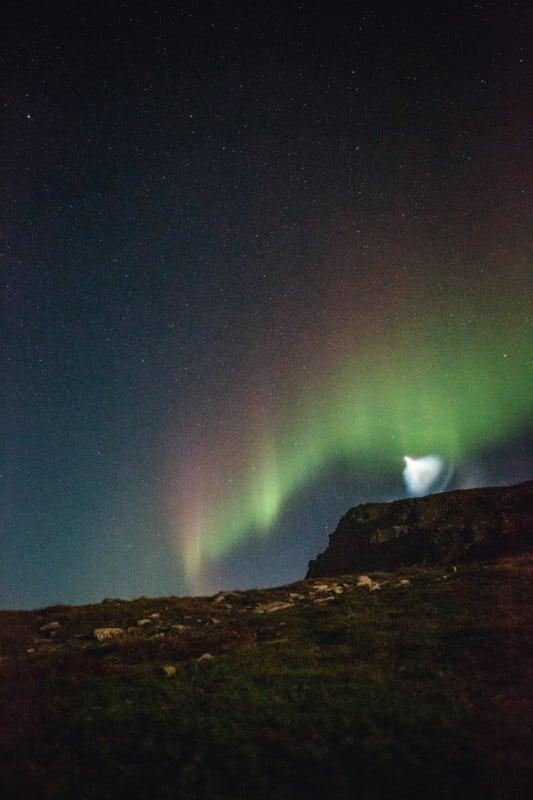
"I suddenly noticed two really bright, cloud-like objects moving in the sky," he recalls. "They moved really fast across the sky coming from the south towards the north. The whole event lasted about five minutes and I was able to get a few shots. Due to the fast velocity, I had to increase the ISO up to 12,800 for a higher shutter speed to get a decent exposure without motion blur."
Kuhnt shot multiple photos of the event with his Canon 5D Mark III and Canon 24-70mm f/2.8 II lens. He says that he had never seen anything like it before and was, at first, not sure what he was looking at, but then remembered seeing photos of the SpaceX launch over Los Angeles.
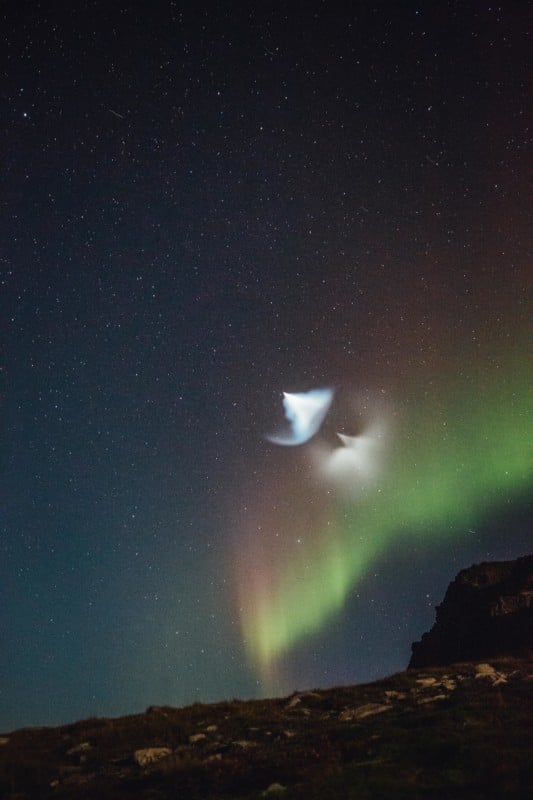
"I googled the latest rocket launches and saw that an Atlas V rocket just launched from the Vandenberg Space Force Base in California, carrying the Landsat 9 Satellite," he says. "After a bit of research, I was sure that we just witnessed the deorbit burn of the Centaur Upper Stage and fuel blowout. Those both clouds got illuminated by the Sun which made them visible. The rocket itself is too small to see with the eye since it’s orbiting between somewhere about 550 to 680 kilometers in altitude. The launch alone would be really exciting to witness but that it flew right through the northern lights was just the icing on the cake."
NASA's Landsat 9 recently captured its first images of Earth as part of its mission to document the changes to the topography of the planet over a series of years. Kuhnt says that the path of the rocket went right over his location in Norway, which can be seen in the trajectory animation video below (around the 28-second mark):
Despite the incredible luck of seeing a rocket though the northern lights, Kuhnt says he had to abort their trip in the middle of the night because the wind increased and changed its direction.
"After the second tent pole broke we decided to call it a day (or night) and we descended two hours to the car at 3:00 AM. But overall it was a nice trip," he says.
More of Kuhnt's work can be seen on his website and Instagram.
_Image credits: Photos by Florian Kuhnt and published with permission. _
#news #spotlight #astrophotography #aurora #auroraborealis #floriankuhnt #landsat #landsat9 #nasa #nasarocket #northerlights #norway #rocketship #space
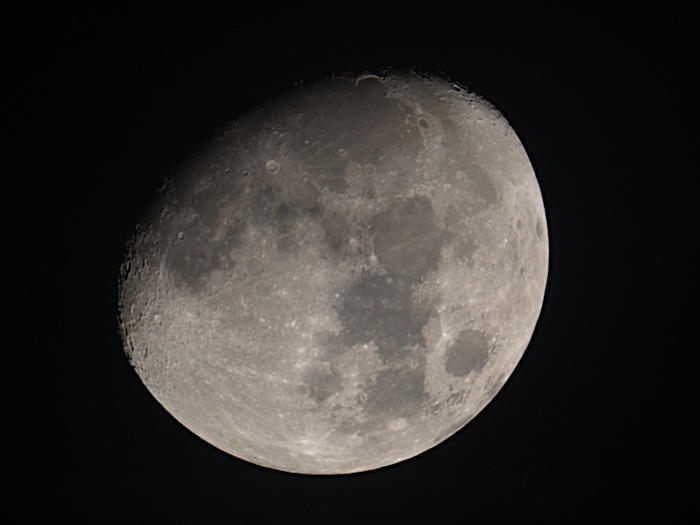
Lunar #astrophotography from my friend Gary in the UK. He said:
I managed to get a snap of the Moon ... it was taken with the camera attached directly to the focuser ...
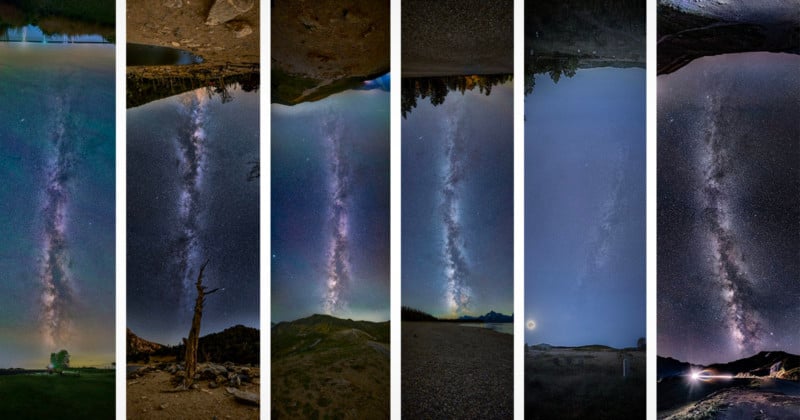
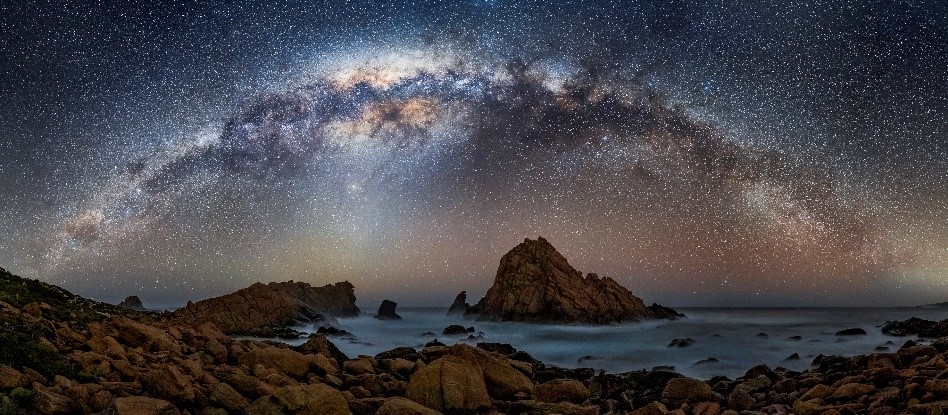
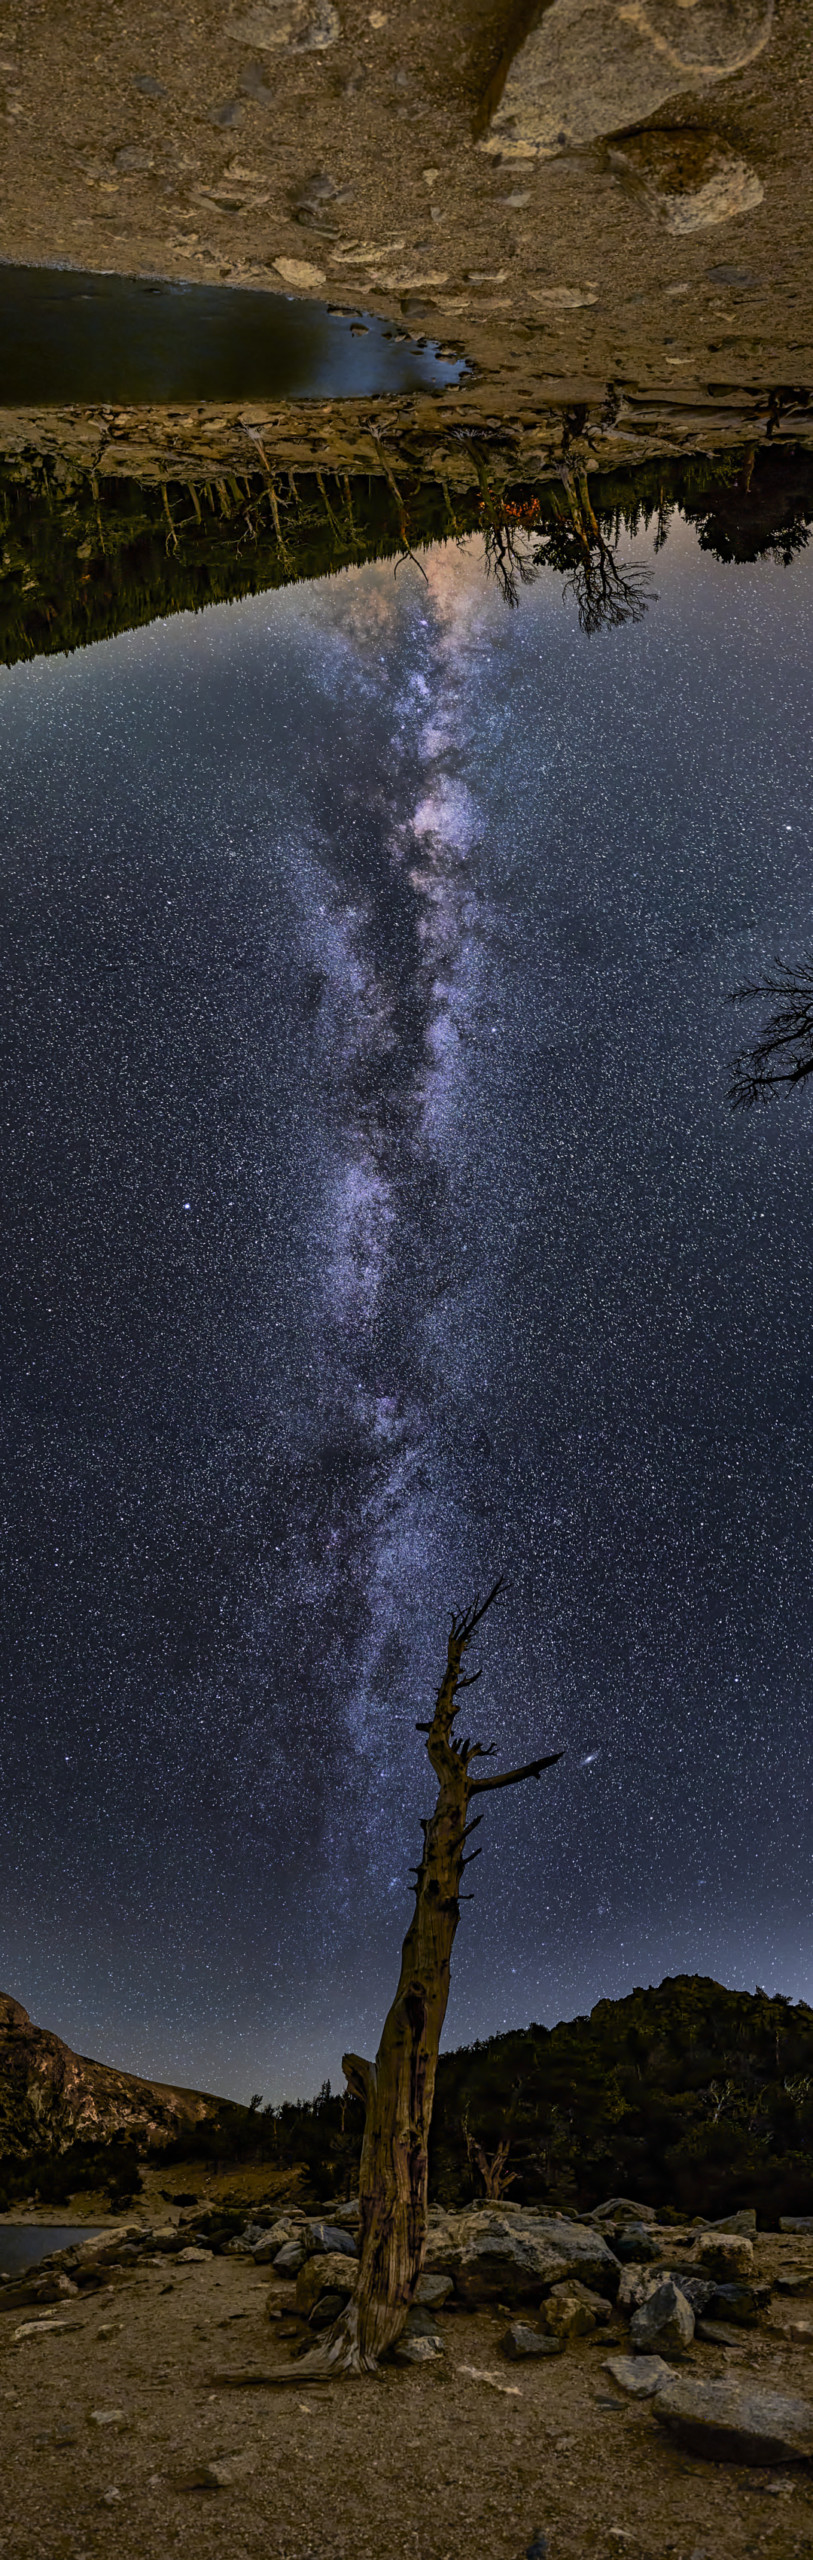
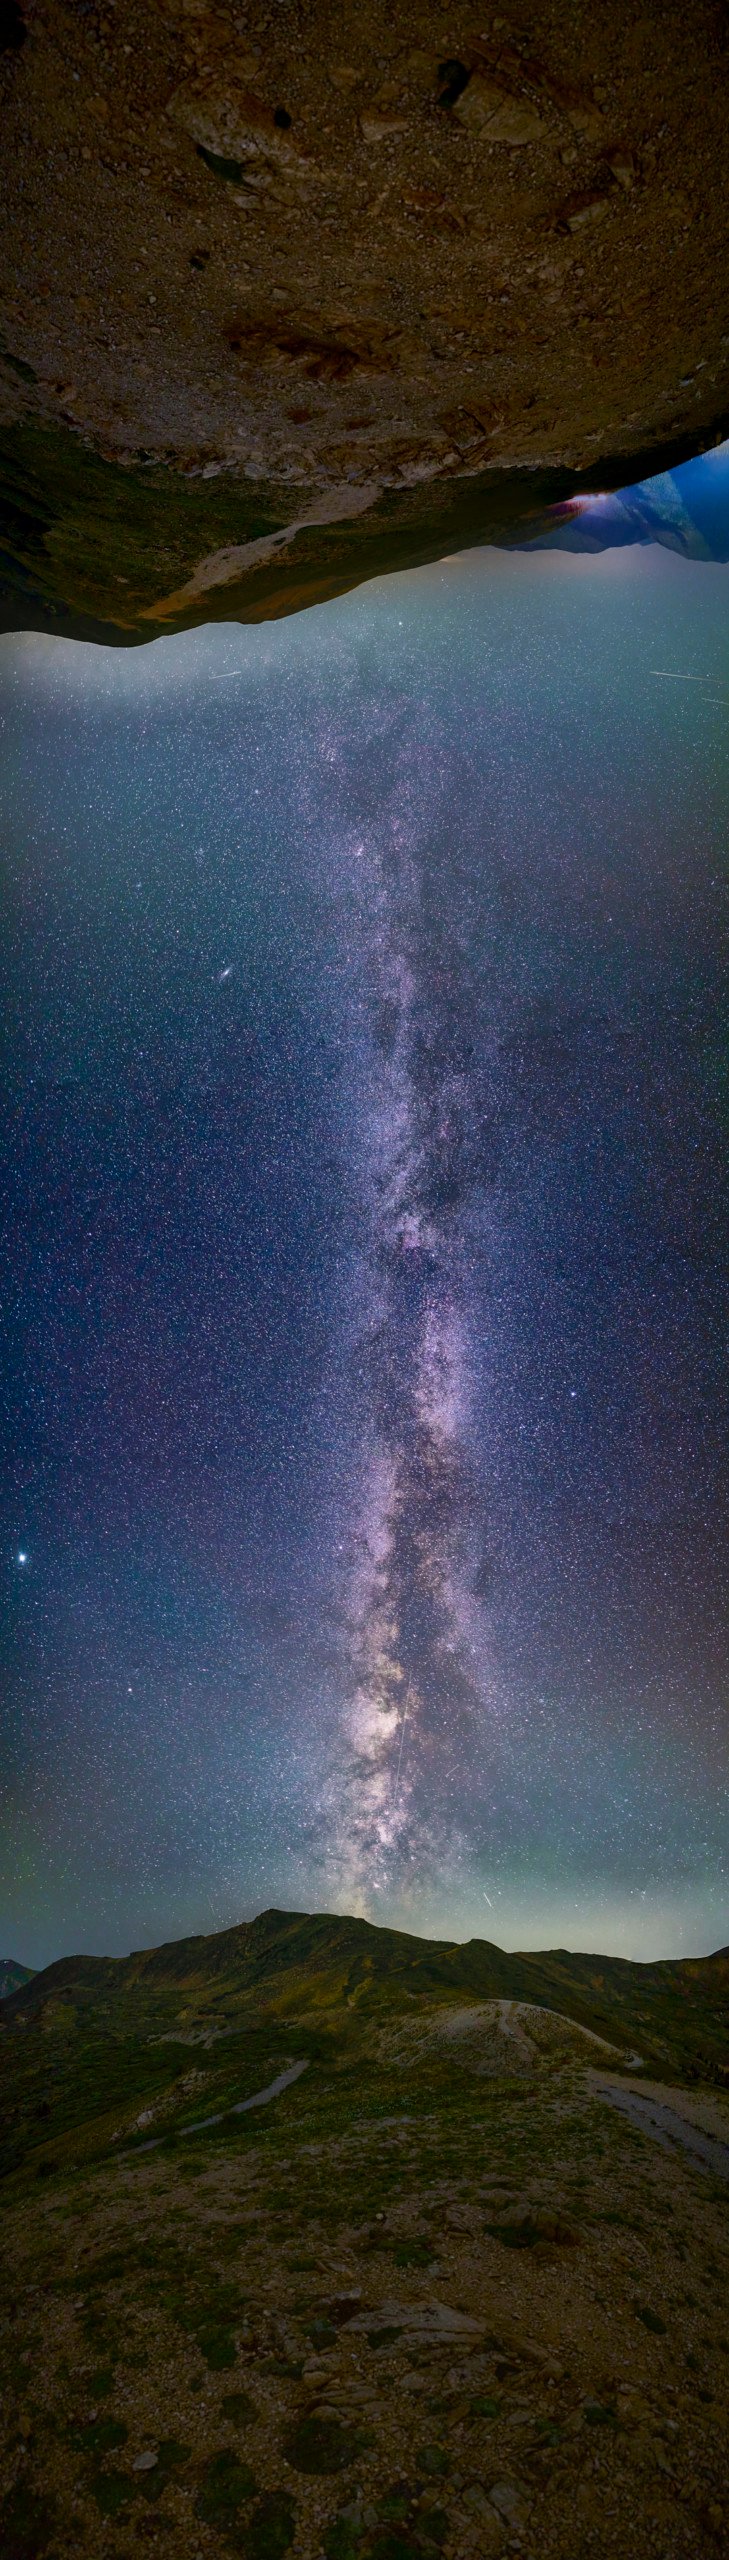
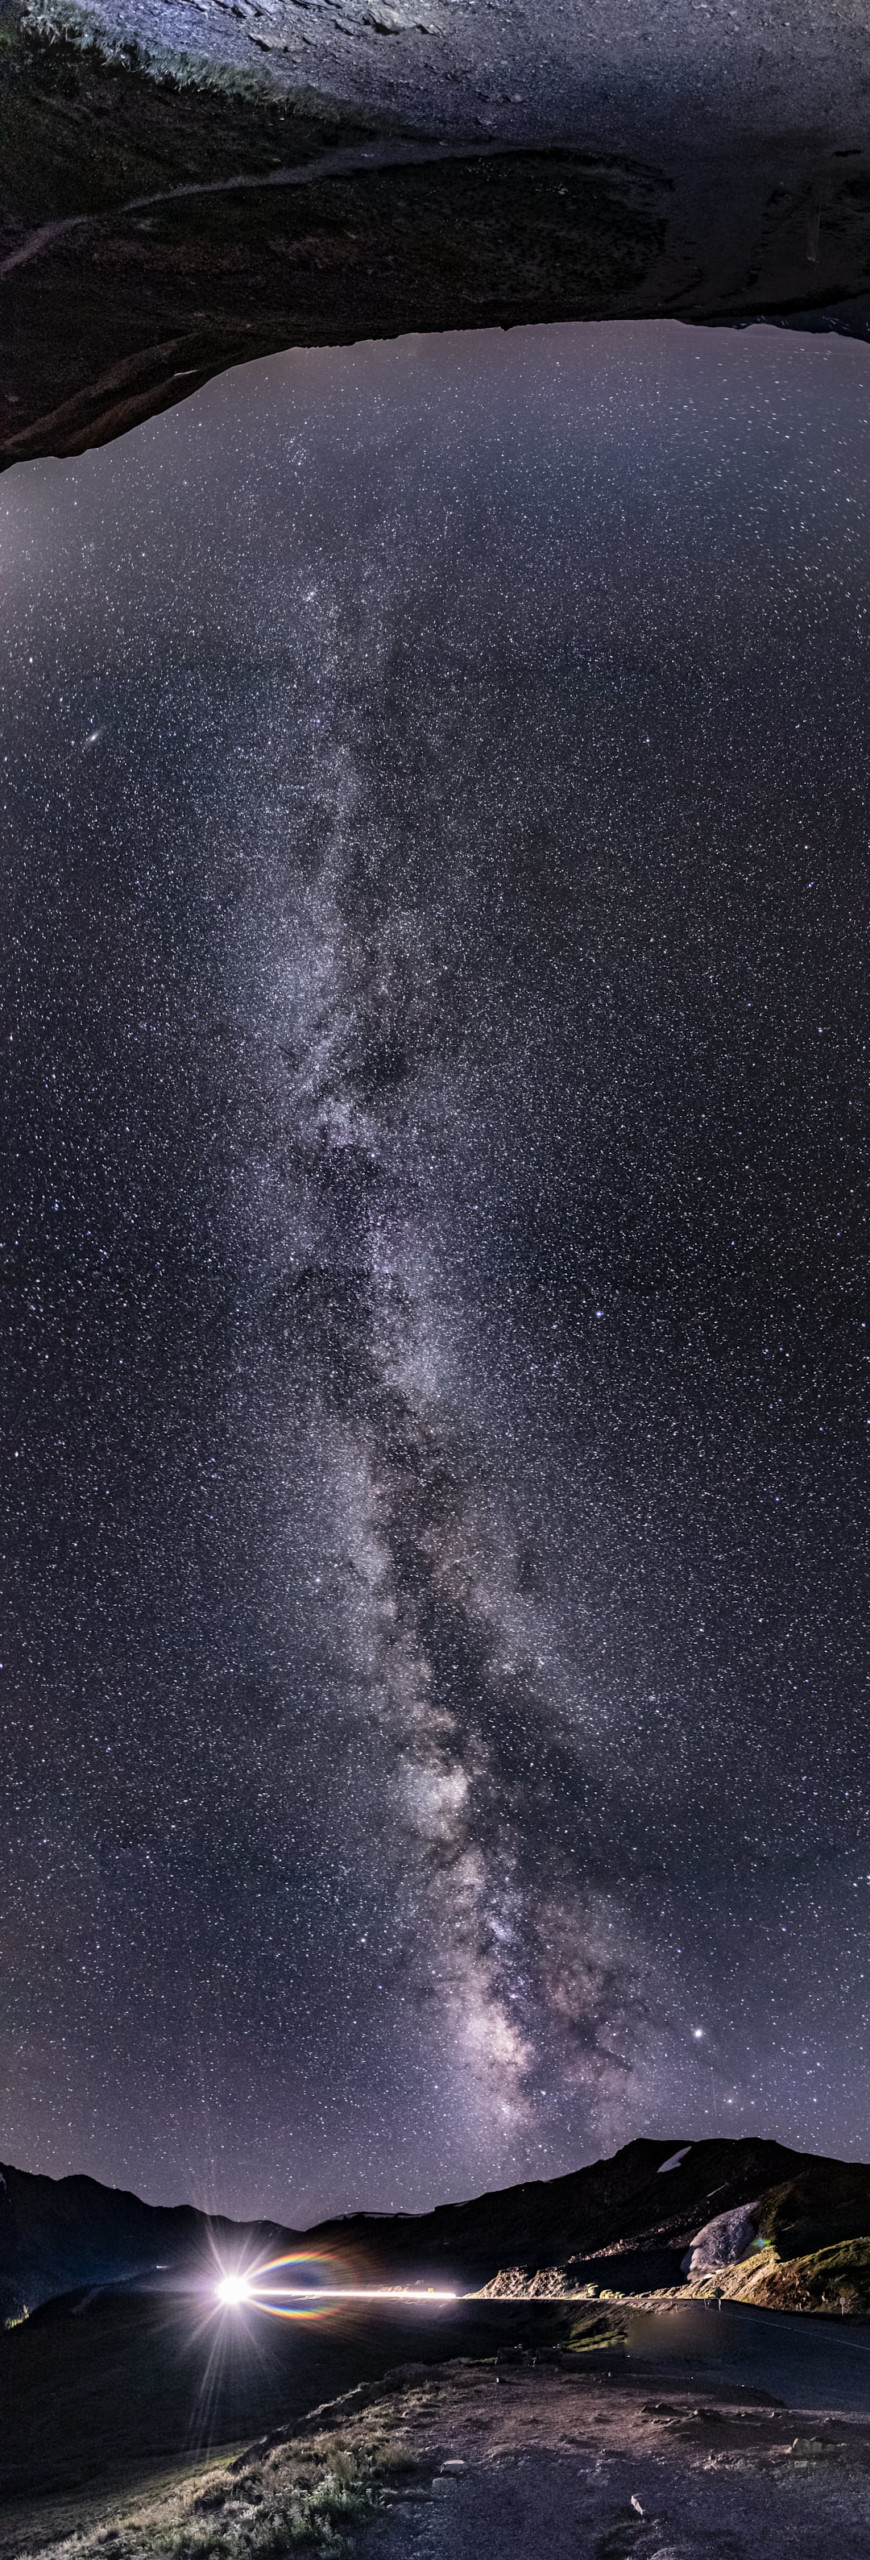
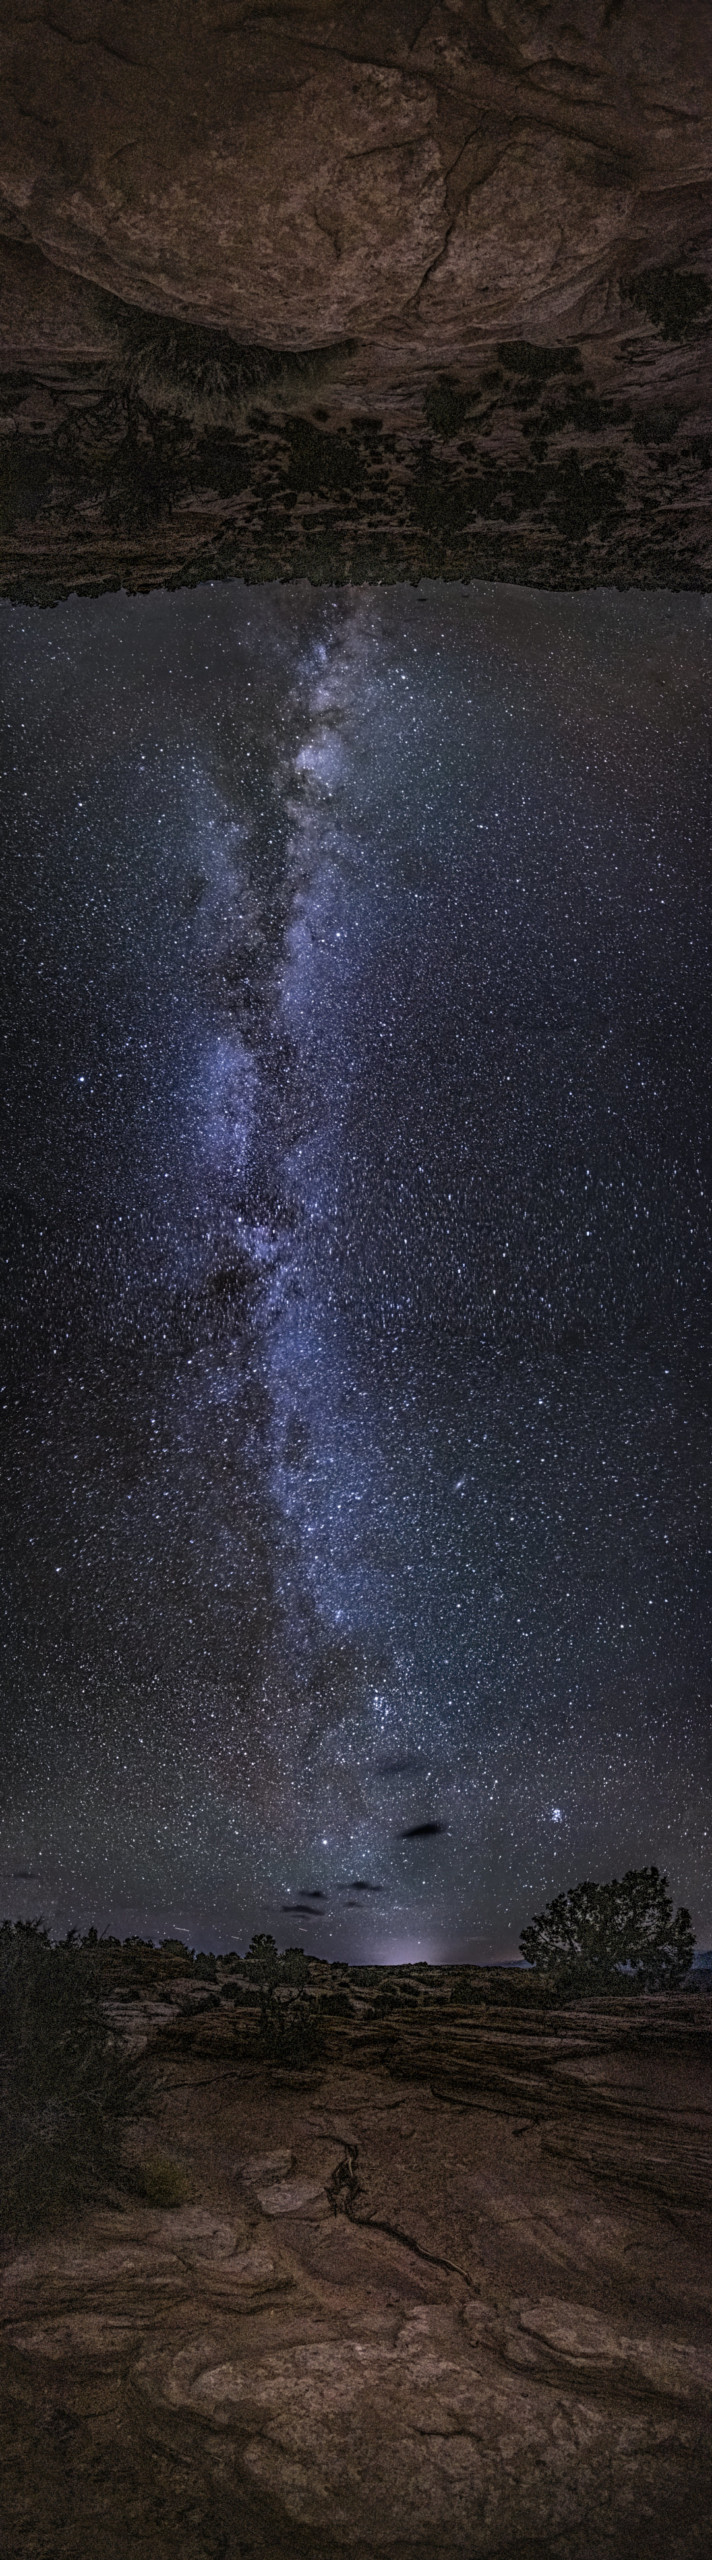
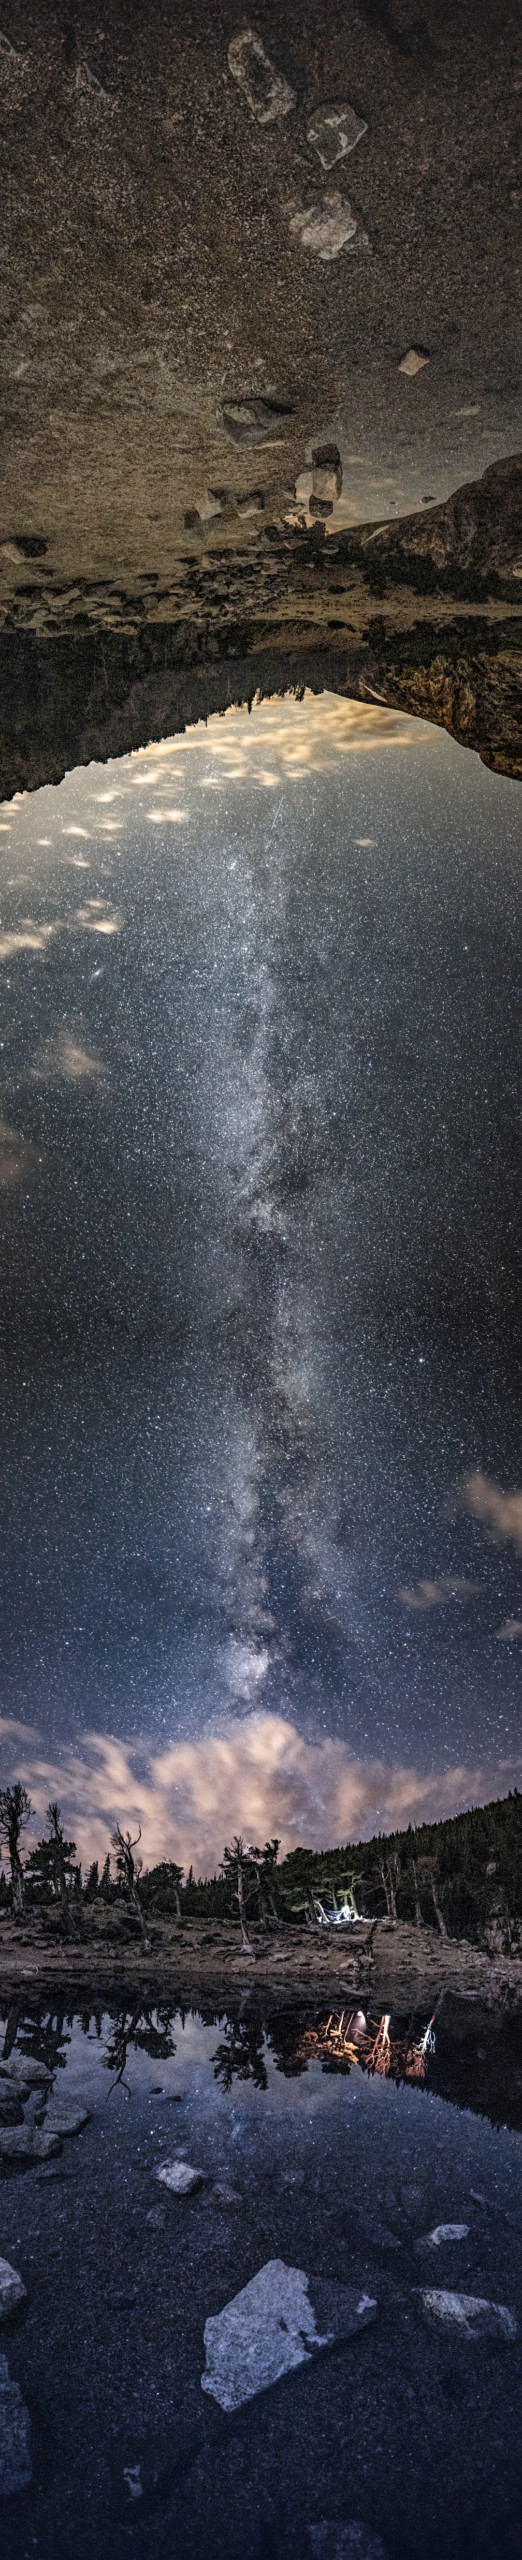
Photographer Geoff Decker has spent the last two years creating what he calls Nexus Panoramas: vertical photos that use the Milky Way to link two landscape foregrounds in a single image.
All images below can be clicked and viewed in higher resolution.
Decker calls the images Nexus Panoramas for two reasons. One, the term nexus is defined as "a connection or series of connections linking two or more things." He says he wanted to clearly define this type of images as a panorama where the Milky Way is used to link two lanscape forgrounds using a single series of images.
The second reason?
"Nexus honestly just sounds spacey," he tells PetaPixel. "It's used by a various number of space organizations and Sci-Fi material so it just fit the definition."
Decker says that he got the idea for these images in August of 2019 while going through old equipment. He came across an old Nodal Ninja, which is a spherical panorama head that was used to create "tiny planet" photos and virtual walkthroughs for realty companies before the modern methods used today became available. On that note, Decker says that about a month after he rediscovered his Nodal Ninja, the company announced it was closing its United States offices.

"At the time I was also practicing astrophotography, learning how to stack images to clean up noise and such. When I found it, a bit of inspiration just kind of hit that, in theory, I should be able to use this type of head to achieve a perfect vertical shot of the Milky Way," he says.
The idea made sense, but creating finished images was more of a challenge and revolved around his tripod setup and software issues.

"At the time, I was using an older steel Manfrotto tripod I had lying around. As I came to learn, the tripod was going to be pivotal to getting the image quickly and easily and this was not it. The thing, while sturdy, was impossible to level, and with these panoramas, you only have so long before the Milky Way is out of ideal alignment. I was still able to get my first Nexus Panorama the first go-around but it took a bit longer than what was ideal," Decker says.
"I went through a couple of test setups before I found the ideal one. I use a 3 Legged Thing Punks Brian as it's quite lightweight and fairly stable at its tallest setting (which comes in useful). I still use my Nodal Ninja, and between the Nodal Ninja and the tripod, I have a leveling base to expedite leveling the entire setup," he explains.
Decker says that on the software side, anyone who tries to stitch photos together for panoramas understands that it can be a pain. He explains that with this particular panoramic image, it is very easy for some of the automated options to get "lost" in the stitching process and as a result, fail. He says he took a lot of time finding the right software that wouldn't be terribly time-consuming but would also retain high image quality with minimum compression.
"At the time, Photoshop had a difficult time (and still does). Surprisingly, I found Lightroom’s Panorama function could resolve it most of the time. And any time I have a difficult one, such as the Tombstone panorama, I use Affinity with no issues," he says.
The time for an edit can take a while, and Decker says he's edited one in as little as a few hours while others can take a week or more to get right -- editing on and off during that span, of course.
Decker explains that the process for creating these images breaks down into eleven steps.
The process starts just as most typical astrophotography expeditions do:
"With locations, it's hard to be picky because you have to be facing a very specific direction," he explains. "And honestly, I take a bit of a nomadic approach to astrophotography in general, where I find an area with a dark spot, travel there, and see what happens."
A good location for these photos means clear skies and low light pollution, which he says has been hard this past year in Colorado where he lives because of the smoke from forest fires.
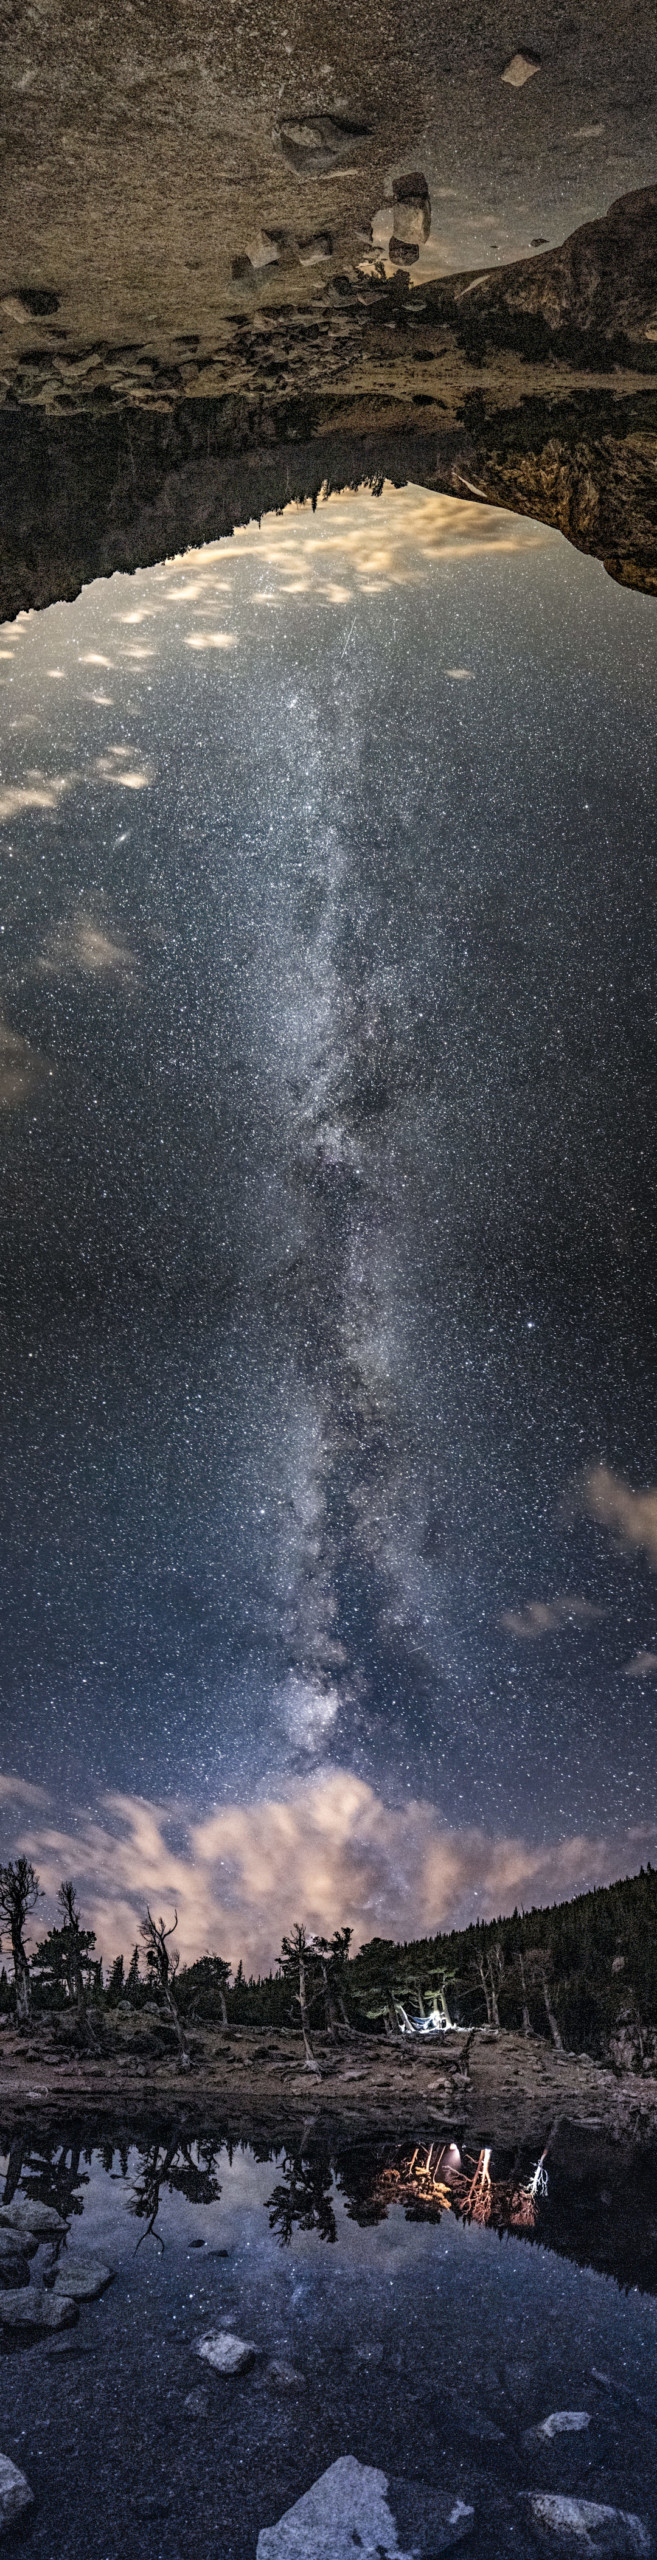
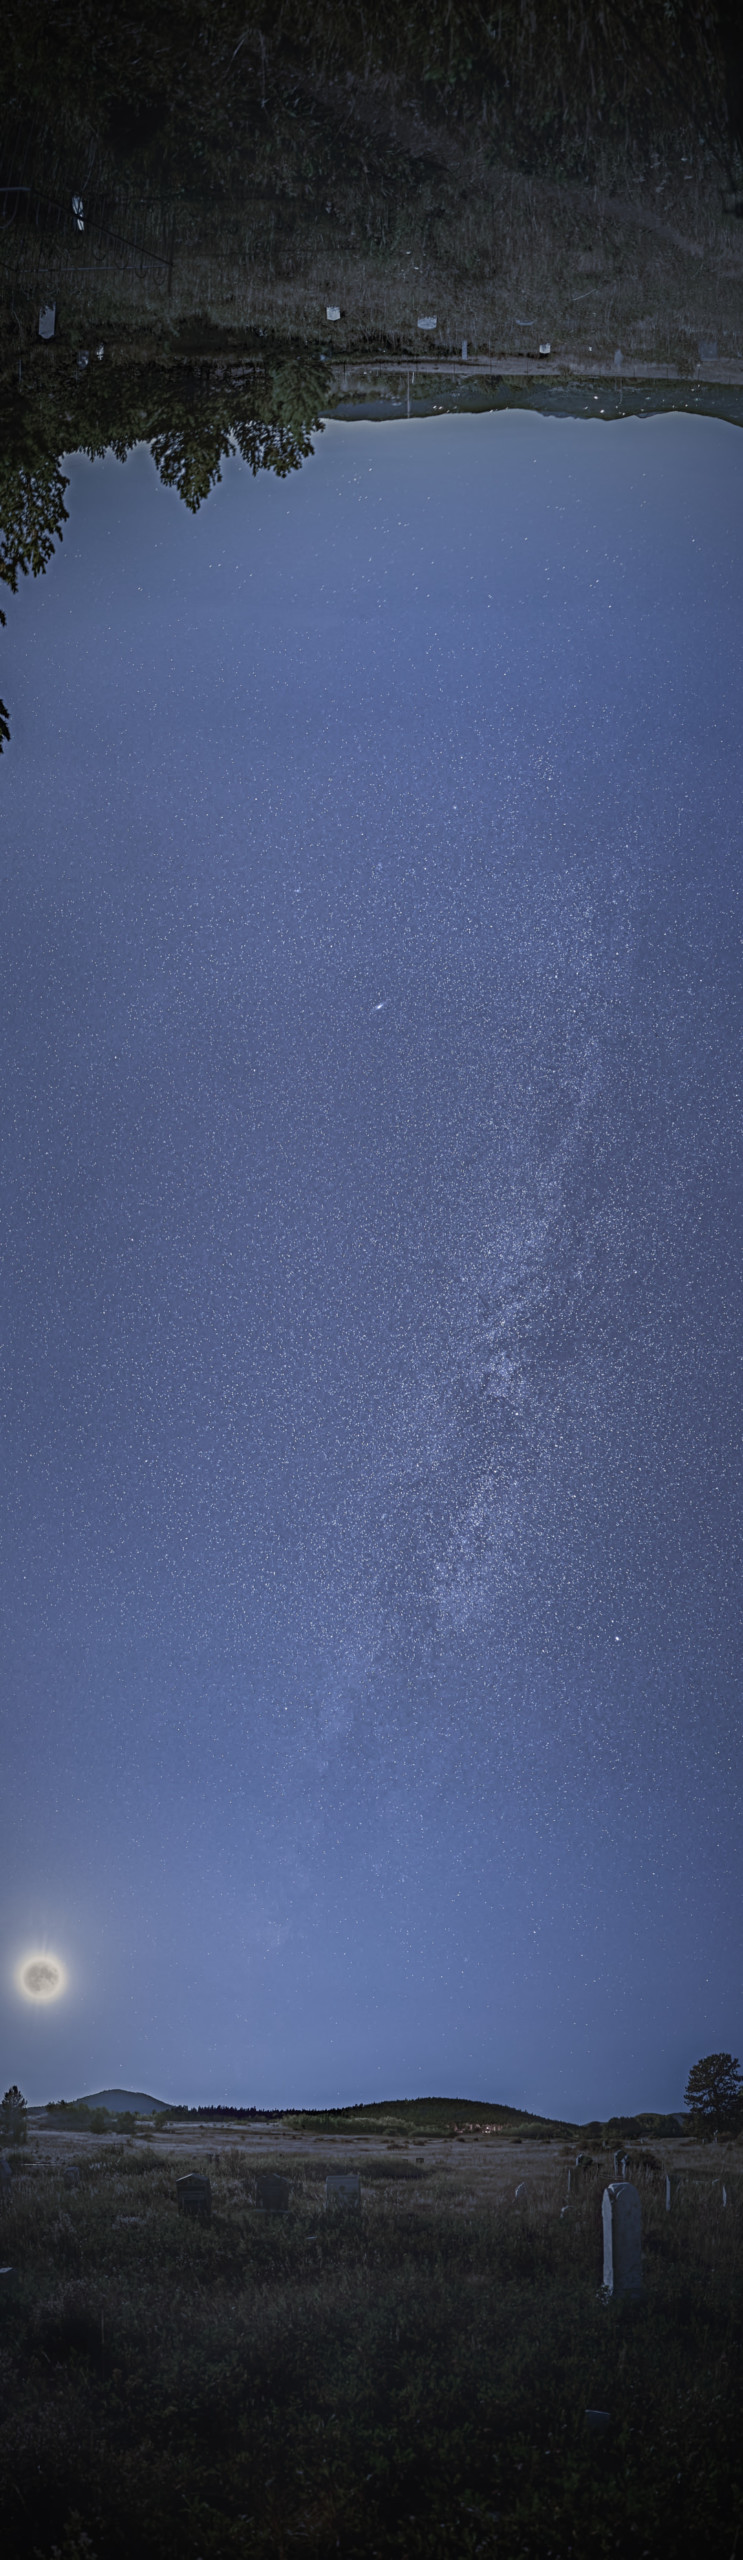
"Next year, I do plan to experiment a bit more. Despite taken during a close to full moon, I do like the Tombstone panorama and plan on hitting up a few ghost towns to get some more interesting foregrounds."
After he has picked a location, next comes field planning:
Decker says that the number of photos he uses for his Nexus Panoramas varies depending on if he sets the camera in a landscape or portrait orientation. He says the landscape setup requires more images as it is a shorter image, but usually resolves better.
"At the Grand Tetons, I used 32 images in the session," he says. "Duplicates of the foreground were taken, one at the ISO used for the sky (1250) and one for a brighter foreground (4000)."
Decker says that ideally, the best medium to enjoy his photos is in print.
"I had one printed on metal this year for the annual Louisville Art Association National Photography show (won people’s choice award) and what's cool about these photos is that there is no right or wrong way to hang them. You can literally hang them on any side and each orientation makes it a different photo," he says. "You lose that in digital. Plus, they look really cool printed on metal.
"That being said, I bet they look great on ultra-wide monitors."
More of Decker's Nexus Panoramas and his full portfolio of photography can be seen on his website.
#features #inspiration #astronomy #astrophotography #fineart #fineartlandscapephotography #landscapephotography #milkyway #milkywaygalaxy #nodalninja #prints #space #ultrawide #vertical
Jupiter took a hit. No, not to the top40. An object hit it.
Nasa confirmed:
https://twitter.com/esaoperations/status/1437799318971367440
Gosh, if any of you read John C. Wright, something else entirely comes to your mind, right? I'm sorta scared now.
#astrophotography #jupiter #brazil
Light on at Jupiter! Anyone home? This bright impact flash was spotted yesterday on the giant planet by astronomer José Luis Pereira.
— ESA Operations (@esaoperations) September 14, 2021
Not a lot of info on the impacting object yet but its likely to be large and/or fast!
Thanks Jupiter for taking the hit☄️#PlanetaryDefence pic.twitter.com/XLFzXjW4KQ
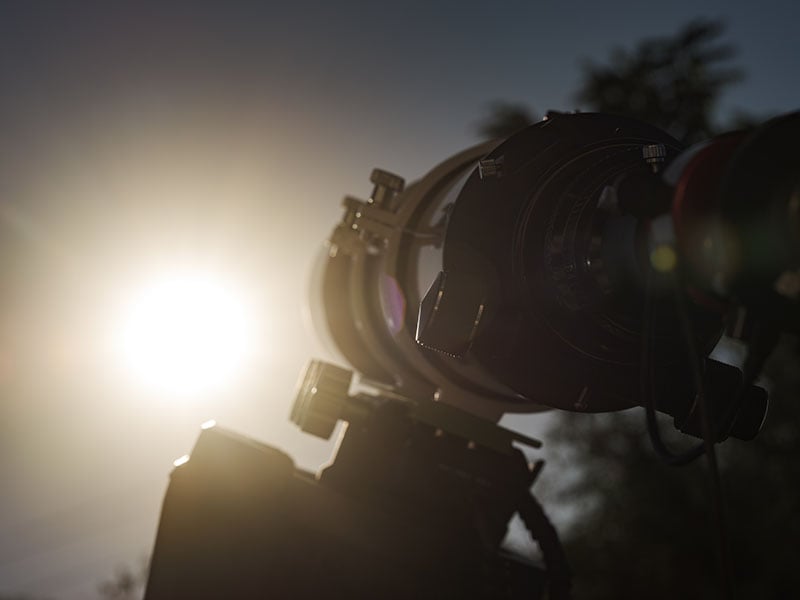
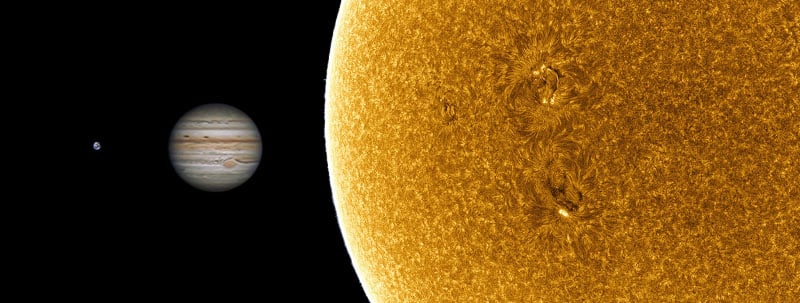
A big ball of light hovers above our heads everyday. It is always there and most people take very little time to notice it. While we are not suggesting that you spend time staring at it and going blind in the process, science has allowed us the ability to look directly at the sun in the safest ways.
As consumer technology has become more affordable, the average person can peer into the multiple layers of the sun using dedicated equipment that can be purchased at any good telescope retailer.
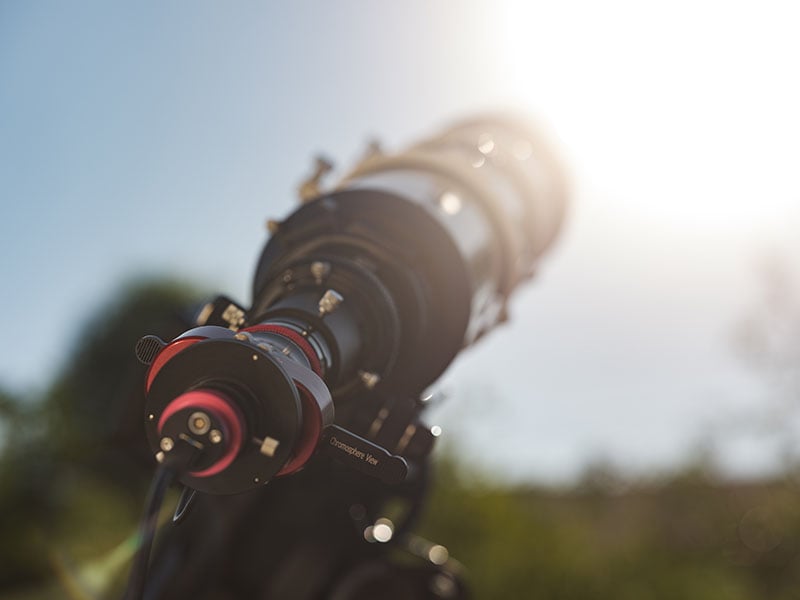
In this article, we will be focusing specifically on a layer known as the Chromosphere: an area of the sun that is visible within the orange to red spectrum. Using a specialized filter, this device blocks out all unwanted light while passing the specific bandpass we are looking at.
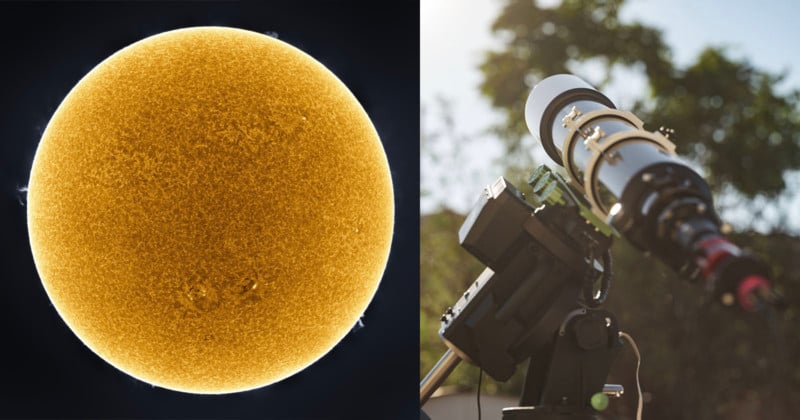
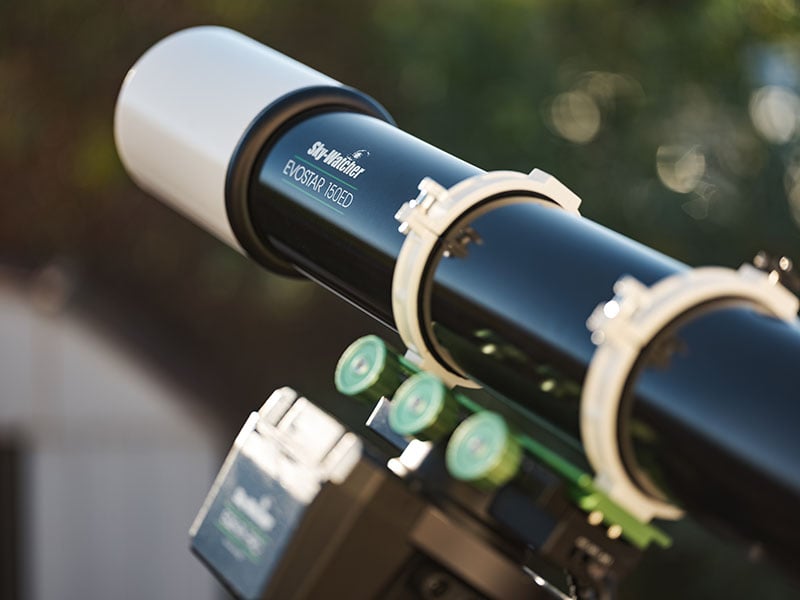
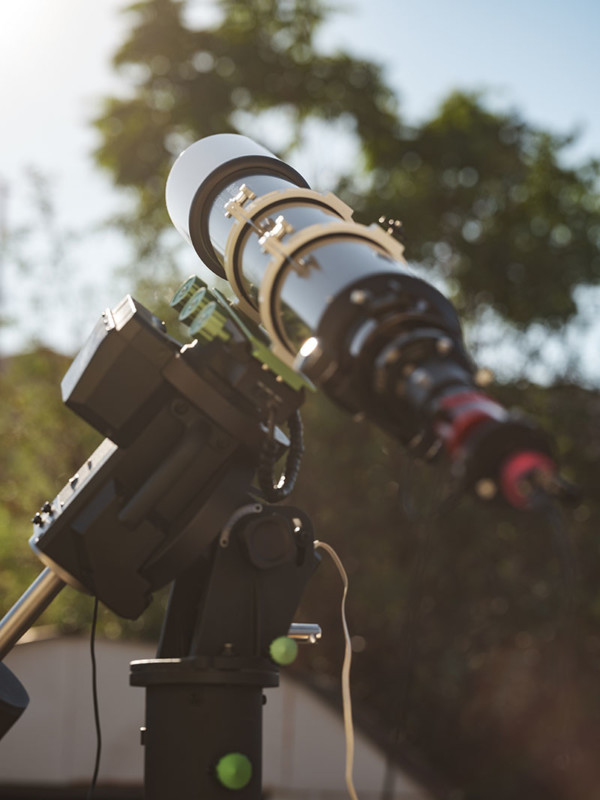
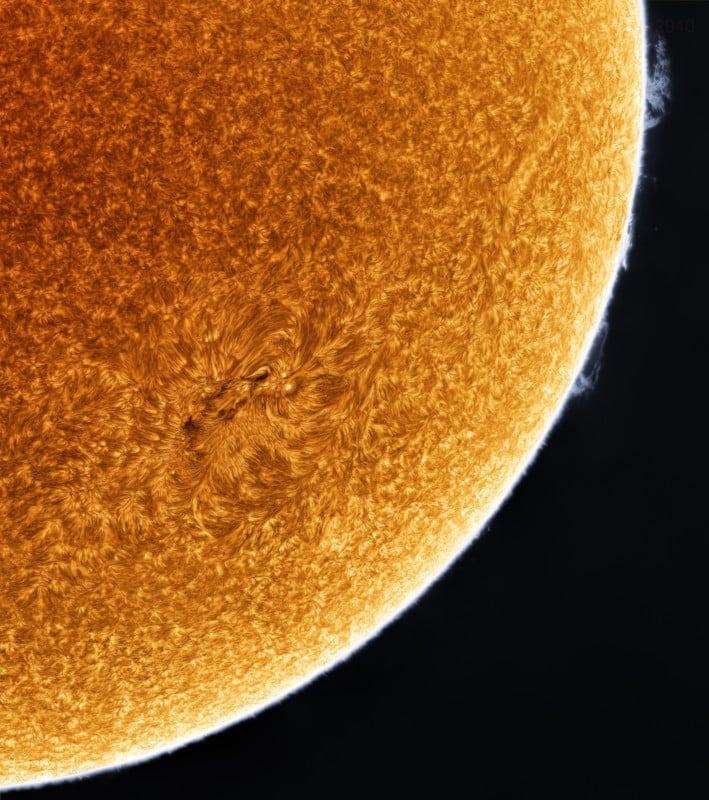
This full-disc image of our sun is created using a large refracting telescope and a high-speed CMOS monochrome camera.
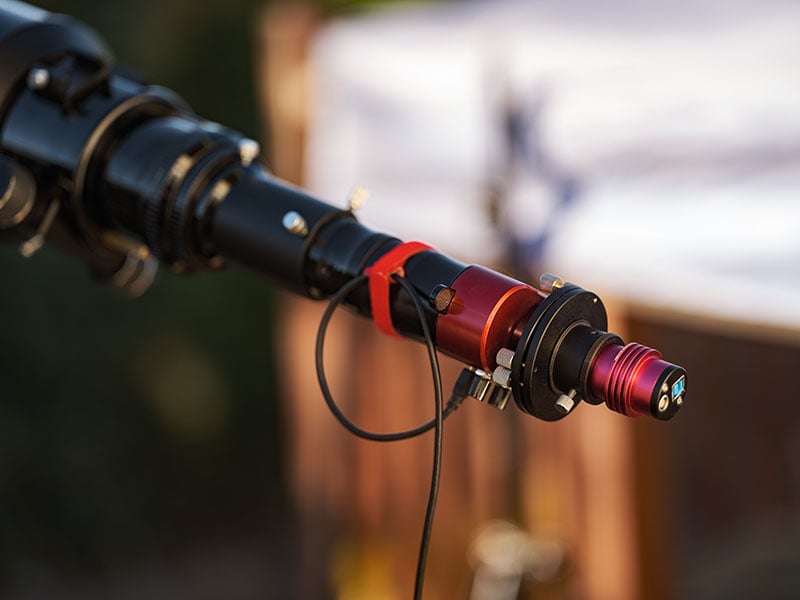
A special type of filter known as an etalon is used in conjunction with a blocking filter. Since the layer of the sun is what we want to observe, the blocking filter is designed to let in light at 656nm wavelength. In this case, a Daystar Gemini is used which also has a 4.2x telecentric Barlow built-in.
The camera in question is made by QHYCCD, a company that specializes in making cameras for the astrophotography market. This particular camera, the QHY5III-174M has a smaller sensor compared to what we are used to. At only 2.35-megapixels, a final image is built of 90 panels to create a mosaic of sorts, making a complete image of our star.
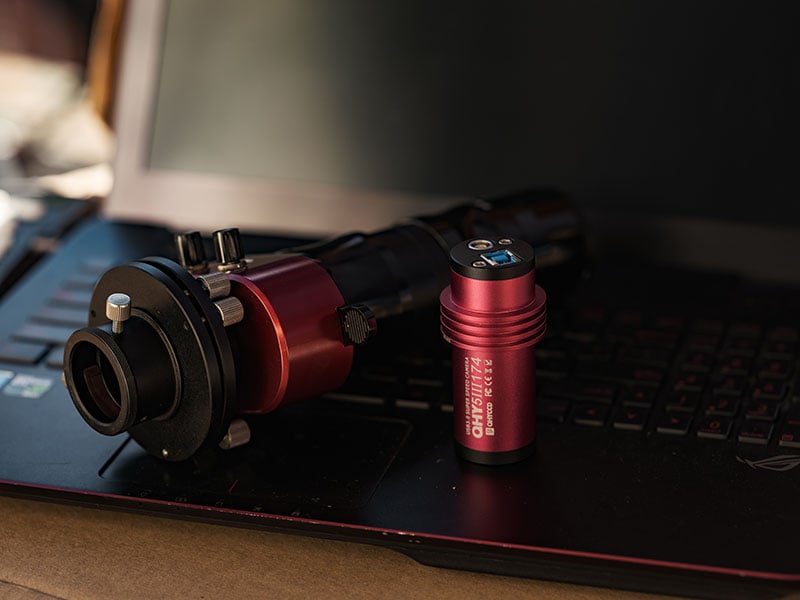
Each panel or image is made up of a high-speed video capture of 1000 frames, which is later stacked together to create a highly detailed image with smoother gradients and less noise.
Since the camera has such a small sensor, a tracking mount was used with the assistance of a controller to pan across the sun, taking captures at various steps. Since the sun is actually in constant motion, the time taken to capture each panel has to be under a certain time frame. This sequence took approximately 25 minutes to complete to ensure that the surface did not change too much when creating the final image.
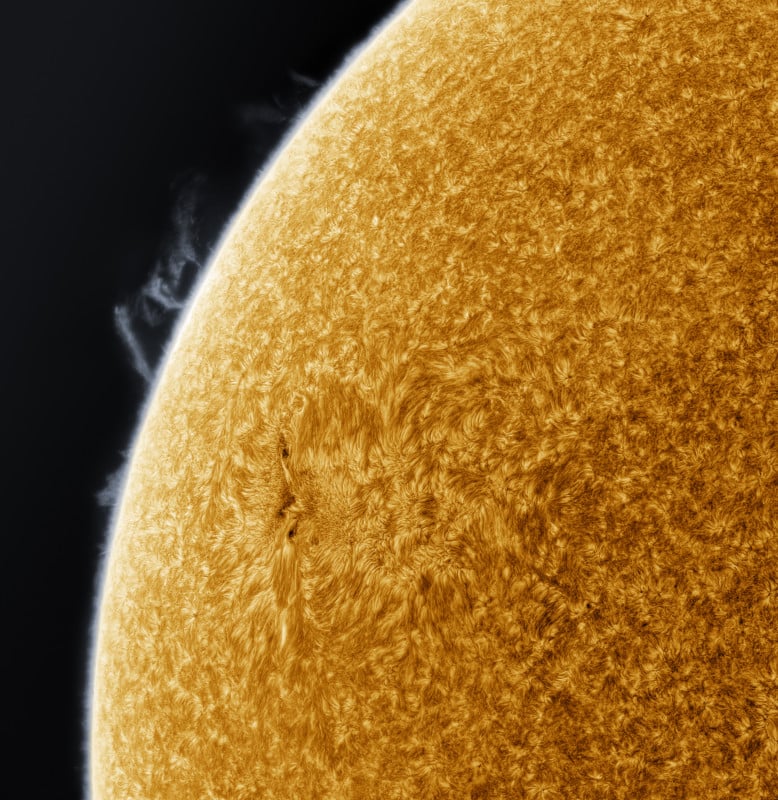
Astrophotographers often employ a technique during the initial phase to sort out what is signal and what is noise. The basic idea is that an image with a lot of noise when combined with other images from the same framing, will result in a better image.
Once these images have been stacked, a process is then applied which helps sharpen the image. Using a specific technique known as deconvolution, a software called IMPPG allows details to be pulled back in. This is much like the pre-programmed settings found in almost all DSLR and mirrorless cameras. Astronomy cameras have these pre-processing steps removed to allow the user more control over the image at the cost of time spent processing.
Next is the long task of aligning each image. While there are many software options to make this process faster or automated, images such as these do not always line up correctly. Often, two images do not contain any specific features for the software to create alignment points and fail at creating stitched images without some type of distortion or misalignment.
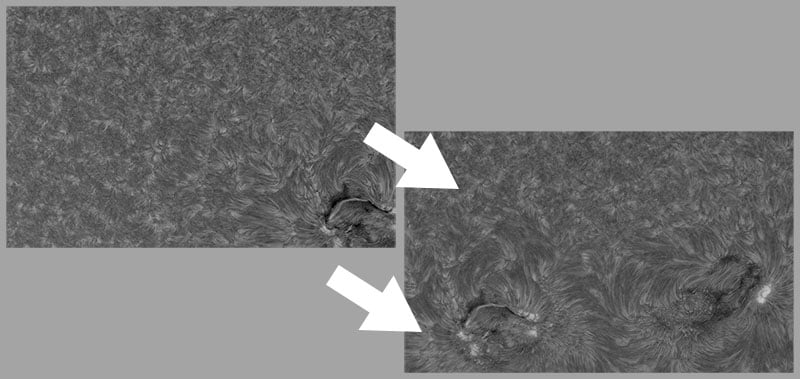
After each frame has been individually aligned, the images are then blended together to make a seamless image. Photoshop Auto-Blend is able to handle this particular task extremely well, even if the two adjacent frames have different varying levels.
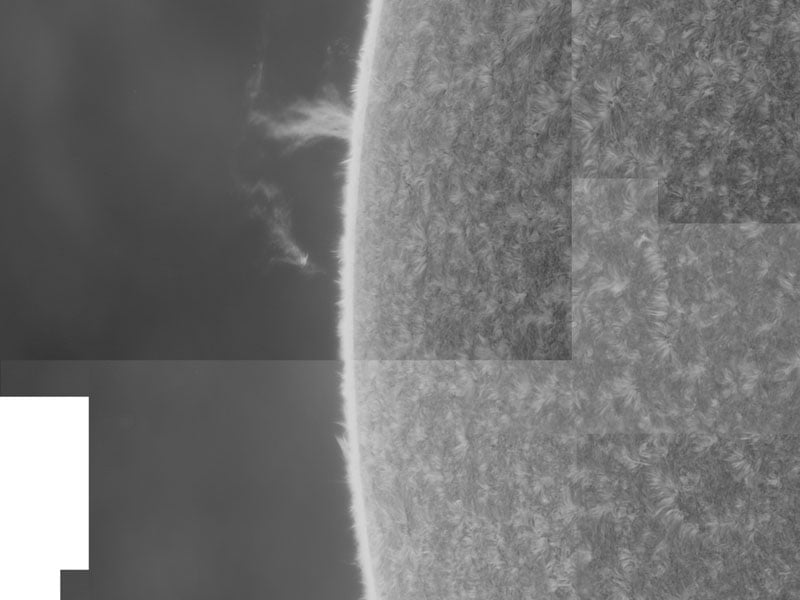
Once each panel had been aligned and blended, a few other tricks were also used to enhance the details further. Applying HDR Toning, details begin to pop out. The HDR image is blended together with the previous result, to make a smoother transition. Varying hotspots and dark patches are also removed to create a more uniform image using the Camera Raw functions within Photoshop.

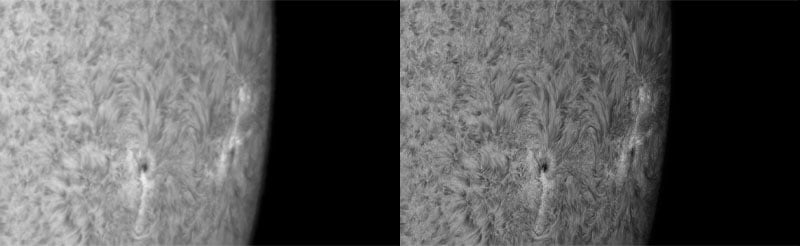
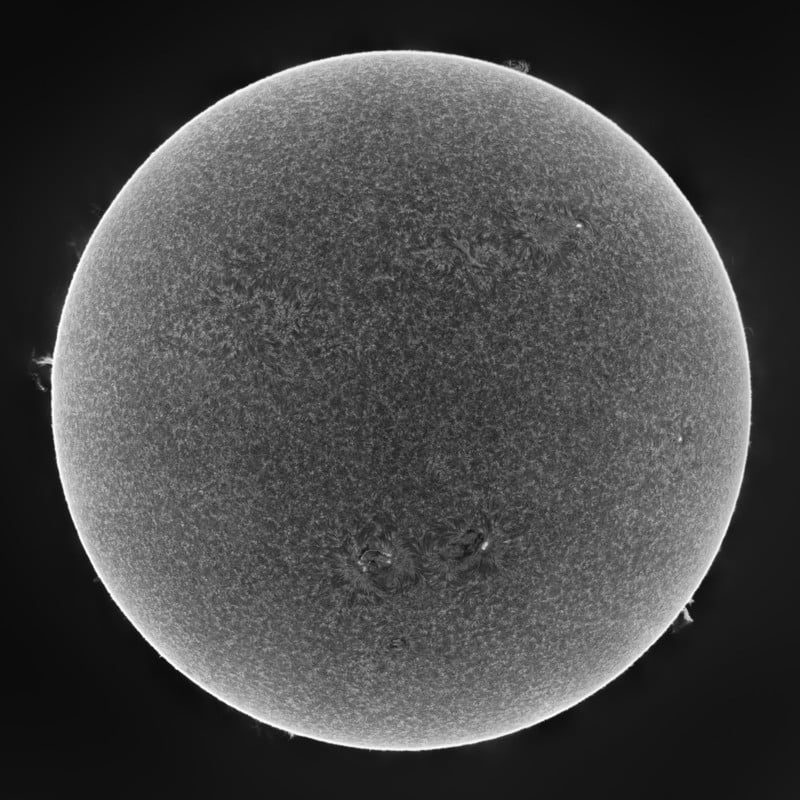 Processed Mono Invert
 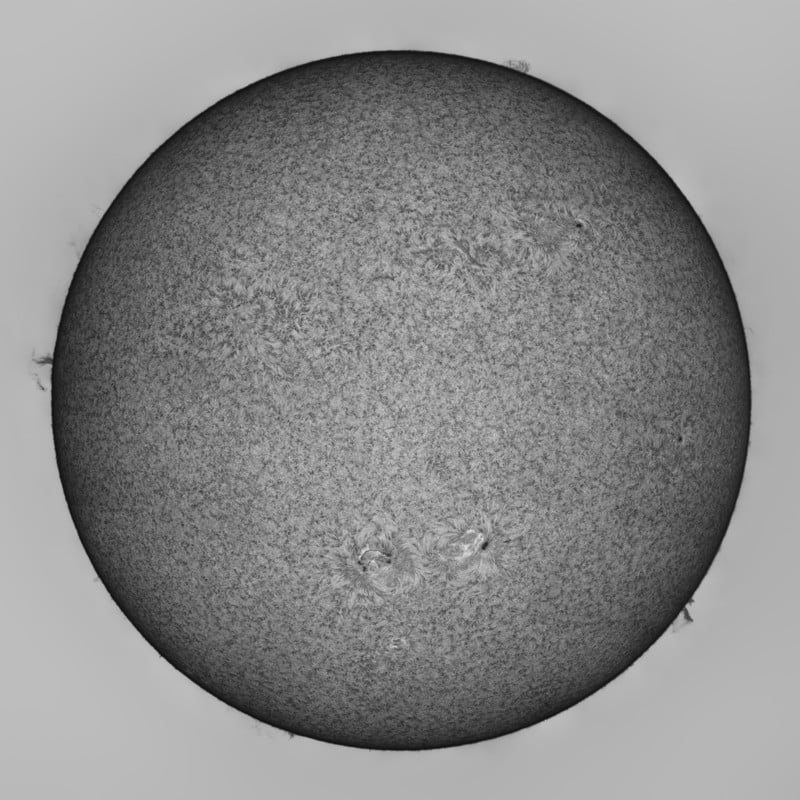 Processed False Mono Positive
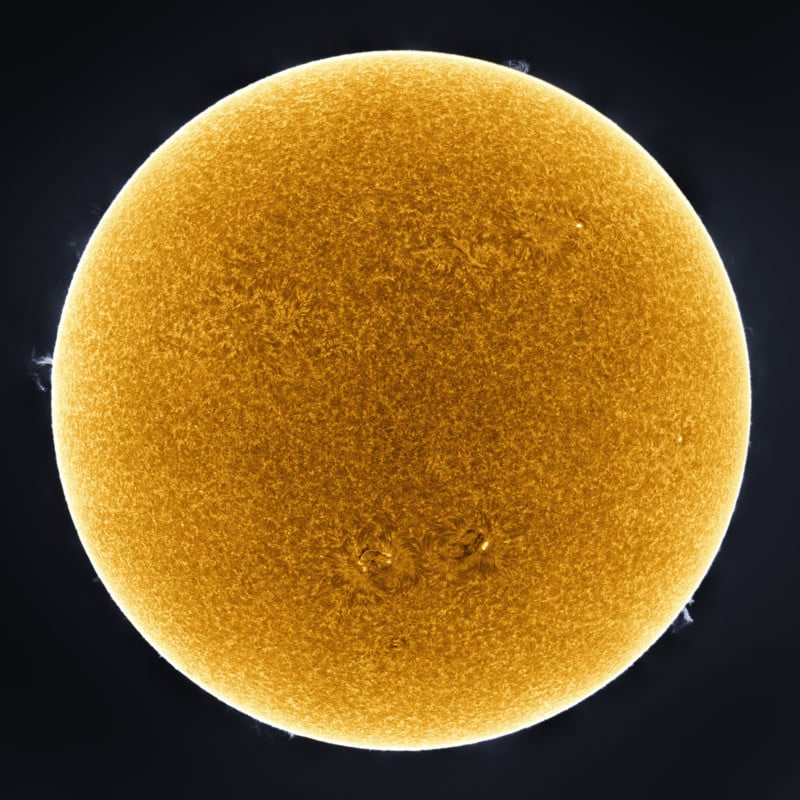
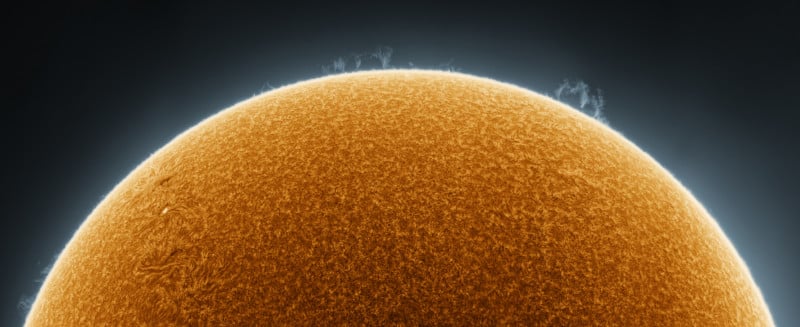
Once the final image is achieved, a false-color is applied to the image. Since our sun is not actually yellow, a curves adjustment is used to give the coloration that most people would associate with the sun during sunset.
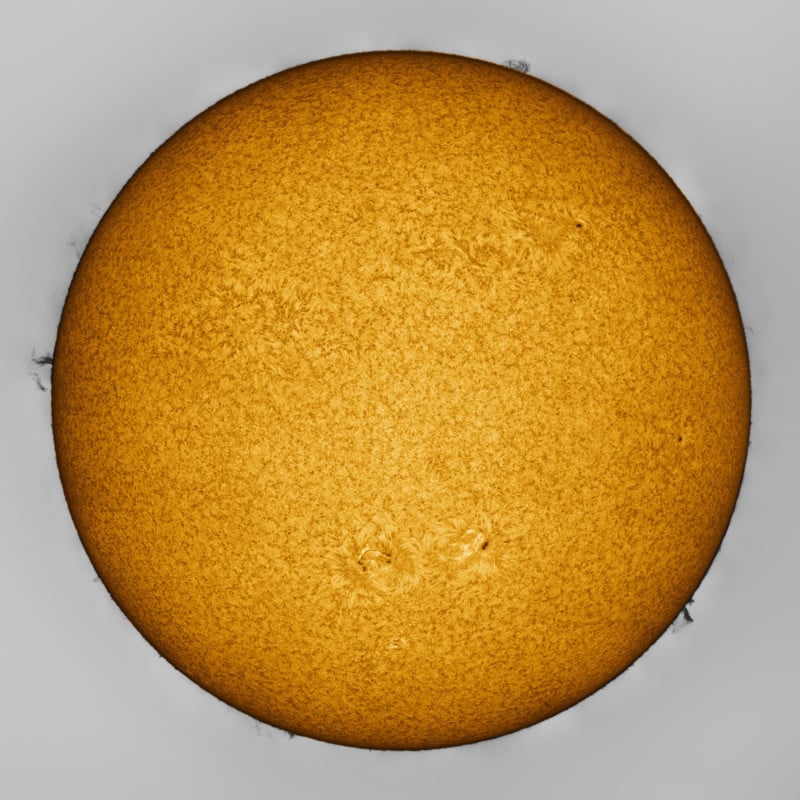 Processed False Color Positive
The final image created is a giant 248-megapixel image that freezes the sun at that moment of capture, never to be seen again in the exact same way.
While a smaller telescope can be used to create these images, larger telescopes have the added benefit of being able to get more details than would with a smaller counterpart. At 1200mm focal length, plus the added 4.2x magnification, the smallest minor details become monstrously big. Each feature can be the size of the Earth and the larger ones would swallow Jupiter whole several times over.
About the author: Simon Tang is an accomplished astrophotographer whose work has been widely recognized, including by the Royal Observatory in its Astronomy Photographer of the Year competition (under the name Siu Fone Tang). Tang regularly shares his astrophotography images on his Instagram.
#editorial #inspiration #walkthroughs #248megapixel #astrophotography #cmossensor #editing #falsecolor #howto #monochromecamera #qhyccd #simontang #sol #solar #star #sun
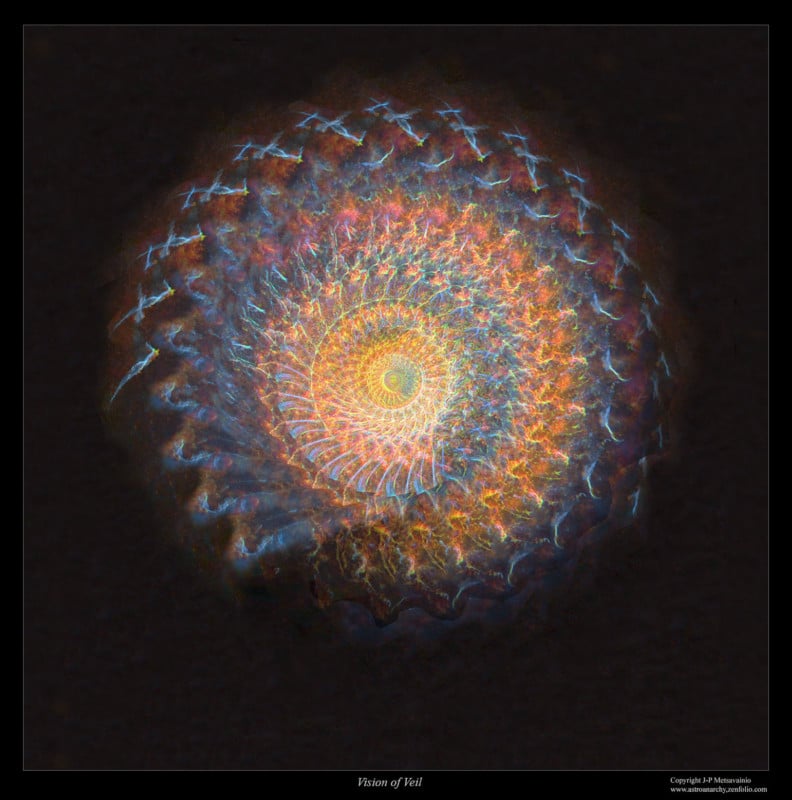
Finnish astrophotographer J-P Metsavainio is known for spending 12 years exposing a gigantic photo of the Milky Way. In addition to his impressive photos, he has also been using them for abstract, kaleidoscopic "Vision" artworks.
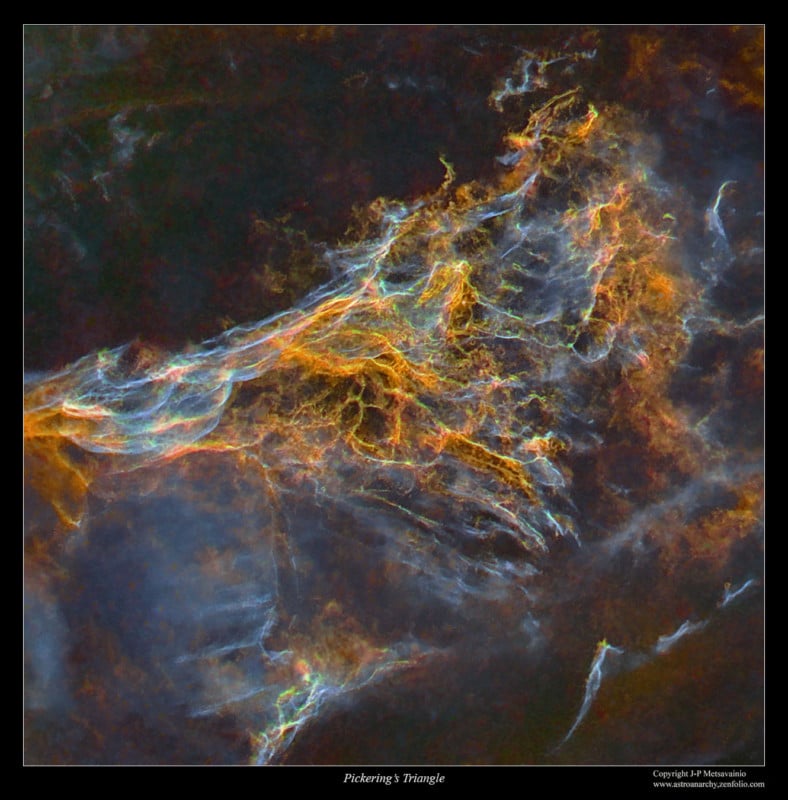 "Pickering's Triangle," the original photo the above artwork was created from.
"I'm an astrophotographer but first of all I'm a visual artist," Metsavainio tells PetaPixel. "As an artist, I'm dazzled by all the forms I'm able to capture in my photos of cosmic objects, nebulae, supernova remnants, galaxies, etc. Colors from ionized elements are connected to the shapes and textures and they form a physical reality around us.
"The Vision series of photographic artworks is based on my photographs of cosmic formations. I have used an old photographic art method of multiple exposures over the same photo, or, as I call it, the 'overlapping lightning method'."
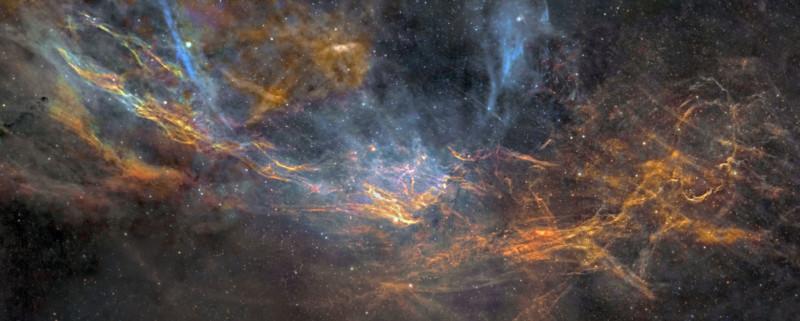 Mosaic Panorama of Western Gygnus
 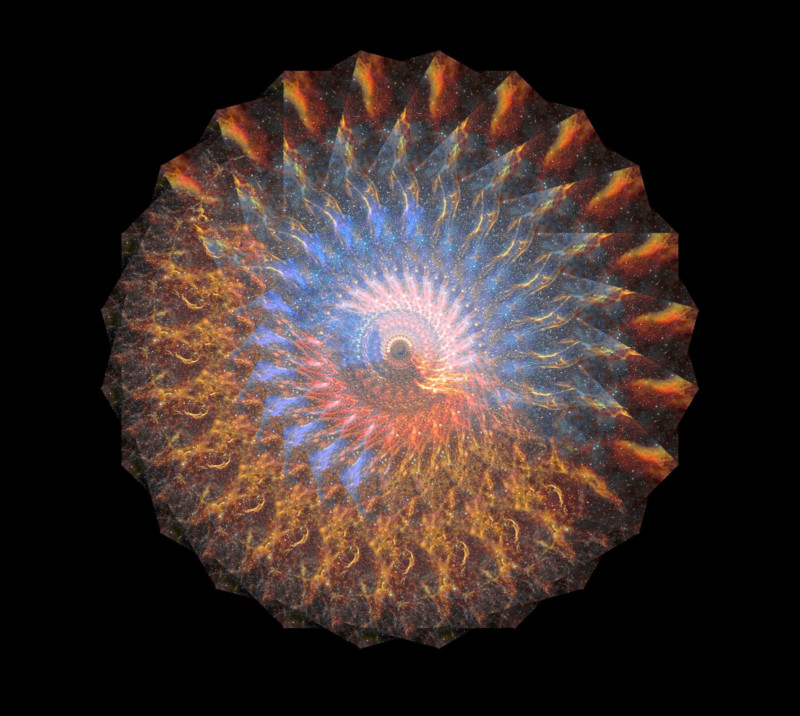 A Vision artwork created from "Mosaic Panorama of Western Gygnus."
 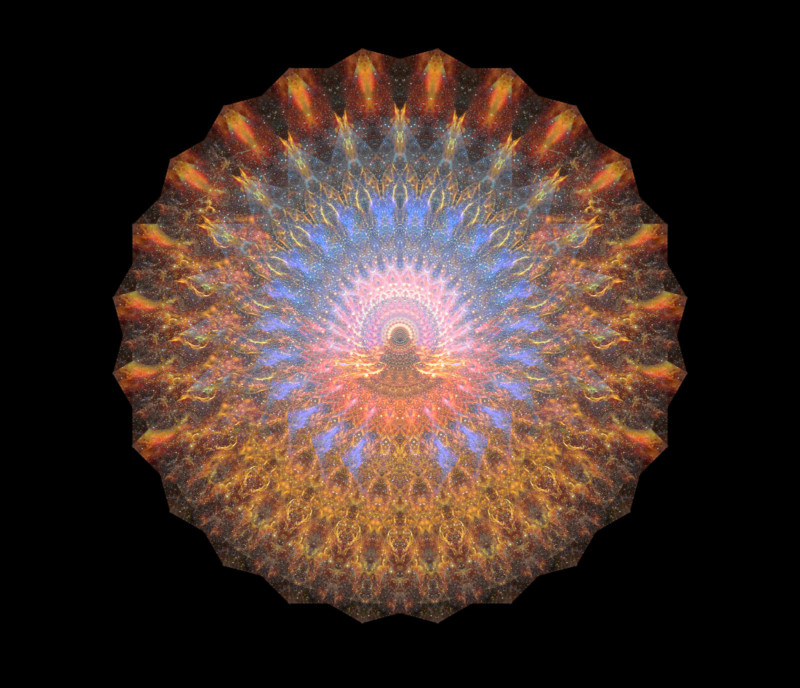 A Vision artwork created from "Mosaic Panorama of Western Gygnus."
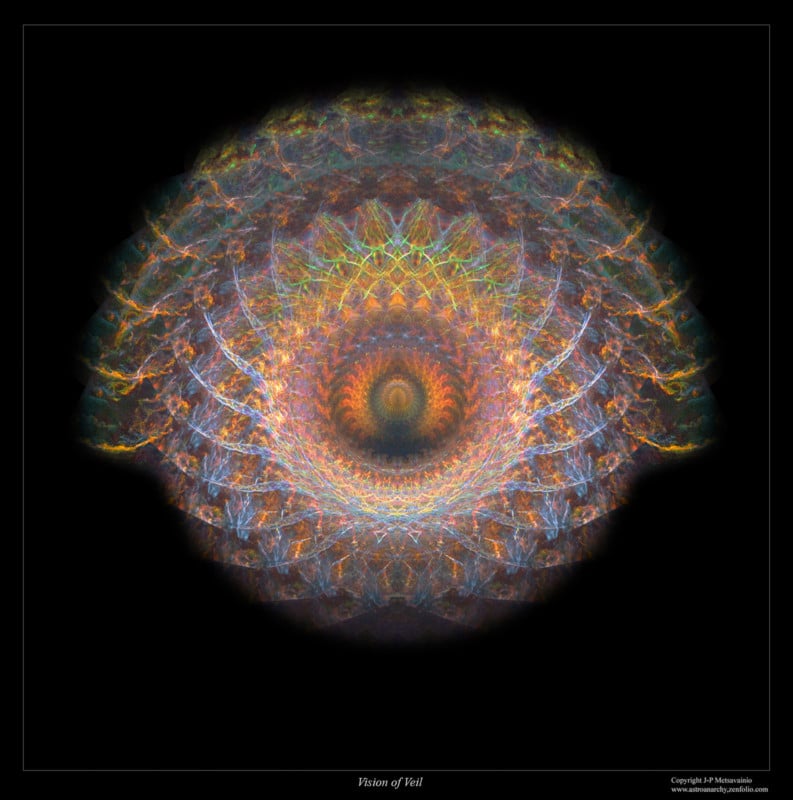
"[This concept] was fashionable back in the 1920s among experimental and surrealistic photographers, and at the time the work was done in a darkroom," the photographer says. "I'm using about the same technique but instead of a darkroom, I'm using digital image processing.
The original photo is rotated, moved, and/or mirrored as I like, and then multiple layers stacked back together so that the original brightness is maintained. For this task, I use Photoshop and various astronomical stacking applications."
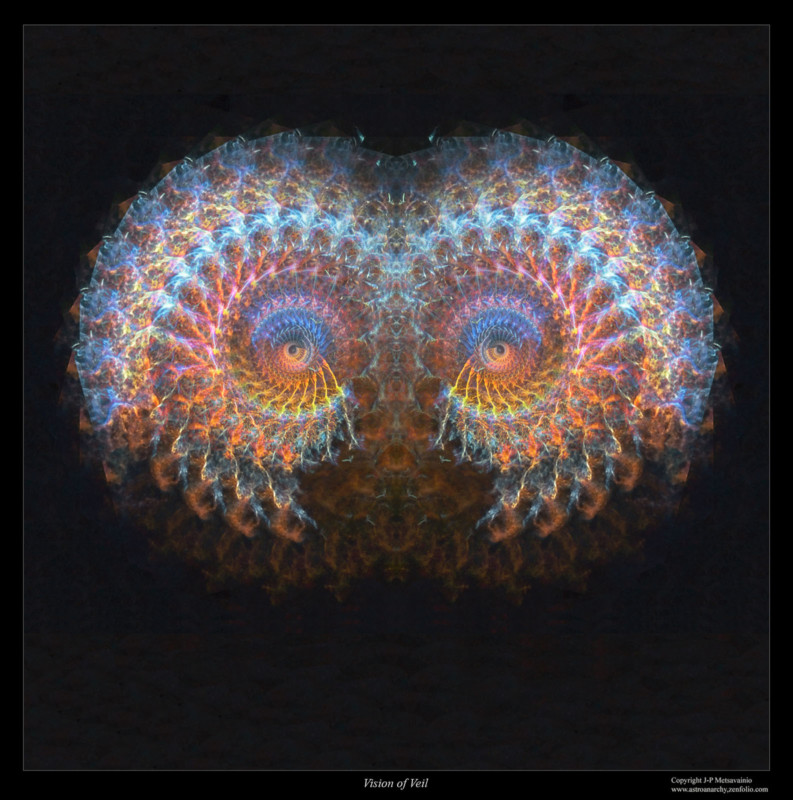
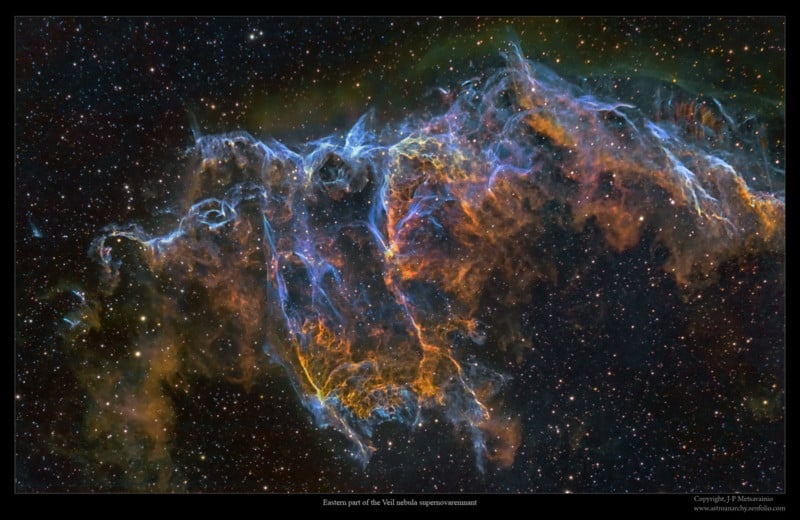 Eastern Part of the Veil Nebula Supernova remnant.
 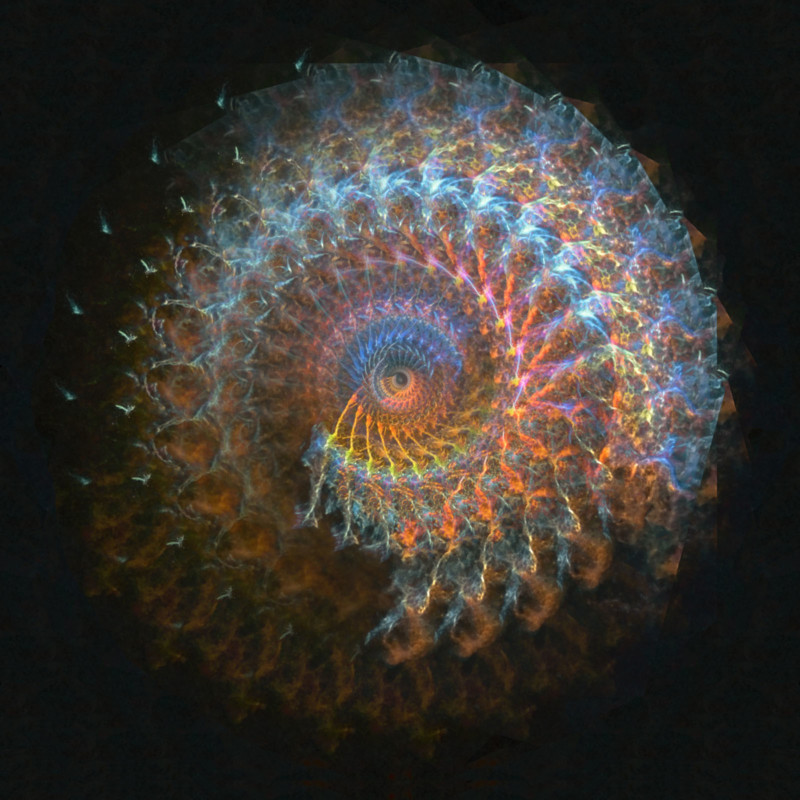 A Vision artwork created from "Eastern Part of the Veil Nebula Supernova remnant."
 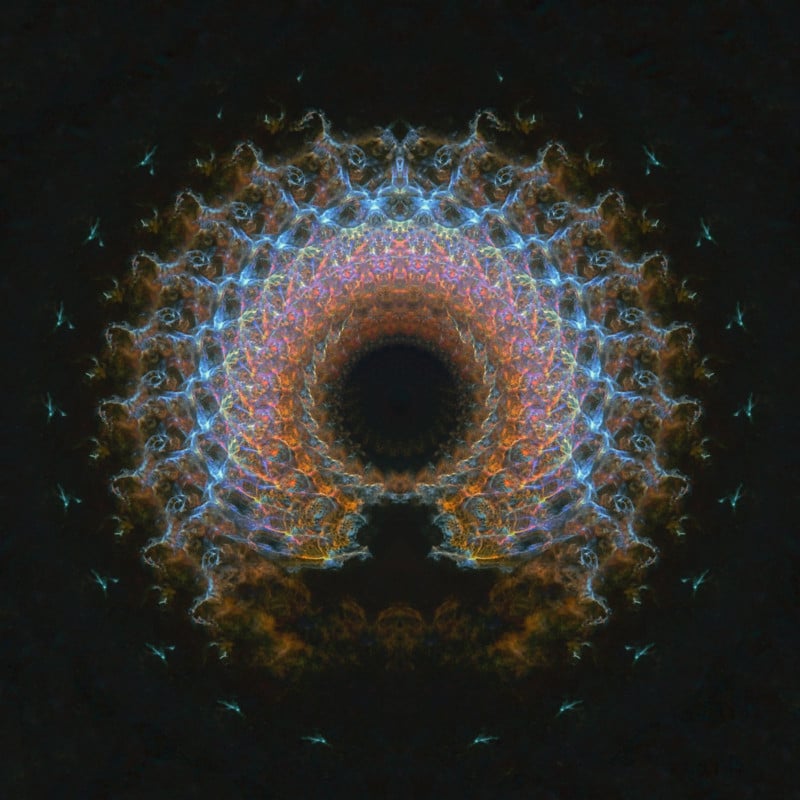 A Vision artwork created from "Eastern Part of the Veil Nebula Supernova remnant."
 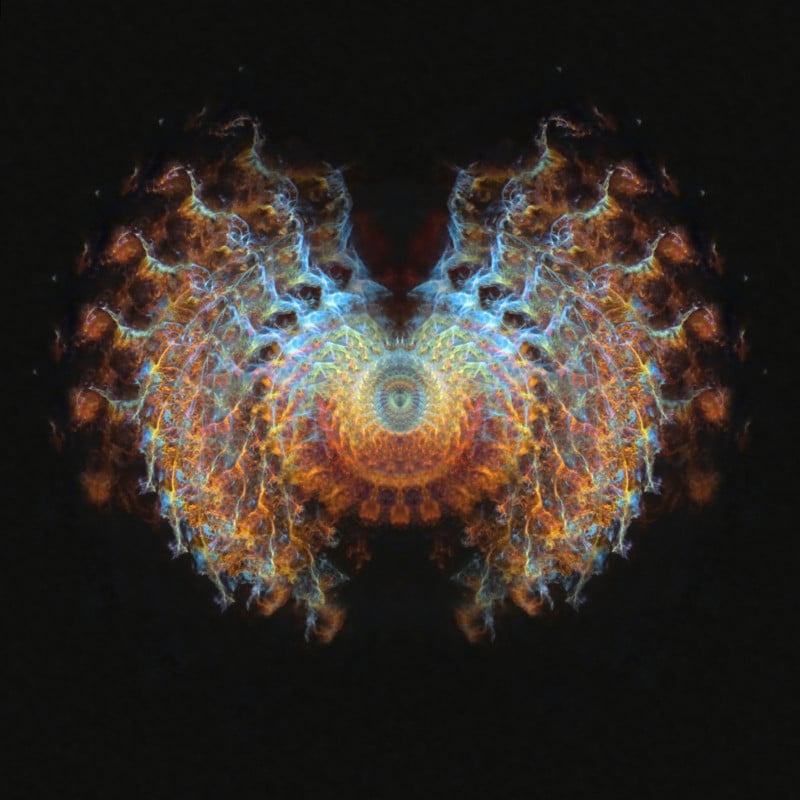 A Vision artwork created from "Eastern Part of the Veil Nebula Supernova remnant."
"The process is not very fast since I carefully plan the final composition before I do the actual work," Metsavainio says. "There is lots of trial and error before the correct combination of movements and rotations is found.
Metsavainio says he spends three to five days on average on each of his Vision series images. He has regularly created them over the past decade but has shared very few of them since they have largely been a personal project.
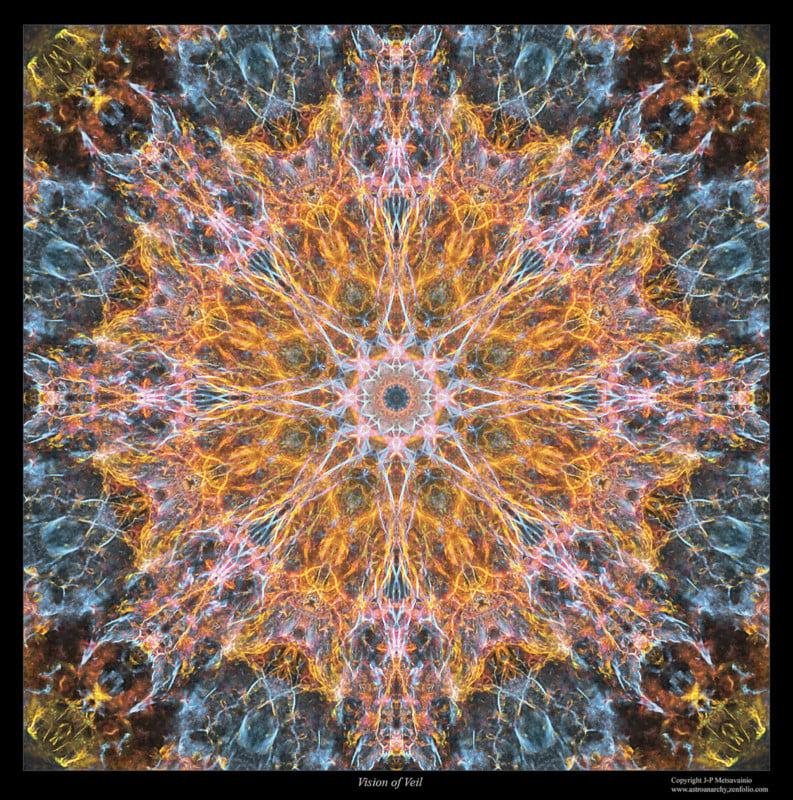
"As an artist, I'm telling a story with my photos, and many times my artworks are also personal notes," Metsavainio says. "The Vision series of photos are forming visual notes about shapes, structures, textures, and colors I have seen and captured during my couple of decades-long journey as an astronomical nature photographer."
You can find a larger gallery of Vision art here and more of Metsavainio's work on his website and portfolio.
#features #ideas #abstract #astro #astrophotography #jpmetsavainio #kaleidoscopic #space
Und nochmal in guter Auflösung über das Webinterface #astrophotography #photography #mywork #stars #milkyway

NASA has published a spectacular image that was photographed by the Hubble Space Telescope that shows what the space organization describes as a three-way tug-of-war between interacting galaxies.
Hubble captured the dramatic triplet of galaxies -- which is known as Arp 195 -- and is featured in the Atlas of Peculiar Galaxies, which is a list that shows some of the stranger and weirder, though no less wonderful, galaxies in the universe.
That Atlas was written by Halton Arp and published by the California Institute of Technology in 1966 and contains a total of 338 galaxies. The entire purpose of the Atlas was to show photographs of different kinds of odd or unusual structures found in galaxies in the universe. While there are many photos of unique galaxies found in that Atlas, this latest photo shows Arp 195, which is located in the Lynx constellation about 747 million light-years from Earth.
Hubble's back! 🎉
After the Hubble team successfully turned on backup hardware aboard the telescope, the observatory got back to work over the weekend and took these galaxy snapshots.
Find out more here: https://t.co/2mWwSGyIKc pic.twitter.com/Y6tVQWrjig
-- Hubble (@NASAHubble) July 19, 2021
Hubble's team originally posted the black and white version of the photo on July 19 which was featured as part of the celebration of the satellite's return to full functionality after it went offline for over a month due to a software error. On June 13, 2021, Hubble went offline due to a glitch in its payload computer and NASA's team spent weeks attempting to fix it. The error almost took down the legendary satellite for good, but scientists were able to bring Hubble back from the brink on July 16.
Observing time with Hubble is extremely valuable, so astronomers don't want to waste a second. The schedule for Hubble observations is calculated using a computer algorithm which allows the spacecraft to occasionally gather bonus snapshots of data between longer observations. This image of the clashing triplet of galaxies in Arp 195 is one such snapshot. Extra observations such as these do more than provide spectacular images – they also help to identify promising targets to follow up with using telescopes such as the upcoming NASA/ESA/CSA James Webb Space Telescope.
Galactic siblings fight, too.
This #HubbleFriday view shows a triplet of galaxies, called Arp 195, caught in a gravitational tug-of-war game.
It’s featured in the Atlas of Peculiar Galaxies, which showcases some of the weirder galaxies in the universe: https://t.co/3hYBoCsc66 pic.twitter.com/SDSHazfgYc
-- Hubble (@NASAHubble) July 30, 2021
Image credits: ESA/Hubble & NASA, J. Dalcanton
#culture #features #news #astrophotography #caltech #esa #galaxies #hubble #hubblespacetelescope #hubbletelescope #nasa #peculiargalaxies #space #universe #unusual
Winners of the David Malin Awards, Australia’s most prestigious astrophotography awards, have been announced for 2021.
https://blog.csiro.au/david-malin-awards-astrophotography/
#photography #astrophotography #beauty #stars #planets #thewholeshebang #wonder
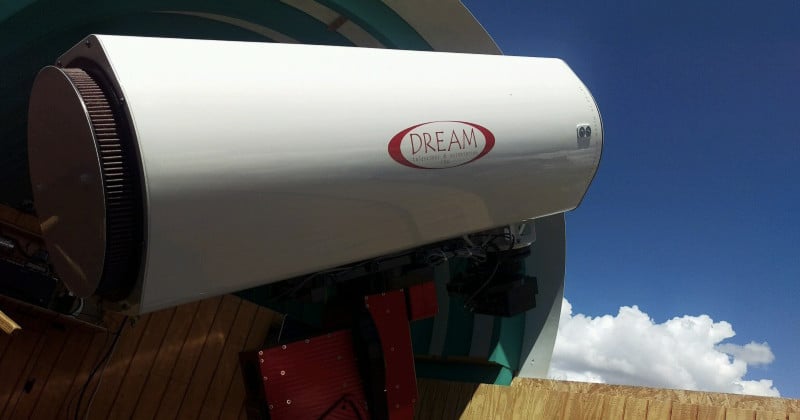
Are you a photographer who would love to give deep space imaging a try – but you’re not quite ready to spend thousands of dollars (or more) to build your own astrophotography rig? With remote astrophotography, you can create astonishing images without the high startup costs. You can learn how to capture and process images using high-end telescopes located all over the world.
Even if you have your own gear, remote technology can supplement what you already have. For example, you could improve your processing skills, capture images without light pollution, try out a variety of equipment options, or capture images from a different location or even hemisphere.
TelescopeGuide recently published a guide to getting started with remote astrophotography. It includes a summary of the best online service providers and a step-by-step walkthrough of how to use Insight Observatory’s remote telescope service. Be sure to check it out, or keep reading below for an introduction (adapted from TelescopeGuide’s original).
There is something uniquely satisfying about using your own equipment and software (plus some patience and skill) to capture a stunning image of a galaxy or nebula in deep space. However, as amazing as it feels to do astrophotography on your own, it's also a hobby that can get, well, expensive.
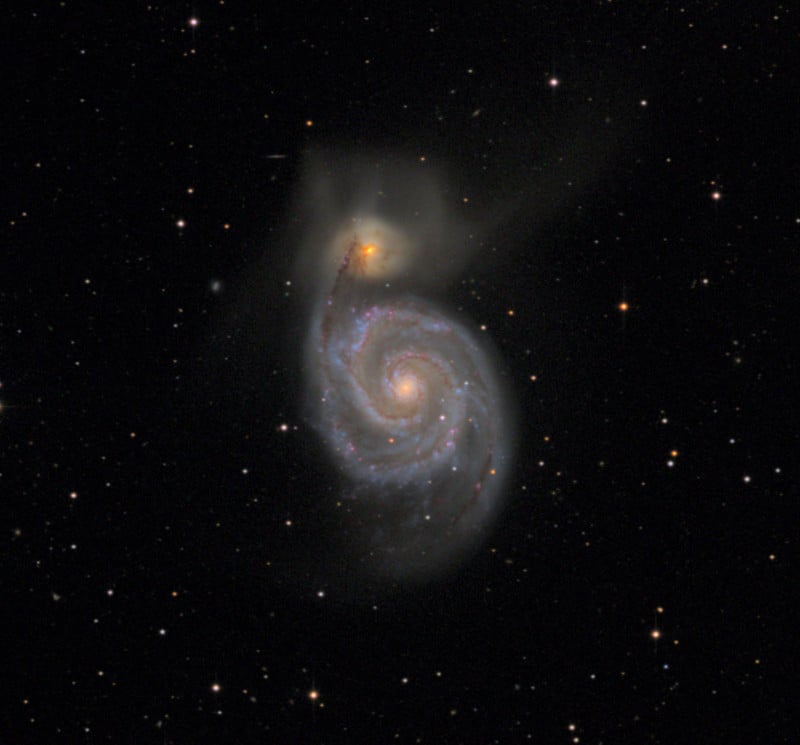 NGC 5194 (The Whirlpool Galaxy, a.k.a. Messier 51; Taken with Insight Observatory's ATEO-1 Remote Telescope; 20 Minutes Total Exposure Time
First, the best celestial images require a high-end apochromatic refractor telescope or a fine-tuned astrograph reflector with precision-built optics. Second, in addition to the telescope for astrophotography itself, you'll need a smooth computerized mount capable of being auto-guided with the help of a secondary guide scope. Third, you'll need a suitable camera and several other accessories -- for example, a dew control system, filters, reducers, field flatteners, correctors, et cetera.
Finally, you'll need a place to set up your equipment. While you can certainly do deep space imaging in your backyard, it takes time and effort each time you want to set everything up and you may need to contend with light pollution or sky conditions, which can make things more challenging.
Also, one last thing: Even if you have excellent gear and a great place for imaging, your particular combination of equipment, location, and hemisphere will always limit what you can capture.
So, regardless of your situation, adding a remote option to your toolkit can help expand the imaging choices available to you.
With remote astrophotography, you collect your image data using a telescope set up in a remote location.
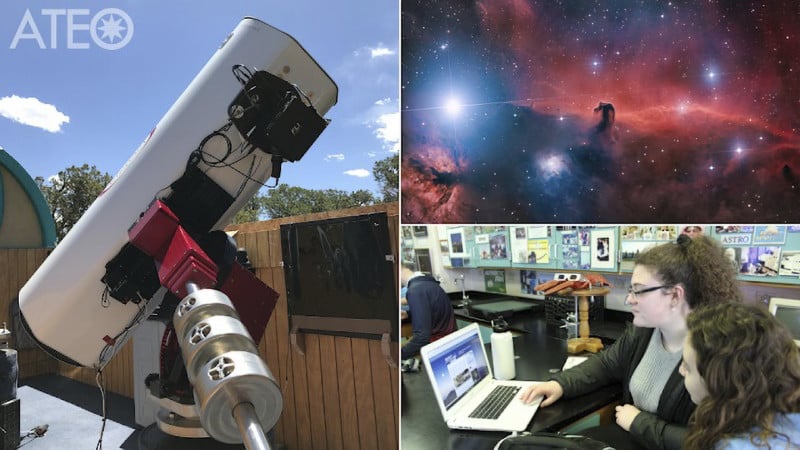 Insight Observatory’s ATEO-1 Remote Telescope with Image of The Horsehead Nebula
An observatory, usually located in a dark-sky location (whether an official IDA site or just a remote location with a very dark sky), houses the rig. The observatory allows electronic control of its roof, so you can remove it anytime for operation without anyone physically onsite at the observatory.
Here is how it works:
For beginners, remote astrophotography offers a great way to get started and learn some of the basics of imaging objects in deep space. You can focus your energy and initial learning on understanding the overall process, figuring out the optimal exposure settings, and converting the raw data into beautiful final images.
Sometimes people who are learning astrophotography spend a lot of time and money on equipment and capturing raw images, but they don’t spend as much time learning and perfecting the back-end of the process where the image “comes to life."
With remote astrophotography, you can learn the entire process before investing in equipment, or you can do a mixture -- use your own equipment while also experimenting with remote imaging so you can compare and optimize results.
If you’re a more experienced astrophotographer, you can still take advantage of the benefits of remote astrophotography:
To learn more, check out TelescopeGuide’s guide to getting started with remote astrophotography, which includes the following:
Whether you’re a beginner looking to learn the end-to-end process of capturing celestial images, or an experienced pro looking to hone your skills, remote astrophotography offers a great way to take your photography to the next level and expand your imaging possibilities.
About the author: Brian Taylor is a technology professional by day, amateur astronomer by night, and writes at TelescopeGuide. He loves exploring the wonder and beauty of the universe—and (especially) sharing it with others. The above article was adapted from its original, published at TelescopeGuide.
#editorial #educational #tips #tutorials #astrophotography #briantaylor #galaxy #howto #insightobservatory #nebula #remote #remotephotography #space #spacephotography #telescopeguide