
#tutorials


How to Try Deep Space Astrophotography Without Spending a Fortune
Are you a photographer who would love to give deep space imaging a try – but you’re not quite ready to spend thousands of dollars (or more) to build your own astrophotography rig? With remote astrophotography, you can create astonishing images without the high startup costs. You can learn how to capture and process images using high-end telescopes located all over the world.
Even if you have your own gear, remote technology can supplement what you already have. For example, you could improve your processing skills, capture images without light pollution, try out a variety of equipment options, or capture images from a different location or even hemisphere.
TelescopeGuide recently published a guide to getting started with remote astrophotography. It includes a summary of the best online service providers and a step-by-step walkthrough of how to use Insight Observatory’s remote telescope service. Be sure to check it out, or keep reading below for an introduction (adapted from TelescopeGuide’s original).
Why Consider Remote Astrophotography?
There is something uniquely satisfying about using your own equipment and software (plus some patience and skill) to capture a stunning image of a galaxy or nebula in deep space. However, as amazing as it feels to do astrophotography on your own, it's also a hobby that can get, well, expensive.
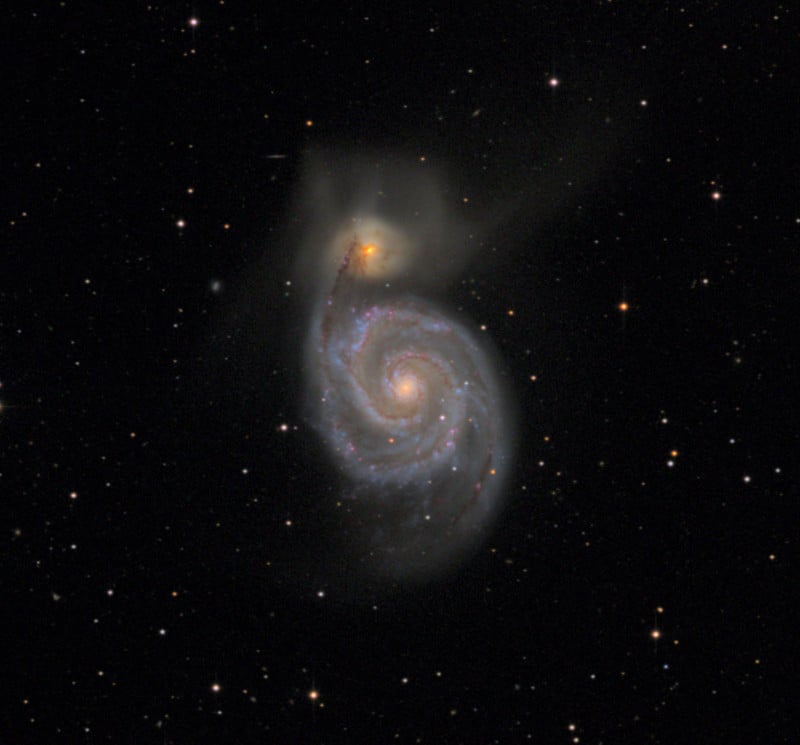 NGC 5194 (The Whirlpool Galaxy, a.k.a. Messier 51; Taken with Insight Observatory's ATEO-1 Remote Telescope; 20 Minutes Total Exposure Time
First, the best celestial images require a high-end apochromatic refractor telescope or a fine-tuned astrograph reflector with precision-built optics. Second, in addition to the telescope for astrophotography itself, you'll need a smooth computerized mount capable of being auto-guided with the help of a secondary guide scope. Third, you'll need a suitable camera and several other accessories -- for example, a dew control system, filters, reducers, field flatteners, correctors, et cetera.
Finally, you'll need a place to set up your equipment. While you can certainly do deep space imaging in your backyard, it takes time and effort each time you want to set everything up and you may need to contend with light pollution or sky conditions, which can make things more challenging.
Also, one last thing: Even if you have excellent gear and a great place for imaging, your particular combination of equipment, location, and hemisphere will always limit what you can capture.
So, regardless of your situation, adding a remote option to your toolkit can help expand the imaging choices available to you.
So, How Does It Work?
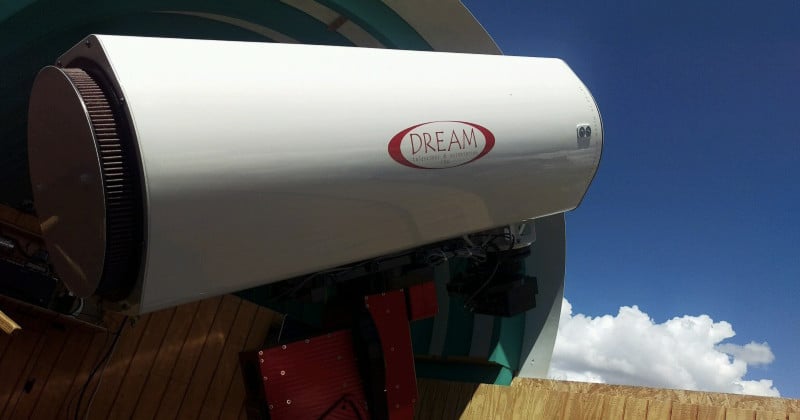
With remote astrophotography, you collect your image data using a telescope set up in a remote location.
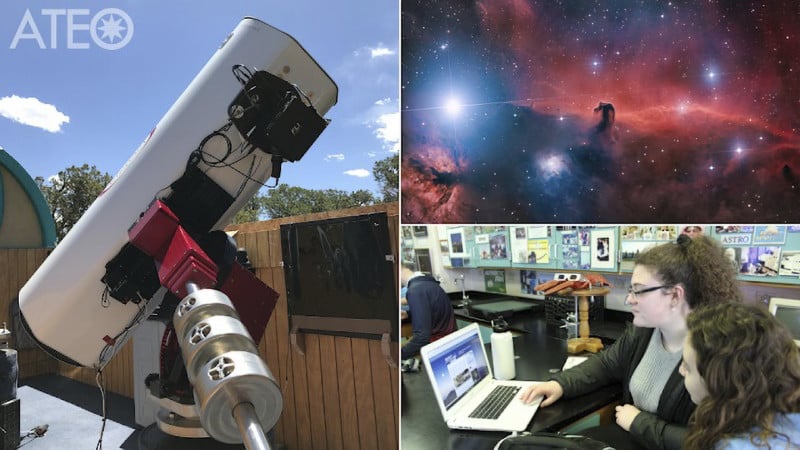 Insight Observatory’s ATEO-1 Remote Telescope with Image of The Horsehead Nebula
An observatory, usually located in a dark-sky location (whether an official IDA site or just a remote location with a very dark sky), houses the rig. The observatory allows electronic control of its roof, so you can remove it anytime for operation without anyone physically onsite at the observatory.
Here is how it works:
- First, you submit an image request to the service provider, specifying your target and any other details required for capturing the image data.
- Next, the computer-controlled equipment collects the requested exposures and sends you a file containing the raw (unprocessed) image data.
- Finally, you use image processing software to “stack” and process your images to produce the final result.
A Great Way for Beginners to Experiment with Astrophotography
For beginners, remote astrophotography offers a great way to get started and learn some of the basics of imaging objects in deep space. You can focus your energy and initial learning on understanding the overall process, figuring out the optimal exposure settings, and converting the raw data into beautiful final images.
Sometimes people who are learning astrophotography spend a lot of time and money on equipment and capturing raw images, but they don’t spend as much time learning and perfecting the back-end of the process where the image “comes to life."
With remote astrophotography, you can learn the entire process before investing in equipment, or you can do a mixture -- use your own equipment while also experimenting with remote imaging so you can compare and optimize results.
But It’s Not Just for Beginners!
If you’re a more experienced astrophotographer, you can still take advantage of the benefits of remote astrophotography:
- Practice and refine your processing skills with a wider variety of targets, conditions, and equipment.
- Use higher-end equipment when you want to create an especially spectacular image.
- Capture images from a different location or hemisphere.
- If you’re crunched for time, take images without setting up the equipment.
- If you have poor local sky or weather conditions, you can take images any time by choosing a location with better conditions since you are no longer limited to imaging only when local conditions are good.
How Do You Get Started?
To learn more, check out TelescopeGuide’s guide to getting started with remote astrophotography, which includes the following:
- What are the best options for remote astrophotography? A summary of the top providers including Insight Observatory, iTelescope, Telescope Live, and more.
- Step-by-step guide: A walk-through using Insight Observatory's ATEO-1 online 16″ f/3.7 astrograph reflector for astrophotography.
Whether you’re a beginner looking to learn the end-to-end process of capturing celestial images, or an experienced pro looking to hone your skills, remote astrophotography offers a great way to take your photography to the next level and expand your imaging possibilities.
About the author: Brian Taylor is a technology professional by day, amateur astronomer by night, and writes at TelescopeGuide. He loves exploring the wonder and beauty of the universe—and (especially) sharing it with others. The above article was adapted from its original, published at TelescopeGuide.
#editorial #educational #tips #tutorials #astrophotography #briantaylor #galaxy #howto #insightobservatory #nebula #remote #remotephotography #space #spacephotography #telescopeguide
2 Shares
How to Use Street Lights to Improve Your Night Street Photography
Nighttime street and urban photography can actually be easy. Street lamps (your ready-made light sources), can effectively provide all the light you need for your photos. The illumination gives you compositional ideas and options for taking great shots.
So how can you use street lamps in your photos?
Let's get into it.
Why Street Lights
Most of us have a best friend. However, they generally are not with us when we are out shooting night street photography. This is actually a good thing because one, they will probably distract you; and two, your current best friend is about to be replaced with a new best friend: the streetlamp.
The streetlamp is the fundamental element that will help you create beautiful night images. Without the streetlamp, there is no night street photography as the streets will be pitch black and there will be no light for the camera to make a decent exposure.
So the humble streetlamp does a few things:
1. It lights the source, allowing the whole lamp pole to become illuminated which can look atmospheric, depending on the locale.
2. It reflects light onto the surrounding area. This can create interesting highlights on a wall, a door, the pavement, the road, a person, etc.
3. It allows you to creatively compose your night street photography images. You can use a Pro-Mist Filter on your lens, which will create an atmospheric halation around the glow of the streetlamp. You can photograph a person entering the pool of light, surrounded by deep shadows. You can focus on the detail and texture that the streetlamp's illumination reflects on a wall or a building. If it is misty, streetlamps look extremely atmospheric, especially when they are trailing off into the distance. You can even use the streetlamp itself as the main element of the composition.
Camera Settings
The most important takeaway when photographing streetlamps and their reflected light is not to overexpose the image. Once the image is overexposed you are left with a clipped highlight in post-processing that cannot be recovered and therefore detail will be gone forever.
This is why I have learned to bracket my exposures when I am shooting Urban Night Photography.
When I am out in the field I have my brackets set to 2 stops underexposed / a correctly exposed shot / 2 stops overexposed. This way I have covered myself if there are any underexposed shadowy areas in my correctly exposed shot and any blown out window or street lights in the correctly exposed shot.
Later, in Photoshop, I will be able to blend in an underexposed shot, (where the streetlamp is exposed correctly), with a correctly exposed shot of the scene, (where the street lamp's light has been blown out). I layer the two shots together, using the well-exposed scene as my top layer, and gently brush in the perfectly exposed streetlamp from the underlying, underexposed layer.
When I shooting night street photography, I generally use a different process. I will check the location before I start photographing people and dial in the settings, check my histogram, and expose for the highlights, making sure that the histogram is not clipped on the right (blown out highlights) and adjust accordingly. Unfortunately, there may be deep shadows, but if I am shooting at an ISO value that doesn't go over my camera's ISO noise threshold then I know I can recover those shadows in Lightroom with either no noise penalty or having some acceptable noise, that I can choose to get rid of if I so desire.
Noise is not a problem as it does not affect the aesthetic pleasantry of the composition, or the Street Photography storytelling. However, an overblown highlight will, in most cases, ruin an image.
So, when it comes to night street photography settings, your histogram is your second best friend.
What to Look For
Illumination, shadows, textures, details, contrast, vibes, and highlights. These are the photographable elements that you can use in your Night street photography, to make your images stand out. Let's have a look at some of these.
Examples
 The final blended photo.
 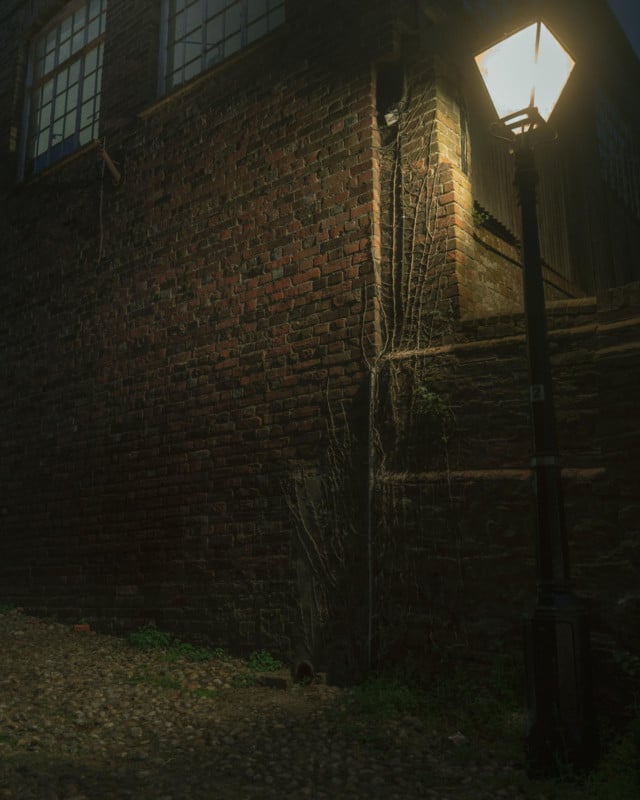 Properly exposed for the scene.
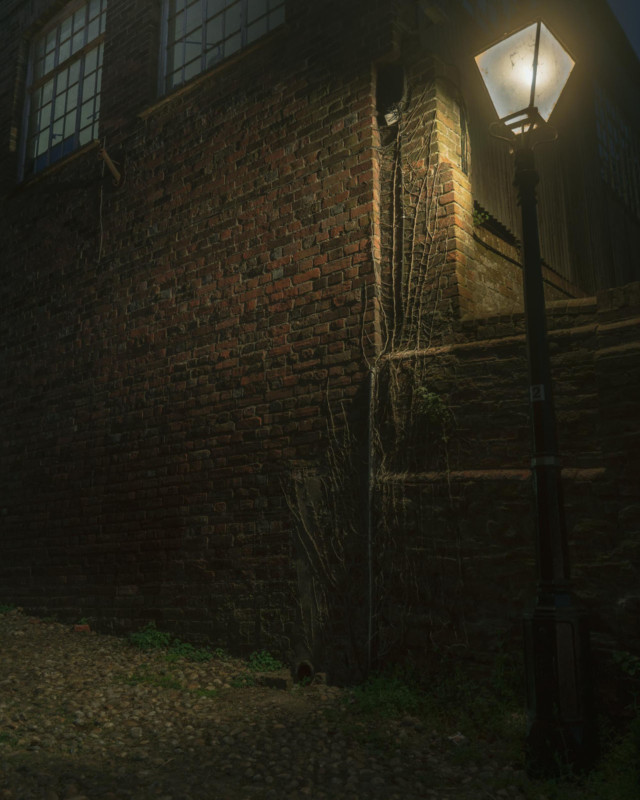
 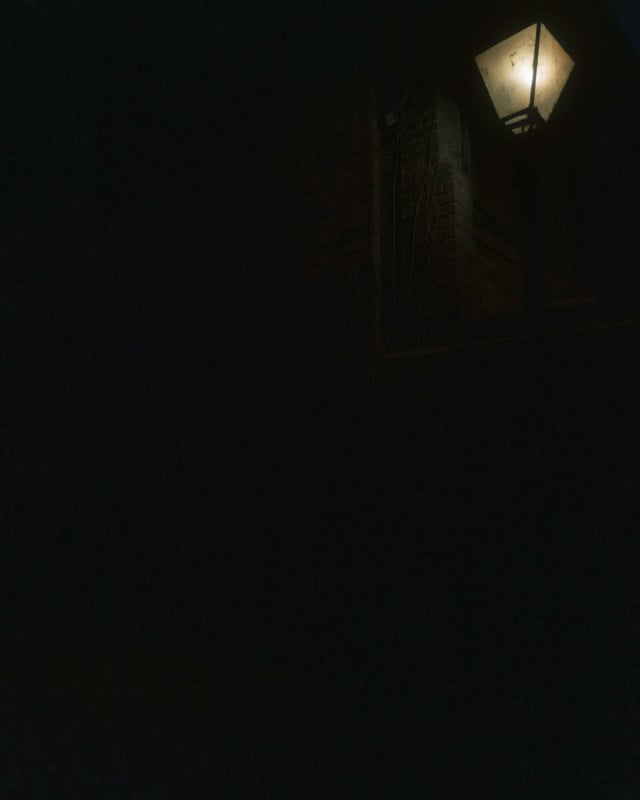 Underexposed for the street lamp.
I have been able to accentuate the details in this image because of the streetlamp reflecting on the wall and on the cobbled stone ground. Notice the beautiful highlights on the edges and the ridges of the wall and the detail on the withered foliage. Notice how subtly the highlights descend into Shadows. I blended exposures with an image exposed for the scene and an underexposed image which was for the lamp, that had the dirt detail that you can see on the lamp housing.
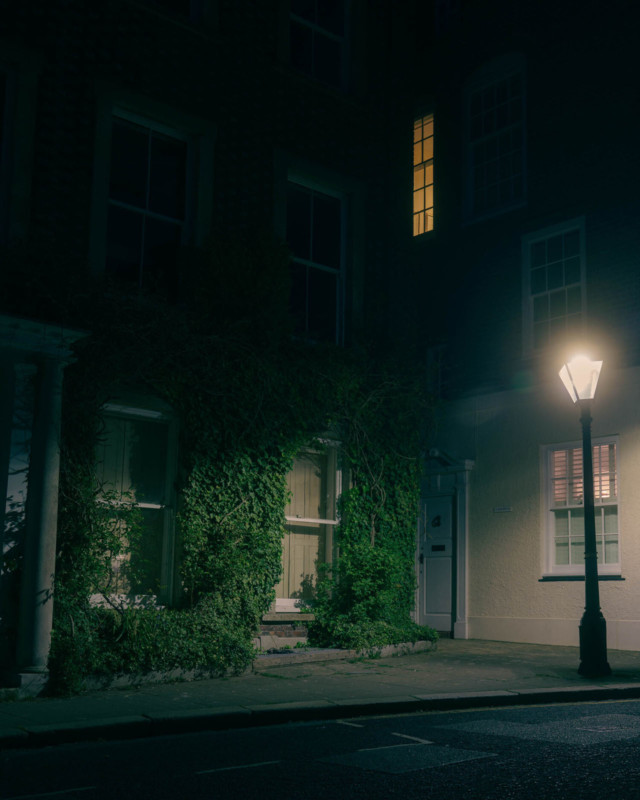 Windows and Dreams
This image works because the reflected lamplight reveals that this is in fact a building. Those two window lights are not reflecting much light at all. If the lamp wasn't on all you would see are two windows, which would look pointless. The lamplight compliments the eerie-looking window, providing gentle shadows around it. It creates a story and causes you to wonder, "Why is that the only light that is on up there? What is going on in that room?"
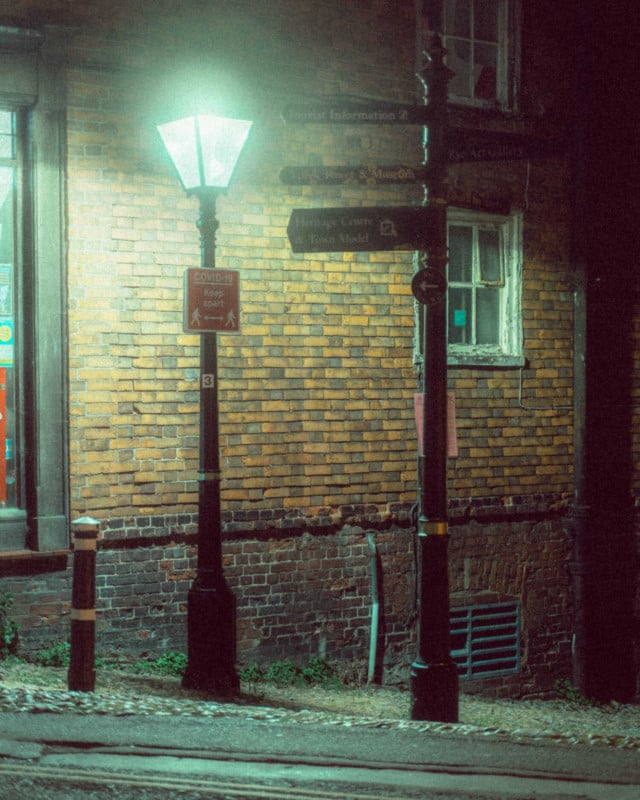
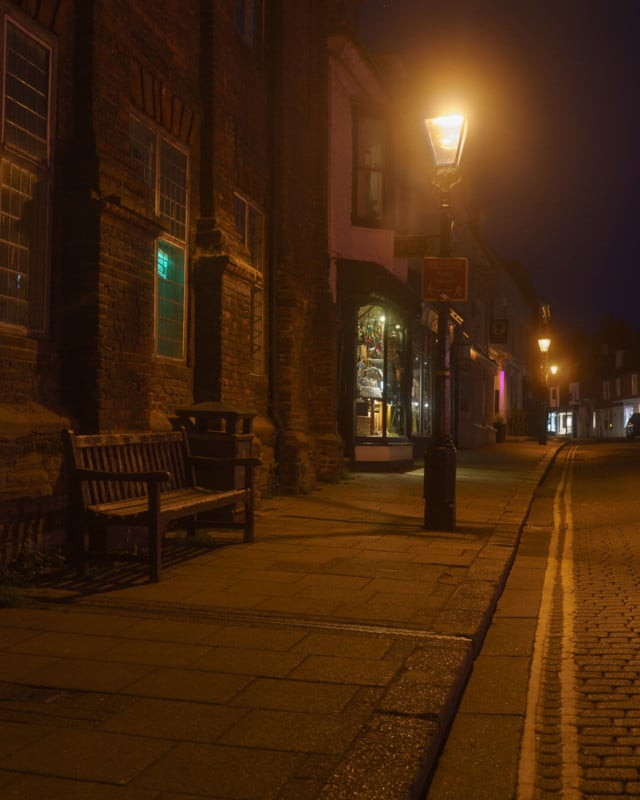 High Street Dreams
That beautiful glow halation around the lamp is due to the Tiffen Pro-Mist Filter which adds a certain amount of atmosphere to the lamp. In this image, the lamp is illuminating the pavement and roads which has allowed me to use the pavement and yellow markings as a leading line. Notice how the street lamp casts an interesting shadow beneath it, and how other streetlamps trail off into the distance, creating depth.
 High Street Blues
The main focus of this image is the streetlamp which, in the center of the shot, creates symmetry. It is also lighting up the detail on the wall and the pavement, creating visual interest and also casting beautiful shadows around the illuminated area. Imagine if the street lamp wasn't there. You would just see a bunch of windows. There would be no visual clues as to what the windows were a part of.
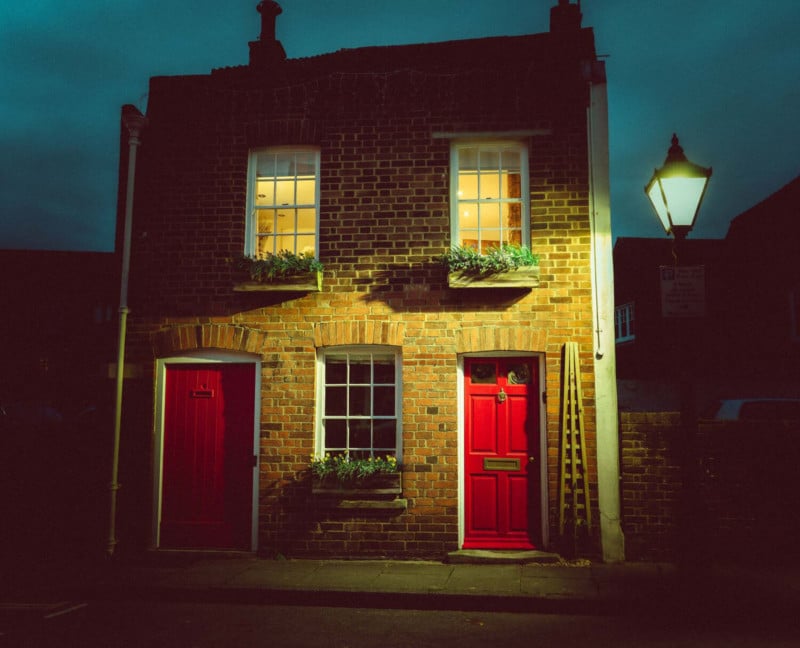 The House
This street lamp is beautifully lighting those red doors and also creating depth and form, as you can see shadow detail on the wall and behind the house. The streetlamp also provides an extra element of interest, revealing to the viewer that this is a street. Imagine if there was no lamp. The house would look flat and you could be left wondering if this interesting house was actually real.
 Mint Glows
If it wasn't for the mounted street lamp in the foreground then this image wouldn't work at all as the entire stretch of pavement would be in darkness, up to the next street lamp in the distance.
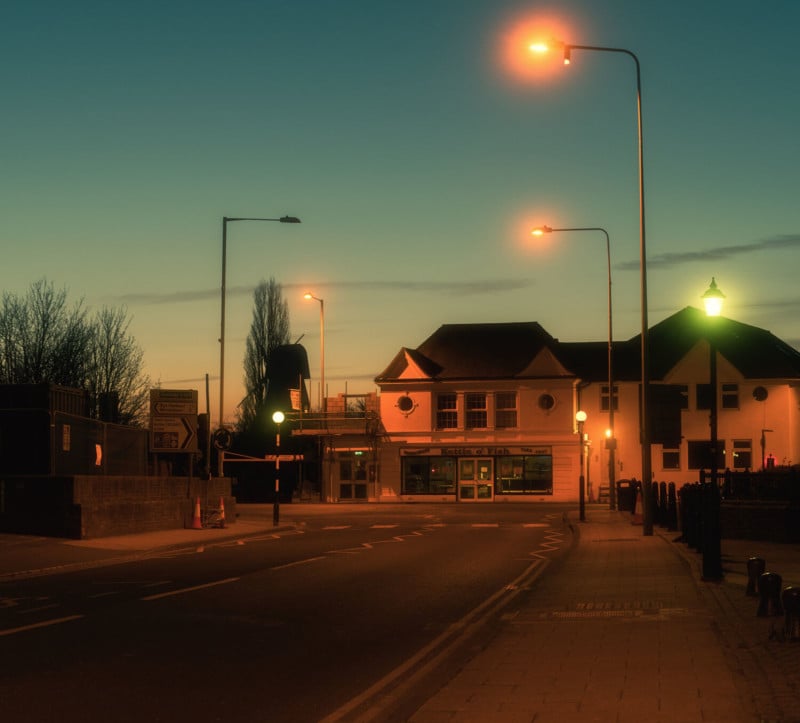 Chasing Dreams
The street lamps in this image are strangely colored which turns out to be a beautiful thing, as they add a lovely orange color contrast against the blue hour sky. That green lamp adds a further element of mystery to this colorful urban night street photography image.
While we pay our bills we will always have light, which means that we will be able to go out and shoot beautiful night Street and Urban photography.
Next time you are out at night, look for what the street lamp is illuminating (or is not) and see if there is some contrast that you can photograph or if there is a story to tell through visual imagery. This article has now got me quite emotional, so I'm off to hug my local friendly streetlamp.
Go forth and create.
About the author : Joe Redski is a fine art photographer and music lover based in the UK. The opinions expressed in this article are solely those of the author. You can find more of Redski's work on his website, Twitter, and Instagram. This article was also published here.
#inspiration #tips #tutorials #joeredski #lighting #night #nighttime #street #streetlights #streetphotography #urbanphotography
1 Shares
If you want to learn programming you can find some #tutorials here ...
Learning #Phython: https://tutsnode.com/?s=python
Learning #Hacking: https://tutsnode.com/category/it-software/ethical-hacking/
... and many more other categories: https://tutsnode.com
#education #software #learn #hack #selfstudy #development #tutorial #lesson
4 Likes
7 Comments
1 Shares
I just wanted to point out a Youtube channel that deserves more attention. For years now I have relied on user Derek Banas for learning a wide range of topics including computer programming, personal fitness, musical instruments and more. He makes high quality tutorials that I'd say are largely unmatched when it comes to free educational content on-line. Derek deserves a shout out for his work and I hope sharing this helps get him more subscribers and donations.
Derek Banas on Youtube
#programming #computers #education #videos #tutorials #fitness #music #code