#landscapephotography

garryknight@diasp.org

Ansel Adams: rare photographs in stunning hi-definition | Art and design | The Guardian

Rare photos taken by Ansel Adams from the collection of David H Arrington, a passionate collector of Adams’ photographs from the beginning, will be offered for sale from 17 February at midday in Sotheby’s New York

#photography #LandscapePhotography #AnselAdams

https://www.theguardian.com/artanddesign/gallery/2022/feb/17/ansel-adams-rare-photographs-in-stunning-hi-definition

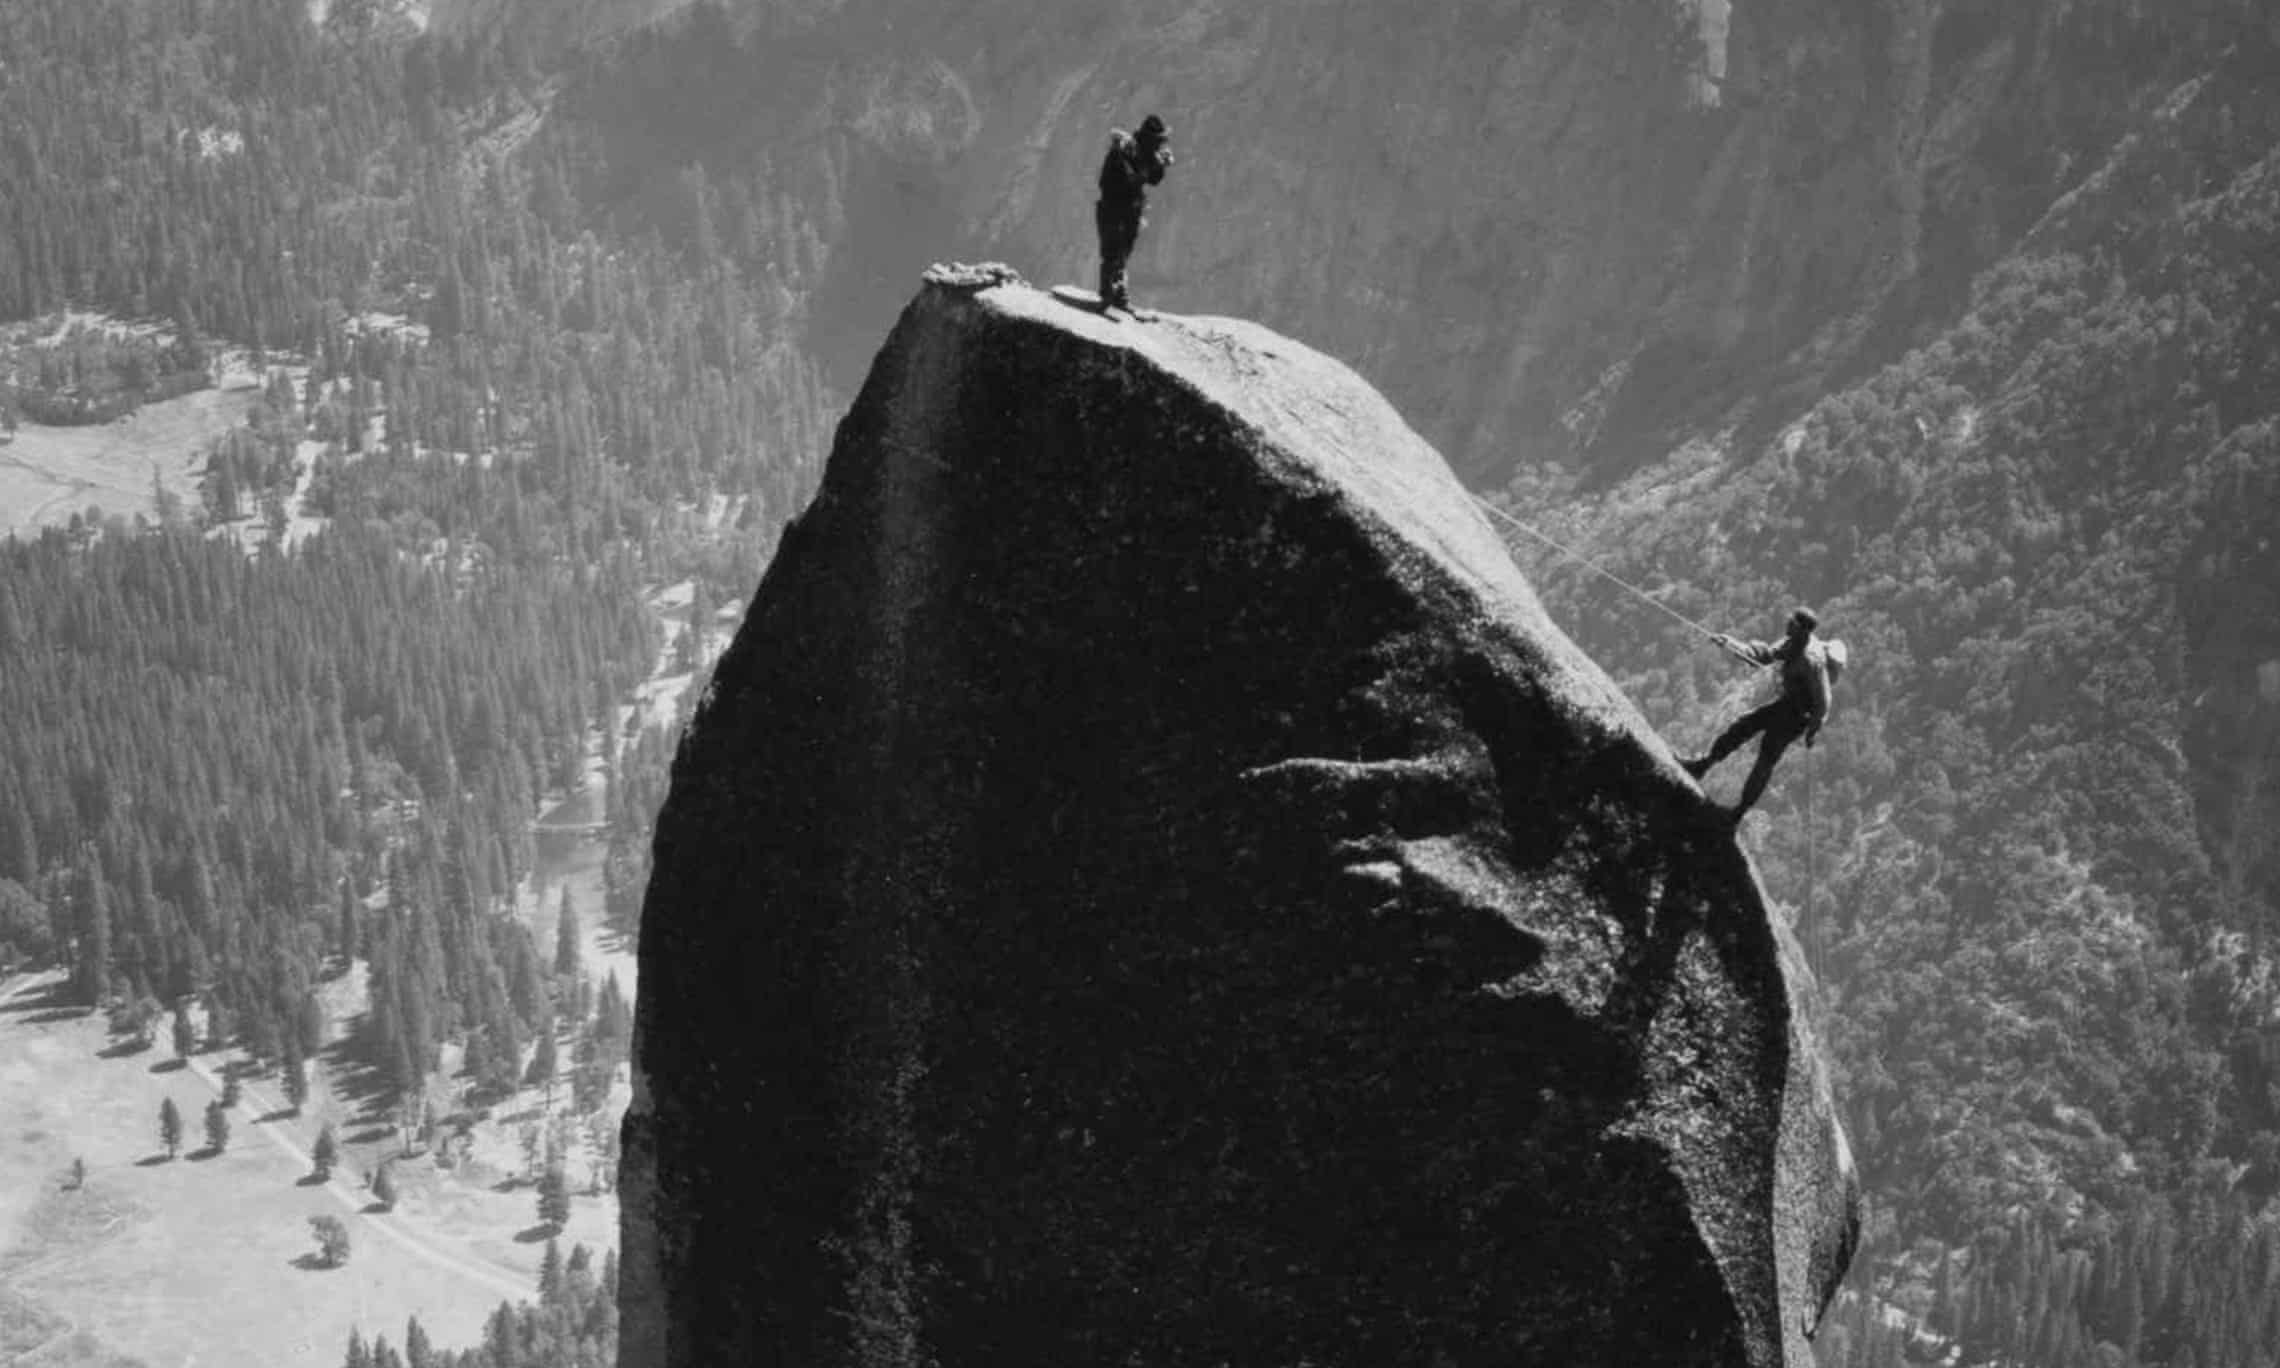
Two men climbing a rock in Yosemite Valley

garryknight@diasp.org

The Winners of the International Landscape Photographer of the Year 2021 | PetaPixel

The eighth annual International Landscape Photographer of the Year has announced the winners of its 2021 competition, which awards both an individual photo as well as names an overall winning photographer.

Most of these look like paintings.

#photography #LandscapePhotography #LanscapePOTY

https://petapixel.com/2022/02/02/the-winners-of-the-international-landscape-photographer-of-the-year-2021/

petapixel@xn--y9azesw6bu.xn--y9a3aq

Photos of America’s National Monuments, The Parks Less Traveled

image

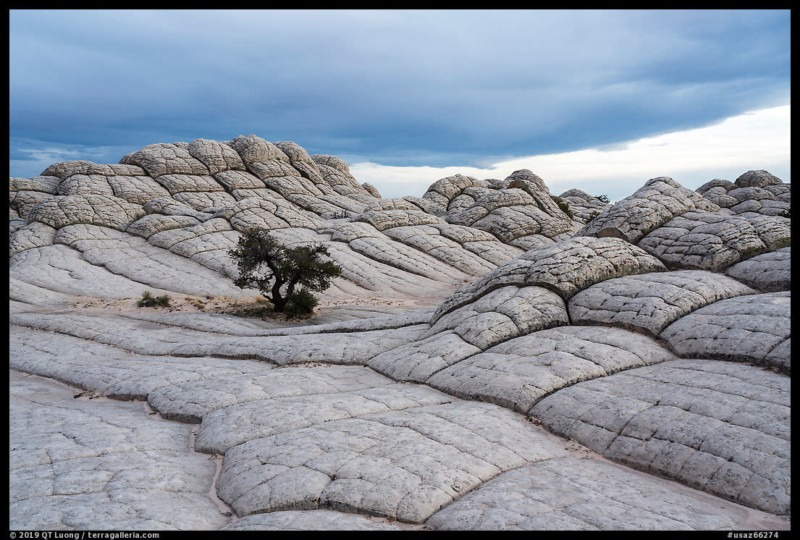
Lone tree on cross-bedding

Are you looking for new landscapes away from the crowds and the tripod holes of the national parks? Are you seeking a more adventurous and out-of-the-beaten-path experience? If so, how about a visit to America's national monuments?

The term "national monument" may remind photographers of Lee Friedlander's influential but quirky book The American Monument, which featured a collection of memorials and statues all over the country. So what's in there for a landscape photographer?

In the United States, the term has a more specific meaning and, at the same time, includes features more general than built landmarks. Defined by a 1906 law called the Antiquities Act, national monuments are federally protected areas containing objects of historic or scientific interest. The main difference with national parks is administrative. The President can swiftly proclaim national monuments with only a signature, thus providing expedited protections, whereas only Congress can establish national parks.

As suggested by its name, the Antiquities Act was initially meant to protect native archeological sites. However, the first national monument was Devil's Tower in Wyoming, a natural feature of geologic interest. Congress had been debating over the Grand Canyon since 1882, but even as commercialism was running unchecked, by 1908, it had not yet acted to protect that quintessential American wonder. President Theodore Roosevelt did, by proclaiming the Grand Canyon a national monument.

Since 1906, 16 presidents have used the Act to preserve some of America's most treasured public lands and waters. Half of today's national parks were first protected as national monuments.

While some national monuments fit within an acre, others protect entire landscapes with natural features as extraordinary as those found in national parks. In some sense, those landscape-scale national monuments could be seen as national parks in waiting. An excellent example is Grand Staircase–Escalante National Monument located in Southern Utah. At 1,880,461 acres, it is significantly larger than Grand Canyon National Park (1,217,403 acres).

Within its plateaus descending in vividly colored stair-steps from Bryce Canyon to the Grand Canyon, the monument protects significant paleontological sites. However, for the visitor, the attraction is its extraordinary geology of cliffs, badlands, hoodoos, natural arches, and canyons.
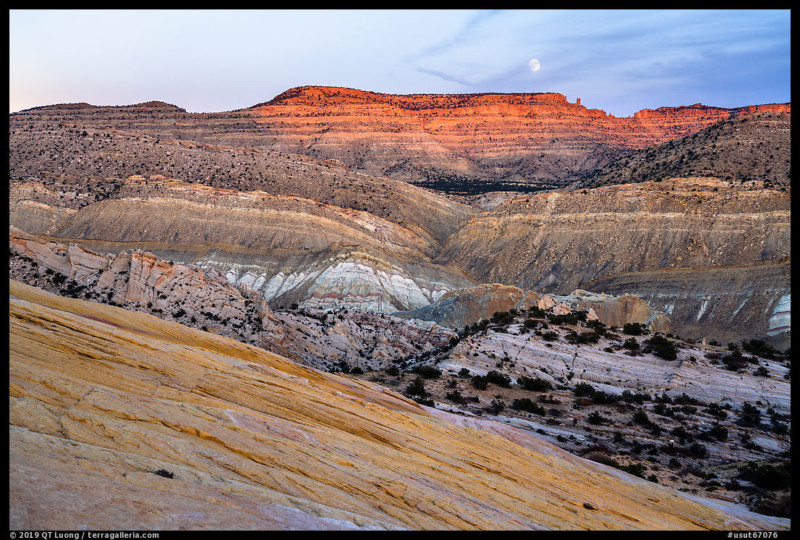
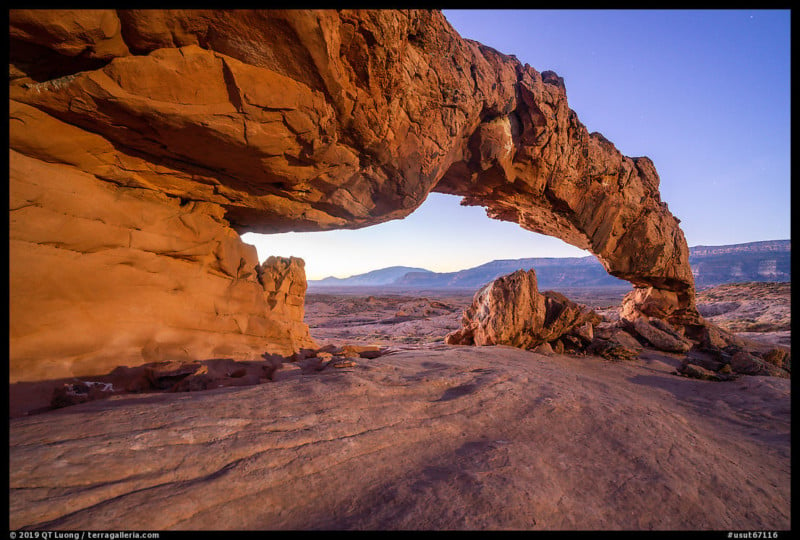
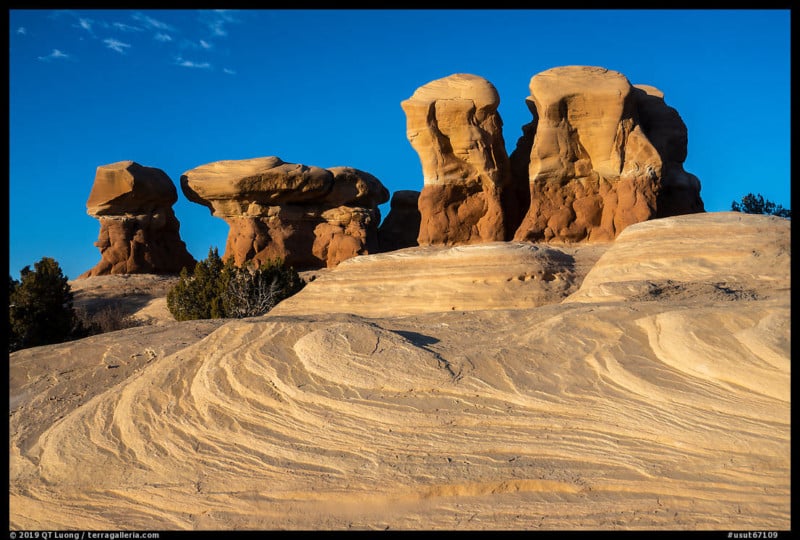
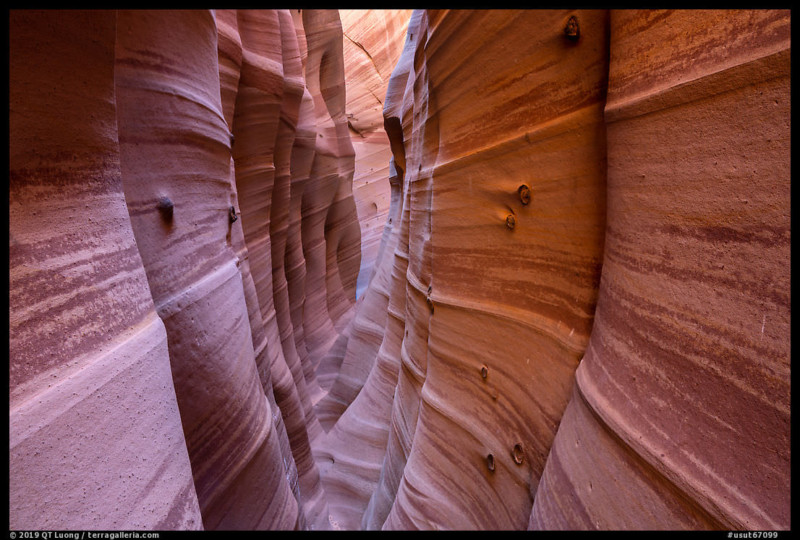
A moonrise over a landscapeMoonrise over Cockscomb from Yellow Rock. Grand Staircase Escalante National Monument, Utah, USA A photo of Sunset Arch at dawnSunset Arch, dawn. Grand Staircase Escalante National Monument, Utah, USA A landscape photo of Grand Staircase Escalante National MonumentSwirls and hoodoos, Devils Garden. Grand Staircase Escalante National Monument, Utah, USA A photo at Zebra Slot CanyonZebra Slot Canyon with sandstone striations and encrusted moqui marbles,. Grand Staircase Escalante National Monument, Utah, USA
Nearby Bears Ears National Monument shares many characteristics with Grand Staircase Escalante National Monument: its location in Southern Utah, its size (1,353,000 acres) larger than Grand Canyon National Park, and wondrous red rock country with even more immense vistas. However, it is primarily a cultural landscape. Hidden in its labyrinth of canyons and mesas are more cliff dwellings and tribal artifacts than any other area in the American West, including some of the most iconic ruins on the Colorado Plateau.

Both monuments marked milestones in conservation. Grand Staircase Escalante National Monument, proclaimed in 1996 by President Clinton, was the first national monument managed by the Bureau of Land Management (BLM), marking the evolution of the nation's largest land caretaker towards conservation. The Hopi, Navajo, Mountain Ute, Zuni, and Ute agreed to set generations-old differences apart to petition for the protection of their ancestral lands.

In response, in the waning days of his presidency, President Obama proclaimed Bear Ears National Monument in 1996, the first national monument initiated by native people and co-managed by them.
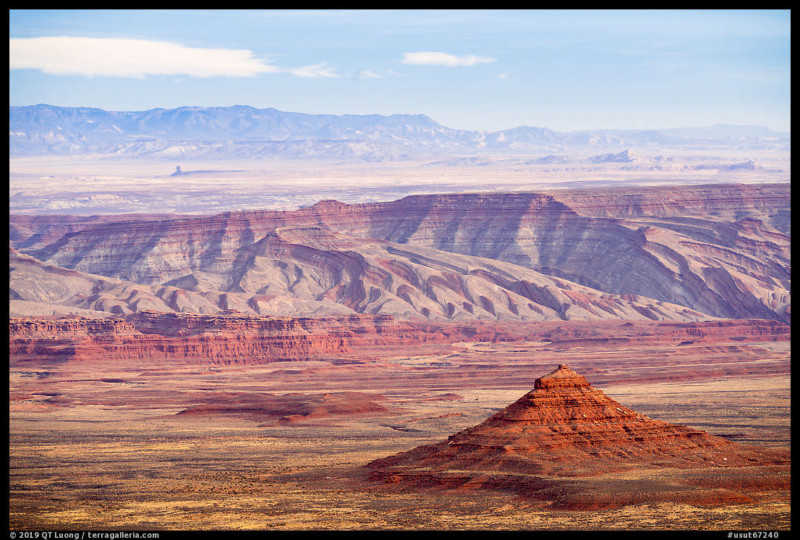
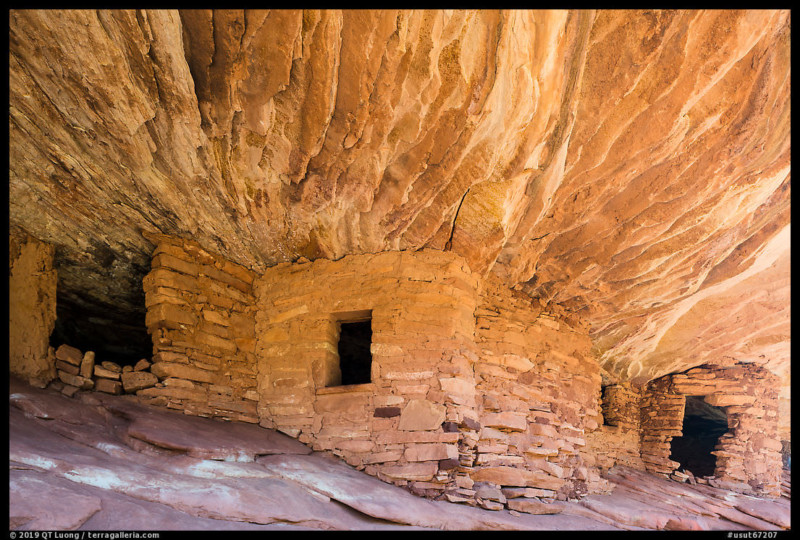
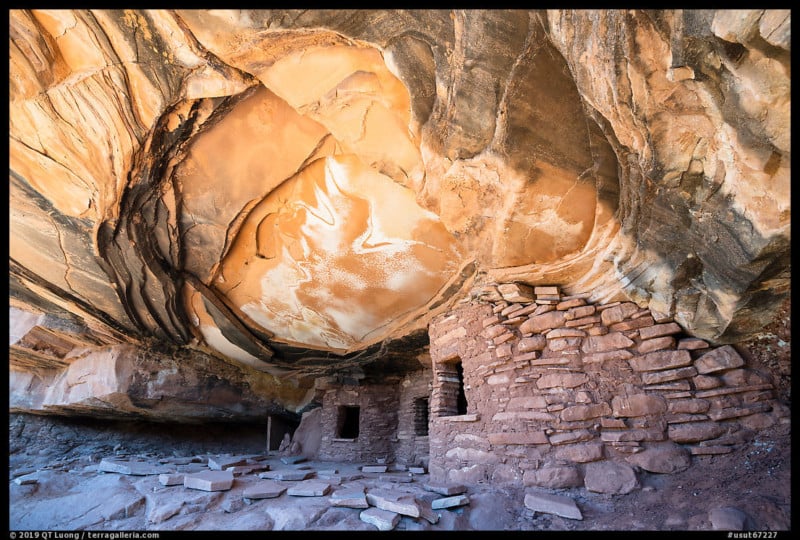
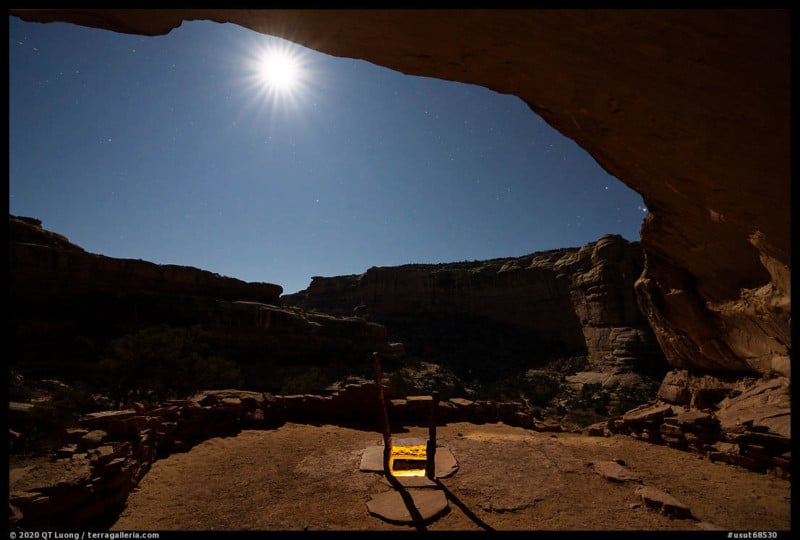
A photo of Valley of the Gods from aboveValley of the Gods from above. Bears Ears National Monument, Utah, USA Flame Ceiling Ruin in Mule CanyonFlame Ceiling Ruin, Mule Canyon. Bears Ears National Monument, Utah, USA Ruin in alcove with collapsed ceilingRuin in alcove with collapsed ceiling. Bears Ears National Monument, Utah, USA A nighttime photo under the moon at Bears Ears National MonumentLight from Perfect Kiva and moon. Bears Ears National Monument, Utah, USA
National monuments are much less known and visited than national parks, but those two just have been in the news since 2017. In the spring of that year, President Trump signed an unprecedented executive order to review all the national monuments created through the Antiquities Act since 1996 that were larger than 100,000 acres. The review's objective was to determine if former presidents had abused their power and if the protections curtailed economic growth.

It targeted a total of 27 out of the 35 larger national monuments, including 22 national monuments across 11 states, in addition to five even larger marine areas. The public comment period of the summer of 2017 generated 97% support for the national monuments under review. Yet, on December 4, 2017, the President ordered size reductions to the two national monuments located in Utah mentioned above.

In January 2018, I resolved to take action the only way I knew, by hiking and photographing the 22 land-based national monuments in the review. I found a broad cross-section of natural environments, covering a significant portion of the American landscape. Totaling about 11 million acres, they ranged from the north woods of Maine to the cactus-covered deserts of Arizona.

Besides their vastness and diversity, their natural features rivaled those in our beloved national parks. Vermilion Cliffs National Monument's Paria Canyon is more than twice as long and every bit as impressive as Zion National Park's Virgin River Narrows. The monument also houses unique world-renowned rock formations like The Wave and the White Pocket.

Giant Sequoia National Monument protects more sequoia groves than Sequoia and Kings National Parks. The Sonoran Desert portions included in Ironwood Forest National Monument and Sonoran Desert National Monument are as beautiful and representative as those in Saguaro National Park, if not more pristine.

I spent months in repeated visits, immersing myself in those sacred lands and discovering remnants of cultures imprinted on the ancient landscape. So many of those monuments were previously unknown to me. I reasoned that those areas were vulnerable because the general public did not know about them and thus was not moved to defend them. This inspired me to publish a book that could help conservation organizations raise awareness of those lands.

To amplify the call for conservation, I invited those who advocate for these national monuments to present their perspective. I am so grateful to 27 local citizen associations caring for those national treasures for contributing their voices, to former Secretary of the Interior Sally Jewell for her foreword, and to Ian Shive for his photographs and words that give readers a glimpse of the almost inaccessible marine national monuments in the Pacific.

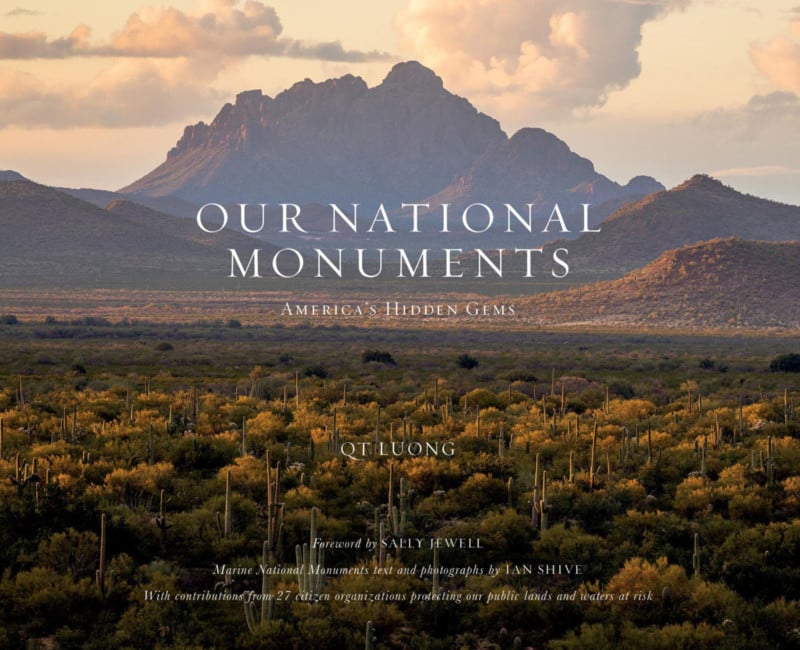
The result is the first photography book entirely dedicated to America's national monuments. While it includes only a subset of them (the 27 monuments at risk from the review), those comprise the vast majority of the large, park-like monuments. Our National Monuments: America 's Hidden Gems is the first in-depth portrayal of those parks less traveled.
After spending a big part of the previous quarter-century photographing the national parks, I was surprised by the freedom offered by the BLM and the U.S. Forest Service's (USFS) national monuments. Freedom from crowds, from rules, and expectations.

The national parks, set for "benefit and enjoyment of the people," are generally equipped with a convenient infrastructure of roads, visitor centers, lodges, campgrounds, and interpretive trails. Set up for mass tourism, they can bring in mass visitation. For example, this year Arches National Park was frequently full and closed to new entries by 9 am. People instead head to nearby Canyonlands National Park, but even there, securing a spot at sunrise for the iconic Mesa Arch requires arriving well in advance.

Next year, you will need a reservation to enter Arches National Park. By contrast, when I photographed three of the better-known natural arches in nearby Grand Staircase–Escalante National Monument, I had the entire place to myself. Despite a dozen visits to Death Valley National Park, I could never find the Mesquite Sand Dunes devoid of numerous footprints from other visitors. At Cadiz Dunes Wilderness in Mojave Trails, I saw many animal tracks but no human footprints, aside from my own.

During the worst days of the pandemic, national parks locked their gates. Embodying the principle that public lands are always open to the public, national monuments never closed, providing much solitude and solace. The heavy visitation of national parks made it necessary to enforce strict rules. You often have to "commute" a long distance to photography spots as no car camping is allowed outside developed campgrounds.

In many national monuments, you can camp almost everywhere you like. Unlike in Grand Canyon National Park, in adjacent Grand Canyon-Parashant National Monument, I could drive right to the edge of the chasm and pitch my tent a few yards away from where I made my sunset, night, and sunrise photographs. Drones are strictly prohibited in national parks, but they are allowed in the national monuments managed by the BLM and the USFS.

Many national parks places have become such over-photographed icons that finding a fresh composition has become as challenging as securing a spot. The national monuments offer new landscapes whose more subtle scenery invites exploration to get to know and love. The absence of postcard views and overwhelming features frees you of pre-conceptions that hinder personal discovery.
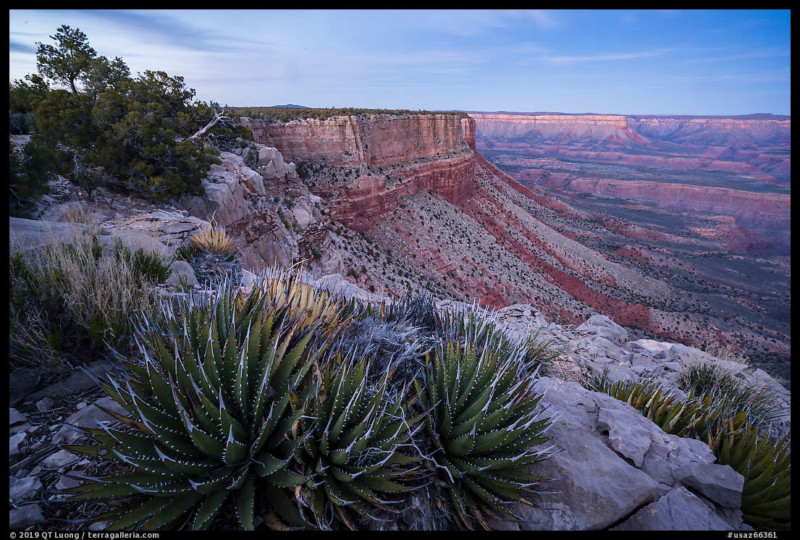
Succulents on Grand Canyon Rim at duskSucculents on Grand Canyon Rim at dusk. Parashant National Monument, Arizona, USA

As the national parks become ever more popular, the BLM and USFS national monuments' vast open spaces offer us places of solitude and inspiration. The rugged experience gives us a sense of the western frontier. With freedom comes the need for personal responsibility, independence, and self-reliance.

As their development is minimal, national monuments can test your preparation and self-sufficiency. Many do not have a single paved road. I needed to rent a 4WD vehicle several times to access some of them. Even then, I still ended up with five flat tires over three years, sometimes in incredibly remote areas. With no visitor centers nor rangers around, no brochures, nor guidebooks, the first obstacle in my explorations was to find information.

Our National Monuments: America 's Hidden Gems provides you with the starting point I wish I had for planning trips. Coffee-table books about places often left me frustrated about being in the dark about the locations depicted. With my previous book, Treasured Lands: A Photographic Odyssey Through America's National Parks, I had aimed to create a book that inspired and informed. Each photograph came with extended practical travel and photography notes, including facts on the parks' natural history or anecdotal observations about my experiences.

Although people in the publishing industry were skeptical that this combination of an artbook and guidebook would work, the book won twelve national and international awards and is also a best-seller in its sixth printing.

My new book, Our National Monuments , reprises this innovative format, depicting each national monument in depth through a selection of representative highlights with keyed maps and location information. Because those lands are not as popular as the national parks, I do not expect the new book to be as commercially successful. But, on the other hand, the general lack of awareness of those lands is also why I felt this book is needed, a sentiment echoed by the grassroots conservation organizations that care for those critical landscapes.

Our National Monuments is my gift to our public lands and those who care for them.

On October 8, 2021, President Biden finally restored the two national monuments in Utah – and one in the Atlantic Ocean. Was it all a bad dream? Republican politicians in Utah are gearing up for a lawsuit to challenge the restoration. The 2017 presidential attack on them reminded us of John Muir's appeal that "the battle for conservation will go on endlessly."

It reminded us that since 1906, America's boldest efforts in conservation have been through the proclamation of national monuments. It prompted me to set out to see for myself the magnificent landscapes of the parks less traveled. I hope it prompts you to learn about our public lands' hidden gems and embark on your own journey.


_Our National Monuments: America 's Hidden Gems by QT Luong features over 330 photographs of 27 national monuments by 36 contributors. The 10×12-inch 308-page hardcover photo book also contains 28 maps and over 70,000 words. It's available from Amazon and other retailers for $55._


About the author : QT Luong was the first to photograph all America's 62 National Parks -- in large format. The opinions expressed in this article are solely those of the author. Luong was featured in the film _The National Parks: Americaʼs Best Idea by Ken Burns and Dayton Duncan. His photographs are extensively published and have been the subject of large-format books including Treasured Lands (winner of 10 national and international book awards), many newspaper and magazine feature articles, solo gallery and museum exhibits across the U.S. and abroad. You can find more of his work on his website, Twitter, Instagram, and Facebook._

#educational #inspiration #spotlight #travel #america #landscape #landscapephotography #nationalmonuments #qtluong #unitedstatesofamerica
petapixel@xn--y9azesw6bu.xn--y9a3aq

The Winning Photos from the Hasselblad Masters 2021 Competition

image

Hasselblad has announced the winners of the 2021 Masters photography competition across 12 categories. The winning photographers gain the title of "Hasselblad Master" and receive a medium format mirrorless Hasselblad camera.

The Hasselblad Masters competition is regarded as one of the world's most prestigious professional photography competitions, and winners are selected through a combination of a public vote and a professional Hasselblad Masters Jury comprised of internationally renowned photographers and imaging experts. A full list of Jury members can be viewed on Hasselblad's website.

Hasselblad says that this year's competition was larger than previous years and expanded to 12 categories to include Heritage, which commemorated Hasselblad's 80-year anniversary. The 2021 competition received a record-breaking number of over 63,000 submitted images, double the amount of uploaded images compared to 2018. Entrants do not need to have taken the photos with a Hasselblad camera.

In addition to the title of Hasselblad Master and a new medium format camera, winners will shoot for a collaborative project that is then published on all Hasselblad channels and in a high-quality commemorative Hasselblad Masters book, which will also contain a special feature on each of the 12 winners along with a selection of their images.

“It was incredible to see the number of professional photographers, Hasselblad and non-Hasselblad users, that participated in the 2021 competition. Not only was this year’s competition extra special due to the celebration of our anniversary, there were more than 89,000 votes overall!” said Hans Cornet, Hasselblad Client Relationship Manager. “With the abundance of creative participants and unique submissions, this gave all the judges involved a difficult task in determining the Hasselblad Masters 2021 winners.”

Below are all the winning photos:

Aerial - Photo by Florian Ledoux Architecture - Photo by Albrecht Voss Art - Photo by Gavin Goodman Beauty Fashion - Photo by Ramon Vaquero Heritage - Photo by Marcus Bitsch Landscape/Nature - Photo by Honghua Shi Portrait - Photo by Marek Würfl Product - Photo by Paul Fuentes Project 21 - Photo by Yihao Wang Street Urban - Photo by Nikolay_Schegolev Wedding - Photo by Matthäus Machner Wildlife - Photo by Alice Zilberberg

The full gamut of 2021 finalists can be viewed on Hasselblad's website as well as all of the official rules and a full timeline of the competition from its acceptance of entrants through voting.


_Image credits: All photos individually credited and provided courtesy of Hasselblad Masters 2021. _

#news #spotlight #aerial #architecturephotography #competition #fineart #hasselblad #hasselbladmasters #hasselbladmasters2021 #landscape #landscapephotography #portraits #portraiture #product #wedding #weddingphotography #wildlife

petapixel@xn--y9azesw6bu.xn--y9a3aq

Landscape Photography in the Outer Hebrides of Scotland

image

Three landscape photos of Scotland

Torridon, Glencoe, and the Isle of Skye have drawn landscape photographers and artists over the centuries. The highlands of Scotland are extensive and uninterruptedly breathtaking – a Big Country indeed. This is the internationally perceived face of Scotland – a meticulously sculpted land of peaks, glens, lakes, and shorelines. And rain or mist to make or break the scene dependent on your disposition.

But distant from the western shore, an extensive string of pearls awaits the more intrepid traveler. The Outer Hebrides stretch for 140 miles – a sliver of land 40 miles away resting on the horizon. They are comprised of the joint isles of Harris and Lewis, North Uist, Benbecula, South Uist, and Barra.

Here is a different Scottish landscape. Pure and wild, beaches to melt a heart, rolling hills and lakes, abandoned homesteads left furnished some 70 years ago – a unique landscape tied to culture. Time slows down out here. The clock ticks to a different beat. There is a softness to the landscape that sways with this rhythm.

Tarbert is a port town, a docking place for the ferry from Skye but a taste of other times hangs in the air. Terraced cottages line the side of the hill. We rented a cottage for four nights and set off to dip our toes into the landscapes of Harris and Lewis. Not an hour and a half after stepping off the ferry we walked the length of Seilebost beach.

A little travel weary – but the landscape just soaked us up and soothed us in. I took some initial photographs on the beach into blue hour – just to let the camera out of the bag as the light was dull and dimming. We drove back to Tarbert in the dark. We had indeed arrived.

At dawn the following morning we sat in the sandy car park at Rosamol as the skies provided a free car wash. There were two other cars and a camper van – each seemingly daring the other to take to the beach first. The rain eased and we walked the wet sandy track to the wide beach. The hills of Harris dipped in and out of clouds. The light was a dirty grey and the photographs taken that morning were a reflection of the weather. But the hills and islands encroaching the beach were akin to an amphitheater and made an instant impression that would draw us back to this beach.

The eastern shore of Harris is pockmarked with tiny lochs that meet the sound of the Minch, the strait that divides the isles from the highlands. The western shore could not be more different – the lauded beaches that deservedly act as a magnet for landscape photographers and artists. The beaches lend themselves to the creation of dreamlike impressions that longer exposures serve best. I fully expected my wide-angled lens would live on my camera body for the trip but found that longer focal lengths better served my purposes.

All of the beaches along the western shore deserve a dedicated visit. Horgabost beach is compact and suffers from occasional drifts of dead seaweed as was the case when an unexpected burst of evening light necessitated an impromptu visit. The beach was not an option so I hurriedly ran atop the dunes and shot to exclude it – a 6-second exposure to soften the marram grass as it merged with the Atlantic.

Horgabost beach in ScotlandHorgabost beach

The following day we took the spectacular single-track road to Huisinis beach and witnessed golden eagles and a large migration of redwings on the route.

Huisinis beach in ScotlandHuisinis beach

This is another compact beach good enough to shoot independently but the jewel of the area is Tragh Mheallan. The beach requires a good 45-minute walk with an incline along a well-marked cliff path.

An otter greeted me along the cliff walk. A white-tailed eagle flew overhead. The beach was enormous and empty. The marram grass held no human footprint but was indented by the tracks of deer. My composition was rushed as the light faded on an overcast afternoon. An enthralling location.

Luskentyre is the most popular beach in Harris – it is effectively a bay – Rosamol and Seilebost beaches at either side. I visited for two sunrises during our stay once on each side.

Luskentyre beach in ScotlandLuskentyre beach

Rosamol should be your first choice as it was mine. The light on my dawn visit was dull. The dunes and distant mountains though impressive deserved better light. A beach tends to fare better in duller light and so my preferred images were abstract in nature and the compositions drew substantially on the sands. At Seilebost, the light was a slight improvement and I played with a layered composition of rocks, sea, sand, mountains, and sky.

And so we had spent 3 days exploring parts of Harris and had not yet ventured into Lewis – the largest part of the island. A trip to this island would not be complete without a visit to Callanais Standing Stones and that is where our final day took us. Out of the bag came the infrared camera for a noon shot of this archaeological wonder.

The Callanais Standing Stones in ScotlandCallanais Standing Stones

The afternoon was drawing in but we pressed on further from home to the Mangarsta Sea Stacks.

The Mangarsta Sea Stacks in ScotlandThe Mangarsta Sea Stacks

The light was never going to be interesting but to view the scene and take an image for the sake of it was worth the effort. And so our short sojourn to the Outer Hebrides ended.

Here are two videos of my 2021 trip to Scotland showing my landscape photography outings in a vlog style:


About the author : Jimmy Mc Donnell is a landscape and wildlife photographer from Co Wicklow, Ireland with an enduring passion for capturing images that reflect the beauty of the natural world. The opinions expressed in this article are solely those of the author. You can find more of Mc Donnell's work on his website and YouTube. This article was also published here.

#inspiration #spotlight #travel #walkthroughs #jimmymcdonnell #landscape #landscapephotography #outerhebrides #scotland #travelphotography

petapixel@xn--y9azesw6bu.xn--y9a3aq

Photographing ‘The Gap’ in Torndirrup National Park

image

The year was 2014. I was seven years younger and because of that, it was a very good year. Do you remember the time when it didn’t hurt to get out of bed? When camera bags didn’t feel like bags of wet cement, and when your eyesight was so good you could spot a discounted Cabernet Sauvignon from one hundred paces? Ah those were the days. I shall remember them fondly.

So how did I get this shot? I am glad you asked. It wasn’t without some serious risk-taking on my part. As you may know from previous lies, I mean stories, I take landscape photography very seriously – so much so my wife has recently purchased Frankincense and Rosehip oil to help straighten out my frown lines. Remember when you didn’t have frown lines?

So really, how was this photograph taken?

First, let me set the scene. It was in Torndirrup National Park at a spot called the Gap not far from the southern town of Albany in Western Australia. The coastline here is battered relentlessly by the Southern Ocean. If you go south from this spot the next landmass you hit is Antarctica. When the swell arrives, it is huge and angry. To say death is a likely outcome when photographing here might be an exaggeration, but it does help set the mood and make things rather more dramatic. What you don’t see behind the camera is the sheer drop into the cold dark water. If you take that drop, you won’t be developing the negs, if you know what I mean!

Rocks, sand, and the seashore against a bright red sunrise

The coastline, because of all this extreme weather, is rugged and photogenic. This group of rocks are larger than they look. In fact, if you fell off these you would probably die horribly. Luckily, I was born with common sense, or is it just common? Anyway, I didn’t think the view from the top was as nice as the view from the bottom. I was then interested in trying to balance the composition and offer interest in the foreground that would lead your eye to the rocks behind. I used a vertical crop to allow more of the foreground to tell the story. This also allowed me to balance the three rocks with the central one as the main point of interest.

The image was shot on my Phase One IQ280 with the 28mm Phase One lens. The shutter was 2.5 seconds with an aperture of f/12 and ISO 35. The camera was secured to a tripod as the light was low; it was before sunrise. Now you say, “Those clouds look to be moving way more than the 2.5-second exposure would imply.” You would be right in that and please let me offer up a defense.

The clouds weren’t moving fast enough and as a result, the sky looked a little, as an Aussie would say, “poxie.” Roughly translated it means pretty average! So being the purist I am and by asking the viewers to “look away, nothing to see here,” I possibly, maybe, definitely added a bit of motion blur to the sky in Photoshop. I know, I know, I can see you now shaking your fists at the screen screaming, “WHY, WHY?” I guess I just got lazy and must have left the ND filter back in the Lamborghini. Still, it is only a little thing, and the real heroes are the rocks. I have also focus-stacked this image from five individual frames, all focused on different points and combined using PT GUI.

In Capture One I messed around (i.e., carefully selected) the white balance to set the color I wanted. I also wanted to lighten and bring out the detail in the rock. By having blues and oranges, two complementary colors, it added to the visual harmony and overall pleasing aesthetic. Photoshop was used to continue to refine the image and I used simple dodging and burning techniques to lighten the light areas and darken the shadows. This allowed me to make the rocks look more dimensional and increase depth and three-dimensionality.

A brightly colored rock surrounded by a flock of birds against a stormy sky

I hope you have enjoyed my completely honest and unbiased technical report on how this image came together. What I haven’t mentioned was how I love what I do and how much fun I have doing it. Life is too short, so get out and enjoy the pure pleasure of making photographs. There are no rules, just pixels -- do with them what you want!


The article is courtesy ofELEMENTS Magazine. ELEMENTS is the monthly magazine dedicated to the finest landscape photography, insightful editorials and fluid, clean design. Inside you will find exclusive and in-depth articles and imagery by the best landscape photographers in the world such as Bruce Barnbaum, Edward Burtynsky, Michael Kenna, Erin Babnik, Chuck Kimmerle, Rachael Talibart, Charles Cramer, Hans Strand and Lynn Radeka, to name a few. Use the PETAPIXEL10 code for a 10% discount off the annual subscription.


About the author: Christian Fletcher has been a professional photographer for over 27 years, and remains dedicated to using photography as a way to reinforce our connection to our natural environment. Christian runs an award-winning gallery in Dunsborough, Western Australia, and teaches workshops both at home in Australia and internationally.

#spotlight #abstractlandscapephotography #elementsmagazine #fineart #fineartlandscapephotography #howitwasshot #landscapephotography #photographytechnique #technique

petapixel@xn--y9azesw6bu.xn--y9a3aq

The Story Behind Los Angeles’s Rare Lightning Storm Photos

image

My name is Emeric Le Bars and this is the story of how I captured some insane, extremely rare photos of a lightning storm in Los Angeles, without really planning anything.

You don’t need to be familiar with Los Angeles to know that the city has an average of 300 sunny days every single year, which makes it one of the sunniest locations in the country and eventually the world. Even though the city usually gets very dry summers, rainy days do happen between the months of December and March. Additionally, lightning storms are historically quite rare in the region. But this year, it was different…

On October 4, 2021, Los Angeles experienced an insane thunderstorm that even a 50-year-old inhabitant born and raised in the area told me had never seen before. Southern California, including Los Angeles, was hit by over 4,000 lightning strikes in a 24-hour time frame. Even if this happened in Florida, a state that experiences year-long thunderstorms, that’s a lot of lightning in such a short period of time.

It was probably not the safest time to go out and shoot, I should tell you. But what’s crazy about my story is that nothing was really planned. I was light-years away from thinking that a storm like this could happen in early October in Los Angeles. Two days prior, it was still 90-degrees out!

I went out shooting only because one of my friends, Craig who was visiting from Chicago, had a few hours to spare before his flight back. Since he was staying in Los Feliz, I suggested we go to Griffith Park nearby because it offers amazing high vantage points of the downtown Los Angeles skyline, Hollywood, the Griffith Observatory, and many other iconic locations when the weather is clear.

This also happened to be the day Facebook and Instagram were down for several hours and the only way to get in touch with him was through Instagram messages; I did not have his number saved in my phone. Around 3 PM, when the app slowly started to work again, I received his message saying he was ready to go at any time. Sunset was only three hours from then, so we had no time to waste.

As I was driving from my apartment to Los Feliz to pick him up, I started seeing some very scary-looking dark clouds approaching from the south. Once I reached his location, I decided to check the radar and noticed that some heavy rain and lightning was coming towards us. Going to Griffith Park, which is mostly hills and required hiking suddenly became a bad idea. So, we decided to go grab a beer in a local bar while we waited for the storm to pass.

Between Instagram being down and the storm approaching, it felt as though everything was against us that day.

After 30 minutes of enjoying a cold one and catching up, the rain calmed down a bit and we decided to drive to the entrance of the park. That said, it was still raining a lot and the constant lightning definitely did not make us want to go hiking and so we decided to wait another 20 minutes in the car. We didn’t want to give up as we could clearly see that the storm would pass fairly quickly; looking South, the sky was mostly blue. At that time, it was only half an hour before sunset and I did not want to miss the good colors if there were any. Speaking from my experience from the last nine years shooting timelapses, after-storm sunsets can be very, very colorful. I did not want to miss it!

And I am glad we didn’t give up.

Even though we didn’t get a colorful sunset, I came back with some of my favorite photos I have ever captured.

We started hiking to our spot in Griffith Park when the rain stopped. Our goal was to capture the downtown Los Angeles skyline at sunset, but once we reached our spot, we noticed some crazy huge lightning strikes to the West, right above the ocean. We could clearly see the Century City skyline and the Griffith Observatory. The visibility was really clear with all the rain and wind from the past couple of hours, so we decided to change our plans and capture this view instead of Downtown Los Angeles, where nothing was really happening.

I want to explain that I know nothing about capturing thunderstorms and lightning. I specialize in timelapse photography, mostly city skylines and other cityscape subjects, and have only shot one or two storms like this in the past.

The only detail I was aware of to capture a great timelapse of a thunderstorm is to reduce the amount of time between each photo as much as possible. This technique will raise the chances of capturing a lightning bolt since the “dark time” is reduced to the minimum.

After setting up my camera, composition, and settings, I decided to shoot a first timelapse with a 2.5-second shutter speed and three-second interval. This will give me only half a second of delay between each photo. Luckily for me, I did not miss a single lightning strike during the 15-minute timelapse.

The park was mostly empty because of the weather, and we were the only two around aside from a few hikers we saw in the two hours we were shooting up there.

As time passed, the storm started to get even bigger. I changed location, only 100 feet away, and tried timelapsing the downtown LA skyline, but wasn't happy with that since nothing was happening in that direction. We had to leave soon as my friend Craig had a flight to catch in a few hours, but agreed to try one more timelapse.

“Once last one,” we said.

And I am glad we did.

The storm had moved just behind the Griffith Observatory. It seemed closer and bigger than when we started, yet it was super clear right above us.

I started shooting a last timelapse aimed at the Observatory when we witnessed the biggest lightning strikes of our entire lives -- I am not exaggerating. The fact that this was happening right there, right then in a city known for its dry and hot weather all year long, was just out of this world.

Since we were over an hour after the sunset, it was really dark around us and I had to use different settings. I went with a five-second shutter speed and a six-second interval. One second between each shot is not much, and even then I did miss a few strikes. Eventually, I did capture a few that turned out to be some amazing photos of the Observatory.

Since I was shooting a timelapse, I could not look at the photos directly, but I knew I captured some unique shots. We were both super excited and could not believe it!

The timelapses in video form are actually not that exciting since the lightning bolts happen on one single frame -- It’s just too fast! But I am okay with this and am just really happy about the stills I got.

What was supposed to be a fun timelapse session with a friend turned out to be the most exciting shoots of the last 10 years. Besides the location, nothing was planned at all and we even had to change our plan a few times. Even at 3 PM, I didn’t even know if we were still going out or not since I couldn't communicate with my friend Craig.

This story was a way to remind you that sometimes, just going out at the last minute can turn out to be the best session of your life! I tend to overthink everything before going out shooting: Are the clouds moving in the right direction? Are those low, medium, or high clouds? Should I go to this spot or to that one? Where do I park? It’s always impossible to fully predict the outcome and sometimes what you expect never happens, but something better might take its place.

Of course, planning is always good and often safer, but some of my favorite timelapse videos and photos ever captured were actually not really planned. This was the case for my SpaceX Falcon 9 timelapse from October 2018, or La Tuna fire in September 2017 (and countless amazing sunsets).

What a crazy session I will not forget anytime soon!


About the author: Emeric Le Bars is a French timelapse photographer who has been based in Los Angeles for the past nine years. He has created over 700 clips of the City of Angels and more than 500 of Atlanta, San Francisco, New York City, Las Vegas, Chicago, Paris, San Diego, Salt Lake City, Denver, Miami, Dallas, Philadelphia, and Montreal, Quebec. His work has been used by multiple companies including Adobe, Facebook, OPPO, Google, Netflix, LG, STARZ, Microsoft, Mastercard, Red Bull, and Nike. Today, he teaches timelapse photography through online classes in both English and French on his website.

#spotlight #travel #emericlebars #historic #landscapephotography #landscapes #lightning #lightningstorm #losangeles #nature #rare #stormphotography #storms #thunderstorm #timelapse #weatherphotography

petapixel@xn--y9azesw6bu.xn--y9a3aq

Dunes and Clouds: Photographing Symmetry in the Desert

image

In 1991, near the end of some book projects that took me on some lengthy photographic journeys through the American West by car for two years, I came up with the idea of creating posters of some of my black and white images for a few of our western National Parks.

My idea was to provide park visitors with a choice instead of the commonplace color posters. Some of those color posters were excellent but I felt there was a large audience who appreciate black and white. My idea, which I pitched to some of my favorite parks, was to provide the visitors with a "fine art" visual interpretation in black and white.

My original attempts were met with great interest by the various Natural History Associations. Most were already familiar with my photography because of various photographic projects such as magazine articles, gallery/museum shows, or word-of-mouth. I had completed a color slide show for Capitol Reef National Park a few years before, and my black and white work was already known by some Natural History executives of Canyonlands and Death Valley National Parks.

In this four-part series written for the ELEMENTS Magazine , I am discussing most of these posters (Read parts one and two). I'll give technical information where my memory serves me correctly, aesthetic considerations and some highlights of making the photographs on the scene. Please join me on this journey through the past!


Dunes and Clouds

The third poster I made for Death Valley is Dunes and Clouds. This was the second dunes image that was made into a poster. The Park thought my first image did not show the expansive range of the dune environment, so I proposed making a new image. I got up before sunrise at the Stovepipe Wells campground, drove a short distance, packed up my 4×5 camera which I routinely fit into my backpack for short to medium distance hikes (with the front and rear stages disconnected to fit), set my heavy Bogen tripod across the top, hung my trusty viewing cut-out card from the tripod head, and trekked into the dunes.

Shortly after sunrise I found this interesting symmetrical composition. The dunes were not sufficient to make this an expressive image but the clouds, filling the sky with patterns contrary to the foreground sand ripples, and even some clouds echoing the sand ripples, immediately made this the image I had to make. My records indicate I used a graduated ND filter in the lens shade hoping to reduce the brightness of the sky and clouds, bringing them under control in the negative. I made the exposure on TMax 100 film just as a slight breeze got up. I decided to expose a sheet of Ektachrome 4×5 color transparency film. Just as I finished the color exposure, the wind became fierce, whipping sand into my face and onto the camera. I hastily put the camera into my backpack, which was no easy task in the now raging sandstorm! I could barely see, squinting to prevent the sand particles from getting in my eyes. On the way back to the car I had to lean against the blowing wind and sand to maintain my balance.

I developed the negative N+1 (over-develop) to increase contrast, knowing that the graduated neutral density filter would prevent the clouds from blowing out and losing detail. I was surprised to see minimal dust spots on the film, and the exposure was excellent! All the desired image values were recorded well on the film. Even so, this was a difficult print to make. The values were uneven, so substantial burning and dodging had to be done to achieve a well-balanced clean image (something I feel is necessary for a symmetrical composition like this).

I showed a mock-up to the Park personnel and was given the "thumbs up" for a sand dunes poster. Fortunately, the poster was relatively easy to print. Using a high-density black ink and pms409 grey ink (which the printers nicknamed "Radeka Grey"), on glossy paper, it was mainly a matter of printing with enough black density to yield a visually satisfying image. My trilogy of posters for Death Valley was complete!


The article is courtesy ofELEMENTS Magazine. ELEMENTS is a monthly magazine dedicated to elegant landscape photography, insightful editorials and fluid, clean design. Inside you will find an exclusive and in-depth articles and imagery by the best landscape photographers in the world such as Bruce Barnbaum, Christopher Burkett, Chuck Kimmerle, Christian Fletcher, Charlie Waite, Rachael Talibart, Erin Babnik and Freeman Patterson, to name a few. Use the PETAPIXEL10 code for a 10% discount off the annual subscription.


_About the author: Lynn Radeka’s professional photography career spans more than 50 years. Influenced in his early work by Ansel Adams and Wynn Bullock, both of whom critiqued his prints, he continues to pursue a technical and aesthetic mastery of the medium of photography. His love of the grand landscapes and intimate details of the American West was born on his first trip to Death Valley in 1966.

Lynn Radeka’s Black and White photography has been featured in eight National Park posters and is represented by several galleries throughout the United States and Europe. He also has the honor of being a featured photographer in the recent book publication "World's Top Photographers: Landscape." Lynn Radeka currently leads photography workshops in Death Valley, Utah and New Mexico with many more locations planned for the near future._

#inspiration #analog #deathvalley #desert #elements #elementsmagazine #film #filmphotography #fineartlandscapephotography #landscape #landscapephotographer #landscapephotography #lynnradeka #storybehindthephoto #storybehindtheshot #travel

petapixel@xn--y9azesw6bu.xn--y9a3aq

Nexus Panoramas: Two Landscapes Linked Together with the Milky Way

image

Photographer Geoff Decker has spent the last two years creating what he calls Nexus Panoramas: vertical photos that use the Milky Way to link two landscape foregrounds in a single image.

All images below can be clicked and viewed in higher resolution.

Decker calls the images Nexus Panoramas for two reasons. One, the term nexus is defined as "a connection or series of connections linking two or more things." He says he wanted to clearly define this type of images as a panorama where the Milky Way is used to link two lanscape forgrounds using a single series of images.

The second reason?

"Nexus honestly just sounds spacey," he tells PetaPixel. "It's used by a various number of space organizations and Sci-Fi material so it just fit the definition."

Decker says that he got the idea for these images in August of 2019 while going through old equipment. He came across an old Nodal Ninja, which is a spherical panorama head that was used to create "tiny planet" photos and virtual walkthroughs for realty companies before the modern methods used today became available. On that note, Decker says that about a month after he rediscovered his Nodal Ninja, the company announced it was closing its United States offices.

"At the time I was also practicing astrophotography, learning how to stack images to clean up noise and such. When I found it, a bit of inspiration just kind of hit that, in theory, I should be able to use this type of head to achieve a perfect vertical shot of the Milky Way," he says.

The idea made sense, but creating finished images was more of a challenge and revolved around his tripod setup and software issues.

"At the time, I was using an older steel Manfrotto tripod I had lying around. As I came to learn, the tripod was going to be pivotal to getting the image quickly and easily and this was not it. The thing, while sturdy, was impossible to level, and with these panoramas, you only have so long before the Milky Way is out of ideal alignment. I was still able to get my first Nexus Panorama the first go-around but it took a bit longer than what was ideal," Decker says.

"I went through a couple of test setups before I found the ideal one. I use a 3 Legged Thing Punks Brian as it's quite lightweight and fairly stable at its tallest setting (which comes in useful). I still use my Nodal Ninja, and between the Nodal Ninja and the tripod, I have a leveling base to expedite leveling the entire setup," he explains.

Decker says that on the software side, anyone who tries to stitch photos together for panoramas understands that it can be a pain. He explains that with this particular panoramic image, it is very easy for some of the automated options to get "lost" in the stitching process and as a result, fail. He says he took a lot of time finding the right software that wouldn't be terribly time-consuming but would also retain high image quality with minimum compression.

"At the time, Photoshop had a difficult time (and still does). Surprisingly, I found Lightroom’s Panorama function could resolve it most of the time. And any time I have a difficult one, such as the Tombstone panorama, I use Affinity with no issues," he says.

The time for an edit can take a while, and Decker says he's edited one in as little as a few hours while others can take a week or more to get right -- editing on and off during that span, of course.

Decker explains that the process for creating these images breaks down into eleven steps.

The process starts just as most typical astrophotography expeditions do:

  1. Find a location
  2. Check weather and cloud coverage
  3. Locate the milky way and locate an area with some nice foreground.

"With locations, it's hard to be picky because you have to be facing a very specific direction," he explains. "And honestly, I take a bit of a nomadic approach to astrophotography in general, where I find an area with a dark spot, travel there, and see what happens."

A good location for these photos means clear skies and low light pollution, which he says has been hard this past year in Colorado where he lives because of the smoke from forest fires.

"Next year, I do plan to experiment a bit more. Despite taken during a close to full moon, I do like the Tombstone panorama and plan on hitting up a few ghost towns to get some more interesting foregrounds."

After he has picked a location, next comes field planning:

  1. Figure out when the Milky Way will be directly overhead and verify you are in a location that shows it off well. You can use apps like Photopills to get an estimate, but its pretty easy to just observe the movement with either your eyes or your camera.
  2. Extend the tripod and level out the head.
  3. Attach the camera. Re-level the head.
  4. Move the nodal ninja with camera attached fully around. Make sure nothing shifts, make sure the lens does not hit the tripod. Knobs and platforms shift so it might be loose, it might not be set the same exact way you had it (or you put the camera on in the wrong position, ask me how I know).
  5. Set the camera up pointing to the core of the Milky Way. Test your astro exposure, focus, and foreground exposure. Adjust as needed.
  6. Once ready, point the camera at about 15 – 30 degrees down. Take one picture every 15 degrees (works the best for stitching), remembering to take two photos for the foreground photos (one at the astro ISO, one at a higher ISO to see the foreground). Step and repeat until you get all the way to the other side of the tripod.
  7. Review images.
  8. Import and edit.

Decker says that the number of photos he uses for his Nexus Panoramas varies depending on if he sets the camera in a landscape or portrait orientation. He says the landscape setup requires more images as it is a shorter image, but usually resolves better.

"At the Grand Tetons, I used 32 images in the session," he says. "Duplicates of the foreground were taken, one at the ISO used for the sky (1250) and one for a brighter foreground (4000)."

Decker says that ideally, the best medium to enjoy his photos is in print.

"I had one printed on metal this year for the annual Louisville Art Association National Photography show (won people’s choice award) and what's cool about these photos is that there is no right or wrong way to hang them. You can literally hang them on any side and each orientation makes it a different photo," he says. "You lose that in digital. Plus, they look really cool printed on metal.

"That being said, I bet they look great on ultra-wide monitors."

More of Decker's Nexus Panoramas and his full portfolio of photography can be seen on his website.

#features #inspiration #astronomy #astrophotography #fineart #fineartlandscapephotography #landscapephotography #milkyway #milkywaygalaxy #nodalninja #prints #space #ultrawide #vertical

petapixel@xn--y9azesw6bu.xn--y9a3aq

‘Living in Long Shadows’ is a New SmugMug Film Featuring Andy Best

image

SmugMug has debuted its latest film that features photographer and filmmaker Andy Best. Called "Living in Long Shadows," the film follows the Best family as they trek across the American Southwest.

Andy Best is likely most accurately described as an adventurer and explorer as much as he is a photographer. He often lives in a camper as he road trips across the country with his family -- he has a wife and two kids. Best, who is also one of Sony's founding Alpha Imaging Collective members, has photographed countless outdoor adventures thanks to the nomadic lifestyle he chooses to live.

He has partnered with National Geographic Adventure, ROAM, and other well-known adventure media outlets, all while maintaining a family and living a life without a firmly planted "home base," a type of lifestyle few can say they successfully keep. Not many would say they even would want to, but for Best, it is the only way.

“I've always been into photography,” Best says in an interview with Alpha Universe in 2019, “But I never really wanted it to be part of my daily job because it was such a passion. I was afraid if it became work, it wouldn’t be as meaningful and I wouldn’t find as much joy in it.”

Best says that he has studied art his entire life, starting with pastels, sketching, and oil painting dating back to his time in his grandmother's studio. He attended film school in Portland, Oregon before working as an independent commercial filmmaker. Eventually, he transitioned to photography as well.

Today, Best says that his location-independent living is key to his success. He tells SmugMug that he is able to take work wherever it presents itself and focus on his mission of capturing photos and videos that highlight the beauty of the Earth along the way.

Best has spent the better part of a decade on the road and says he continually seeks inspiration in our wild places and the different people he meets along the way.

"Creating experiences for my children, while having the unique opportunity to work from the road, allows me to be more present in my family's lives and produce the best work possible,” he says. “This is a chapter we'll never forget! I hope you enjoy our story."


_Image credits: Behind the scenes images courtesy of SmugMug. All other photos by Andy Best. All images used with permission. _

#inspiration #adventure #adventurephotographer #americansouthwest #andybest #landscapephotographer #landscapephotography #nomadic #outdoorphotographer #smugmug #smugmugfilms