#automation

danie10@squeet.me

Android Tasker routine to warn if home WiFi is not functioning correctly
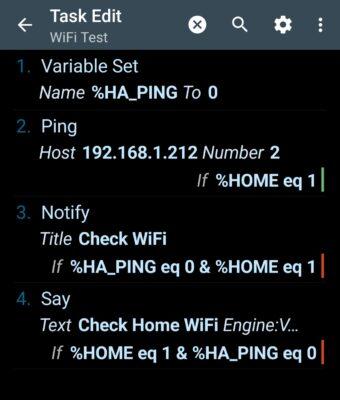
Tasker app screen showing Task Edit at top with name WiFi Test. Below that are 4 numbered actions starting at 1 with an action called Variable Set with the variable name %HA_PING to 0. Then action 2 is called Ping and says Host 192.168.1.212 number 2 (for run two ping tests) and further says If %HOME equals 1. Action 3 is called Notify with a title Check WiFi if %HA_PING equals 0 and %HOME equals 1. Action 4 is called Say and has the text "Check Home WiFi" and only if the condition %HOME equals 1 and %HA_PING equals 0.
Been experiencing a bit of an issue the last month with everything seemingly on and connected, but my Chromecast device would not connect across Wi-Fi today, and sometimes my wife says her phone is not connecting, and I’d have to reboot the home router. So, I decided to write a small routine using the Tasker app to check every 10 mins whether my phone can ping the Home Assistant server over the home LAN. If so, all good, but if not pop up an alert. It only runs this while I’m actually home. If I happen to be at home, but using mobile data, then it will still give an error as the mobile data won’t reach the internal IP address.

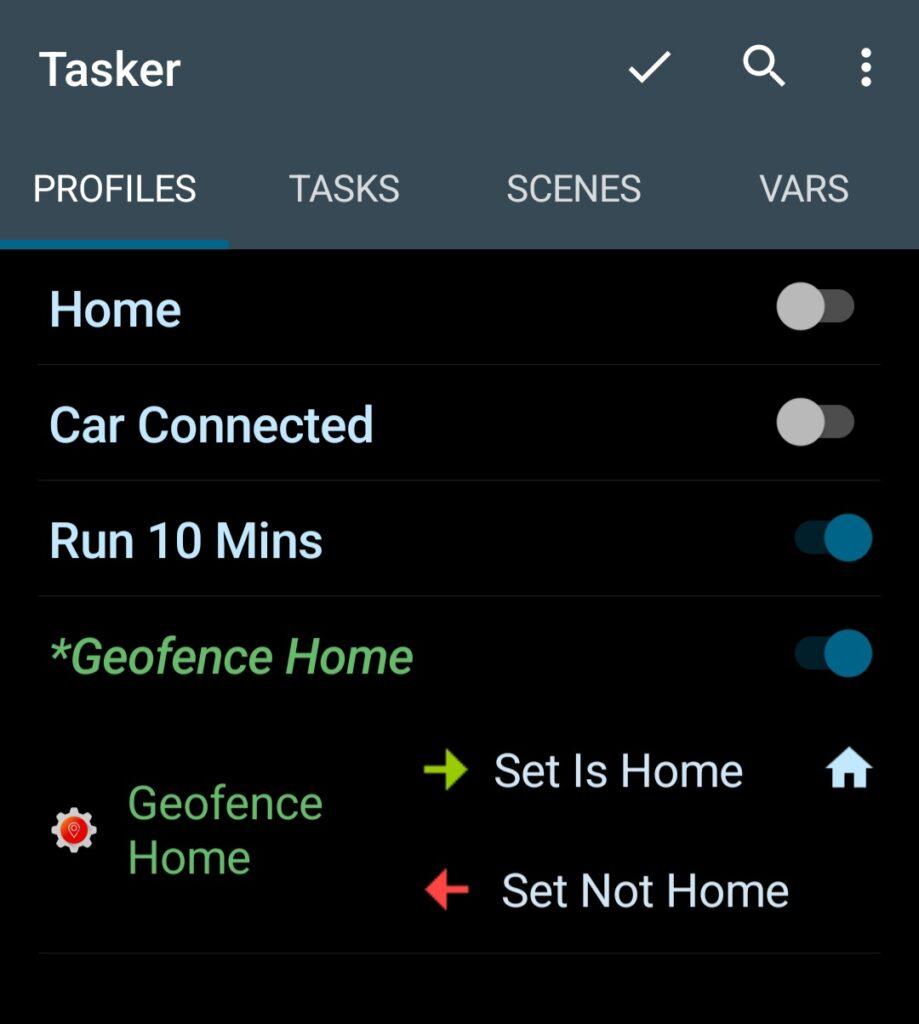
I’m using the Auto Location 3rd party app for Tasker, which provides more reliable geofencing status, but one could also use the standard Tasker location Profile. Basically, either of these will set a variable called %HOME to 1 if I’m at home, or to 0 if I’m away from home. Below is the Profile that triggers this: If at home it runs task Set Is Home, and if not at home (Exit action) it will run Set Not Home.
Screenshot 20240427 161417 Tasker

The actions are just simple ones that set a variable called %HOME and set it to 1 or 0.
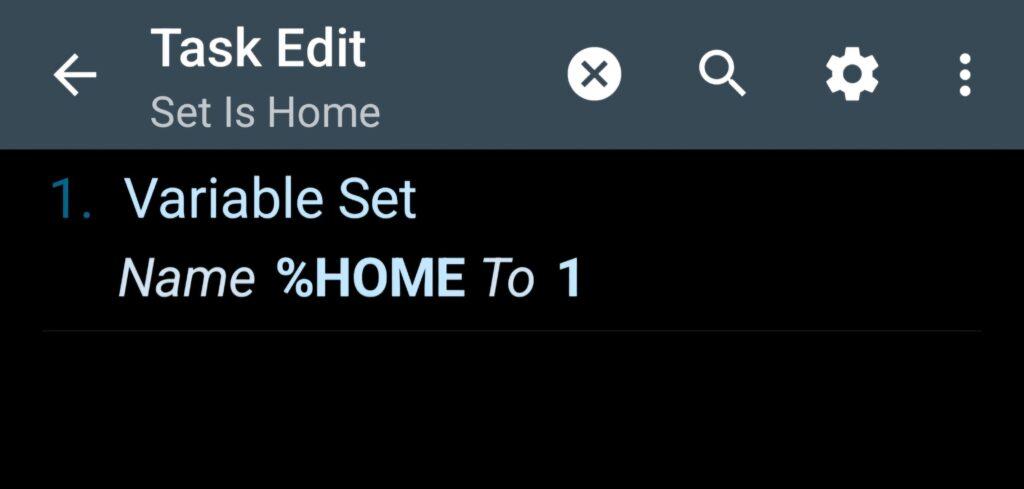
Screenshot 20240427 161511 TaskerThis action sets a variable called %HOME = 1
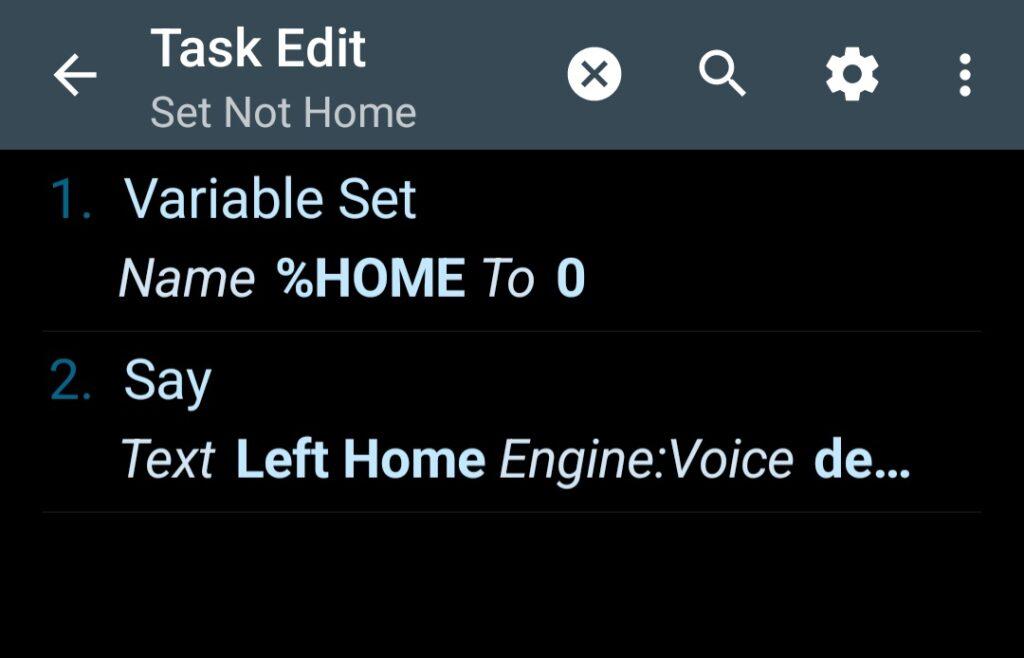
Screenshot 20240427 161544 TaskerThis action sets a variable %HOME = 0 and also just says audibly I have left home.

The other rigger under Profiles is a time one which just runs the WiFi Test task every 10 minutes.
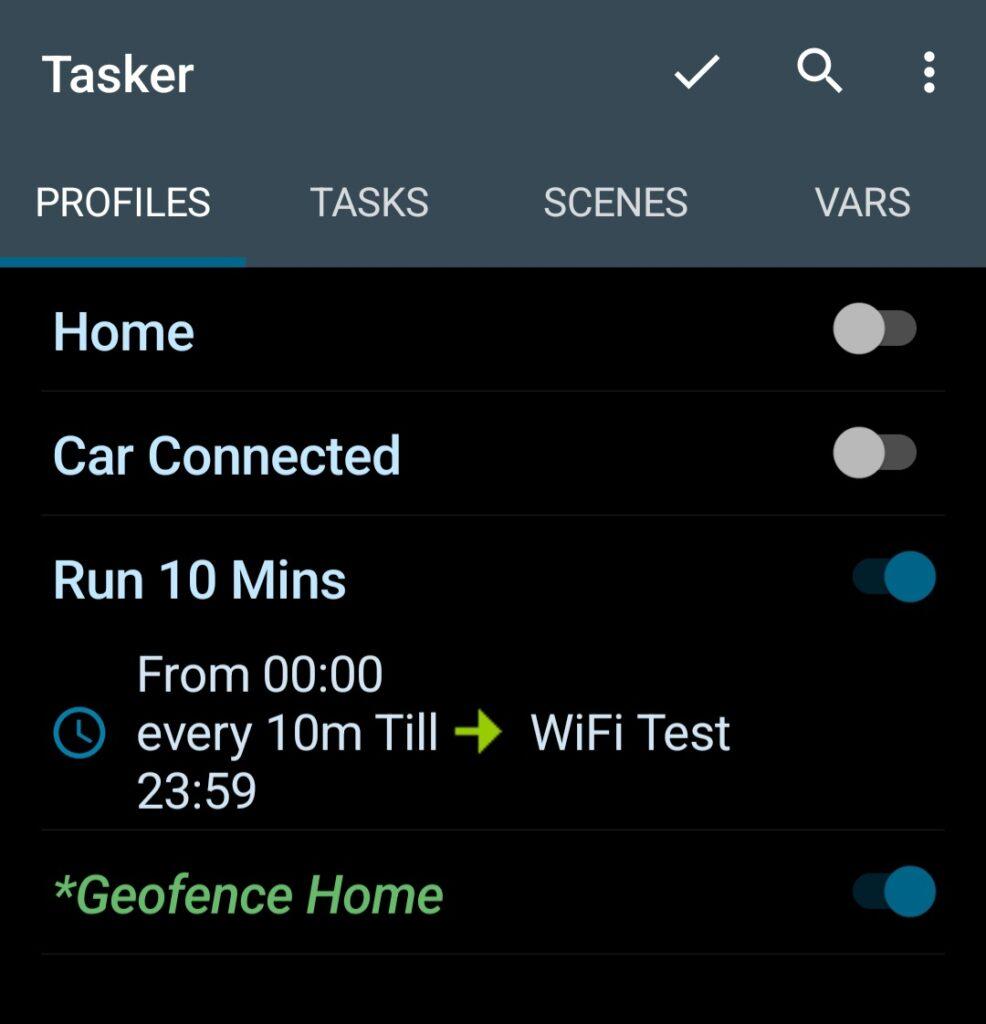
Screenshot 20240427 161452 TaskerProfile to run a task called WiFi Test every 10 mins

The Wifi Test task that runs every 10 minutes does the following:
* Creates and sets a variable called %HA_PING = 0. You can call it anything as maybe you want to ping the home router instead. We set this to 0 to check if the ping test then changes it, and to ensure it does not contain some non-zero value from a previous ping action.
* The Ping action is added and I set it to the internal IP address of my Home Assistant server. I said it can try 2 pings, and I also set a condition for IF %HOME = 1. In other words, only run this action if at home. If I did not add the condition, it would run when I’m away, and then give the ping error. One of Ping action’s fields is for Average Result Variable, and in there I just put %HA_PING. In other words, if there is an average ping result obtained, then set the variable %HA_PING to that variable (it will no longer be a 0).
* I added a Notify action but set two conditions to check before notifying: I must be at home, and the %HA_PING must equal 0. If the ping was successful, it sets %HA_PING to whatever the average result was. If it was not successful, the original %HA_PING is still 0.
* I just added an audible alert too, also based on same conditions that I must be home and the ping test did not set %HA_PING to above 0.
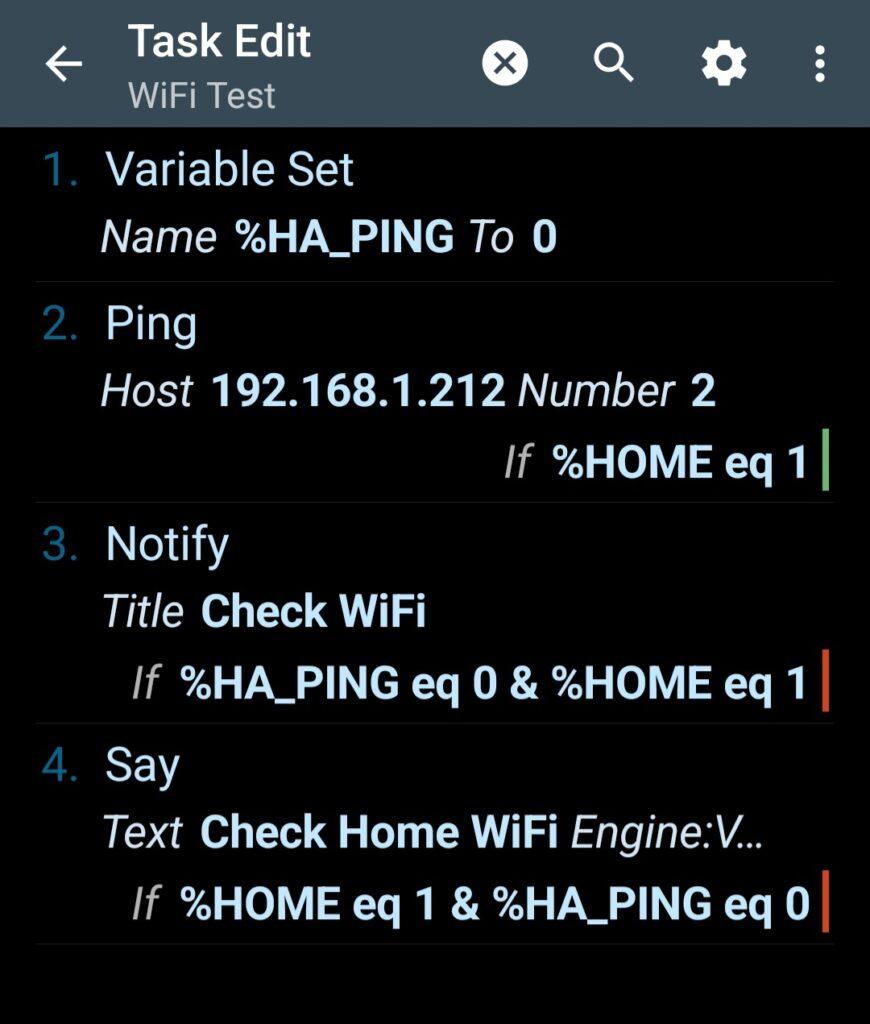
Screenshot 20240427 161601 TaskerThe WiFi Test task

To see what it is does under various scenarios, you can view the variable values in the Tasker app in the VARS tab, as shown below. Below we can see both variables after a run, and they show I am at home, and the last average ping response was 29.773ms.
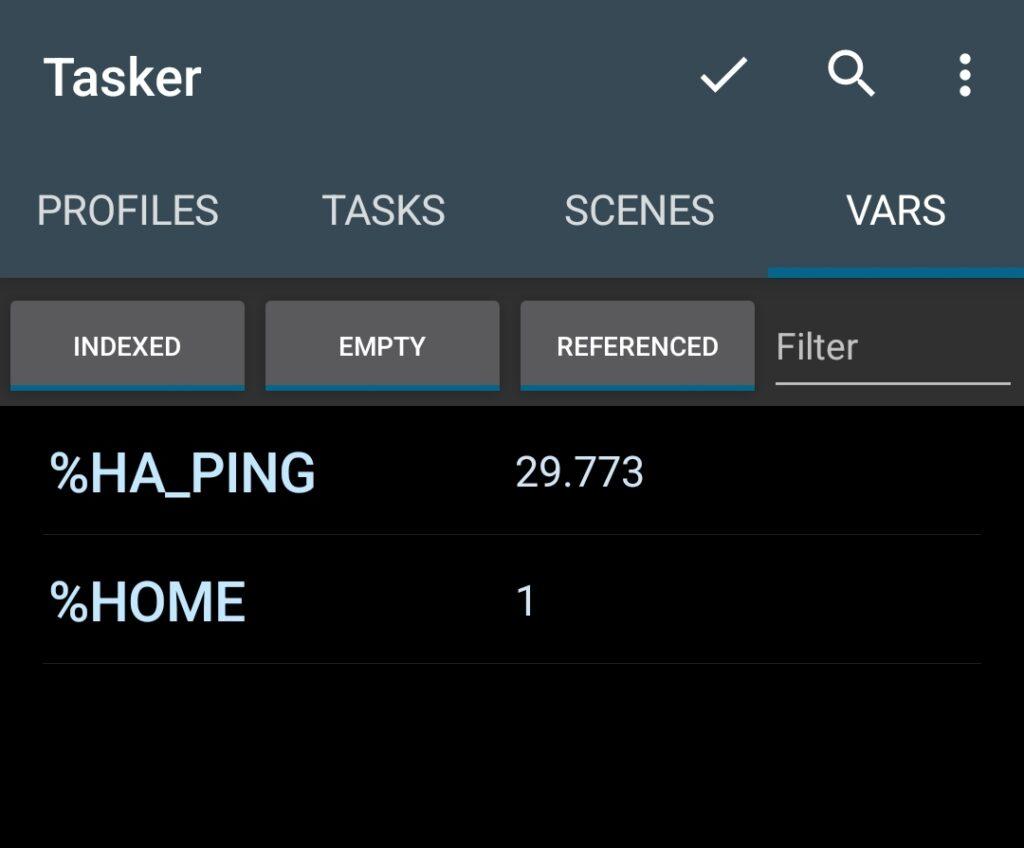
Screenshot 20240427 161631 Tasker

The Tasker app is extremely powerful and fun to use and you can automate so many things with it.
#Blog, #android, #automation, #tasker, #technology

danie10@squeet.me

The xdotool command on Linux can automate just about any keystroke or mouse actions from the command line, or for shortcut keys

Github title image for the xdotool project page
I’m busy looking into xdotool to automate various actions on Linux with the Elgato Stream Deck (well because Elgato only provides apps for Windows and MacOS). There is a good Linux alternative app to work with the Stream Deck, but I do need to be able to execute some commands when I want to bring a specific window into focus from the background, and then to execute a key press shortcut. So an example may be to bring Brave Beta browser window into focus, then activate tab 3 and do a tab fresh.

Another tip I worked out is instead of struggling to identify which window has which name exactly, you can also right-click on a window’s title bar and choose to rename the window. When I restarted that application, it retained the window name.

So, to bring Brave Beta browser into focus, activate tab 2 (CTRL-2), and then do a fresh (CTRL-R), I can just set this command string to a hot key on the Stream Deck: ‘xdotool search –name ‘Brave-Beta’ windowactivate –sync key ctrl+2 ctrl+r’.

You can still do this sort of thing without having any Stream Deck by just setting the same string to any Linux shortcut on the keyboard.

Xdotool lets you simulate keyboard input and mouse activity, move and resize windows, etc. It does this using X11’s XTEST extension and other Xlib functions. With xdotool, you can search for windows and move, resize, hide, and modify window properties like the title. If your window manager supports it, you can use xdotool to switch desktops, move windows between desktops, and change the number of desktops.

See https://github.com/jordansissel/xdotool
#Blog, #automation, #linux, #opensource, #technology, #xdotool

danie10@squeet.me

Ultimate Garage Door Control With Home Assistant Automated Management

Bright red garage door with a green hedge to the right
This is an interesting project to get a simple motorised garage door opener to connect with some intelligence via Home Assistant.

One could split this into two phases, with the first being really simple and not interfering with the motorisation itself. The first phase could just use the reed switches to indicate on the Home Assistant dashboard whether the door is fully closed, open, or somewhere in between (i.e., jammed or stopped). You could set easy automation rules too to have a timer running when the door opens, and if it is not closed within say 2 minutes, to send an alert to you. Or if the door opens after dark, send an alert to you. The sky is the limit with the rules you can build into Home Assistant to automate things for you.

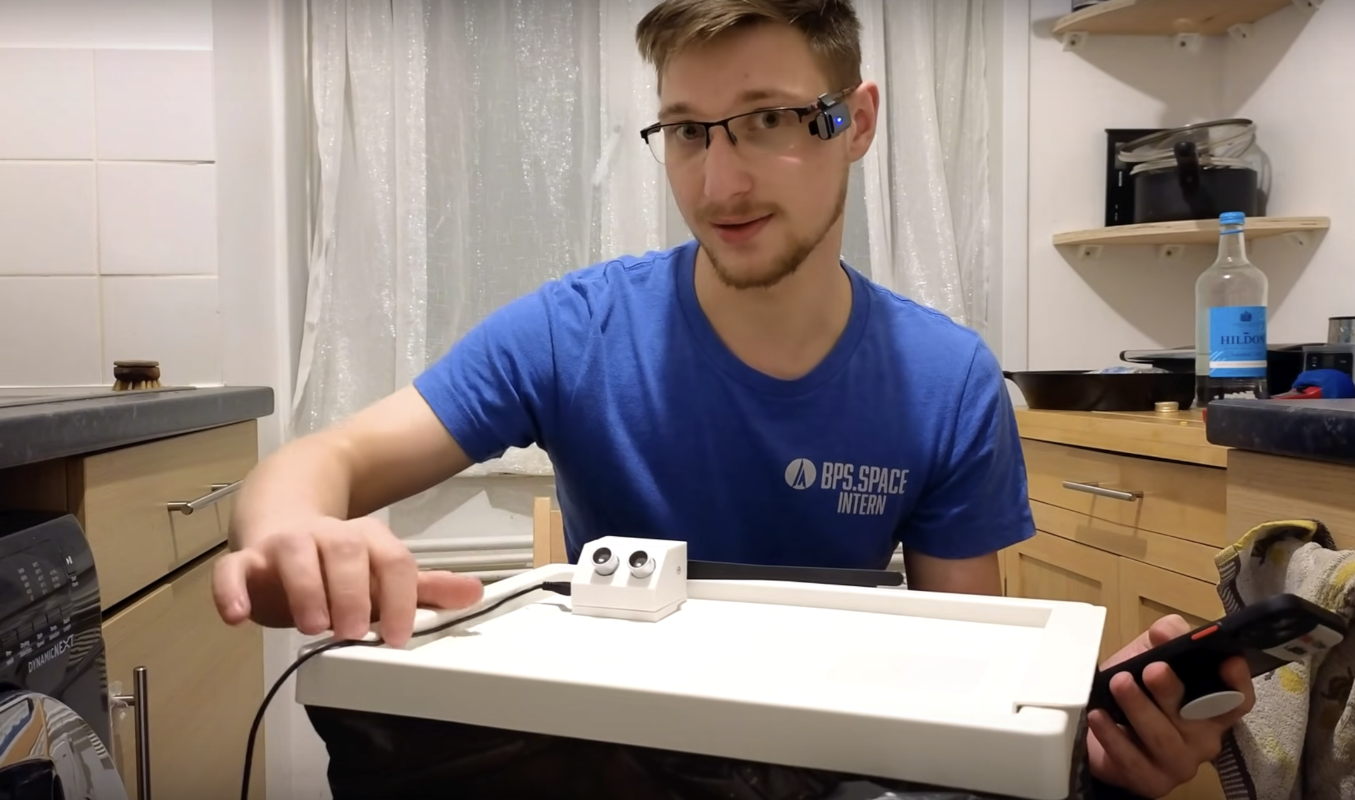
Getting fancier on phase one, you could add an ultrasonic detector to look downwards and see if the car is in the garage (shorter distance) or it is out (full distance to the floor). The opening / closing automation could take the car’s presence into account as well.

Phase two would have some interface with the motor. But this can be quite simple too, as even my old 15+ year old DC Blue garage opener, as a manual test button on the board. This is for simulating the remote-control button. Some also have a switch on the wall for this purpose. Either ways, you can use the contacts of this button / switch to make or break the circuit to trigger the opening or closing. So, no need to have some super fancy, expensive door opener to get something like this done.

This is also not the only way to do this project, as Home Assistant has a number of project recipes to work with different devices. So, consider others if this looks a bit complex, or consider my phased approach too, to get yourself tempted for phase two.

See https://tech.scarey.net/ultimate-garage-door-control/
#Blog, #automation, #garagedoor, #homeassistant, #technology