#nginx

gehrke_test@libranet.de

Meine ersten Tests mit #HomeAssistant und #Zigbee waren Standalone im Sommer mit BindMount auf dem Notebook mit #Podman und #sqlite.

Dann wurde der Rotz unverändert auf den 24x7 Server geschoben mit getunneltem SSH.

Dann Integration in die sonstige Containerlandschaft mit Anbindung an Internetz mit #nginx ReverseProxy.

Bis dahin alles gut. Nun habe ich bei der Migration von 'BindMount' zu regulärem Volume scheinbar den gesamten Datenbestand der sqlite verloren. Backup hätte ich, aber es waren nur ein paar Wochen.

Da ich eh noch auf ein echtes #RDBMS umstellen muss, werde ich wohl auf die Daten verzichten. Kein Bock, da lange nach der Ursache zu recherchieren. Vermutlich würde ich spätestens bei dem letzten Schritt doch wieder die Daten verlieren.

Irgendwas is ja immer...

#SmartHome

nbuechner@pod.haxxors.com

Mirror Ubuntu Pro packages to be used on VMs

Ubuntu Pro is a service offered by Canonical for expanded CVE patching, ten-years security maintenance and optional support. Anyone can use Ubuntu Pro for free for personal use on up to 5 machines. The site also states:

Server with unlimited VMs*

The * is interesting here. Its says:

  • Any of: KVM | Qemu | Boch, VMWare ESXi, LXD | LXC, Xen, Hyper-V (WSL, Multipass), VirtualBox, z/VM, Docker. All Nodes in the cluster have to be subscribed to the service in order to benefit from the unlimited VM support

I use Proxmox and also i could not find any information on how the VMs would actually find the host's license. So i decided to mirror the packages myself and use it in my VMs.

I use nginx to proxy the requests and authenticate with Ubuntu Pro token.

I only provide the basic nginx config part and the script to setup the sources. You have to take care of any security to prevent an open proxy here. Please do not blindly copy & paste this :) . I use SSL. But that is optional of course.

You can get your authentication token from /etc/apt/auth.conf.d/90ubuntu-advantage after you enabled Ubuntu Pro on the host.

To generate the Basic authentication for the config file you can use:

echo "bearer:YOURTOKEN" | base64 -w0

/etc/nginx/sites-enabled/esm:

resolver 8.8.8.8 8.8.4.4 ipv6=off;
server {
    #listen [::]:80;

    server_name YOURHOSTNAME;
    #access_log /tank/steam/access.log main;
    error_log /tank/esm/error.log;
    access_log /tank/esm/access.log main;

    location / {
        proxy_cache esm;
        proxy_max_temp_file_size 1509600m;
        proxy_set_header Host esm.ubuntu.com;
        proxy_set_header X-Real-IP $remote_addr;
        proxy_set_header X-Forwarded-For $proxy_add_x_forwarded_for;
        add_header X-Upstream-Status $upstream_status;
        add_header X-Upstream-Response-Time $upstream_response_time;
        add_header X-Upstream-Cache-Status $upstream_cache_status;

        proxy_ignore_client_abort on;
        proxy_redirect off;

        set $endpoint esm.ubuntu.com;
        proxy_cache_lock on;
        proxy_cache_lock_timeout 1h;
        proxy_cache_use_stale error timeout invalid_header updating http_500 http_502 http_503 http_504;
        proxy_cache_valid 200 90d;
        proxy_cache_valid 301 302 0;
        proxy_cache_revalidate on;
    proxy_cache_methods GET;
    proxy_cache_background_update on;
        proxy_set_header Authorization "Basic YOURAUTHTOKEN";
        proxy_pass https://$endpoint$request_uri;

    }

    listen 443 ssl; # managed by Certbot
    ssl_certificate /etc/letsencrypt/live/YOURHOSTNAME/fullchain.pem; # managed by Certbot
    ssl_certificate_key /etc/letsencrypt/live/YOURHOSTNAME/privkey.pem; # managed by Certbot
    include /etc/letsencrypt/options-ssl-nginx.conf; # managed by Certbot
    ssl_dhparam /etc/letsencrypt/ssl-dhparams.pem; # managed by Certbot

}

server {
    if ($host = YOURHOSTNAME) {
        return 301 https://$host$request_uri;
    } # managed by Certbot
    listen YOURIP:80;
    server_name YOURHOSTNAME;
    return 404; # managed by Certbot
}

install-esm.sh:

#!/bin/bash
function list_include_item {
  local list="$1"
  local item="$2"
  if [[ $list =~ (^|[[:space:]])"$item"($|[[:space:]]) ]] ; then
    # yes, list include item
    result=0
  else
    result=1
  fi
  return $result
}

if [ ! -f /etc//os-release ]; then
   echo "Could not find /etc/os-release"
   exit 1
fi

. /etc/os-release

ESM_FILE=/etc/apt/sources.list.d/esm.list
codenames="bionic focal jammy"
if ! `list_include_item "$codenames" "$UBUNTU_CODENAME"` ; then
   echo "Codename $UBUNTU_CODENAME is not suppported"
   exit 1
fi

wget -qO /etc/apt/trusted.gpg.d/ubuntu-esm-AB01A101DB53907B "https://keyserver.ubuntu.com/pks/lookup?op=get&search=0xe8a443ce358113d187bee0e6ab01a101db53907b"
rm -f /etc/apt/trusted.gpg.d/ubuntu-esm-AB01A101DB53907B.gpg
gpg --dearmor /etc/apt/trusted.gpg.d/ubuntu-esm-AB01A101DB53907B

wget -qO /etc/apt/trusted.gpg.d/ubuntu-esm-4067E40313CB4B13 "https://keyserver.ubuntu.com/pks/lookup?op=get&search=0x56f7650a24c9e9ecf87c4d8d4067e40313cb4b13"
rm -f /etc/apt/trusted.gpg.d/ubuntu-esm-4067E40313CB4B13.gpg
gpg --dearmor /etc/apt/trusted.gpg.d/ubuntu-esm-4067E40313CB4B13

cat > $ESM_FILE <<EOF
deb https://YOURHOSTNAME/apps/ubuntu $UBUNTU_CODENAME-apps-security main
deb https://YOURHOSTNAME/apps/ubuntu $UBUNTU_CODENAME-apps-updates main
deb https://YOURHOSTNAME/infra/ubuntu $UBUNTU_CODENAME-infra-security main
deb https://YOURHOSTNAME/infra/ubuntu $UBUNTU_CODENAME-infra-updates main
EOF

apt update

echo ""
echo "Added Ubuntu $UBUNTU_CODENAME ESM sources to $ESM_FILE"

#ubuntu #ubuntupro #linux #opensource #mirror #nginx

yazumo@despora.de

Freie Suchmaschiene / SearX / Nachtrag


Nachtrag zum Nachtrag vom 26.05.2022 ... zu SearX 🤦 🤷

Dies geht ausschließlich an Linux NutzerInnen. Windows wird nicht unterstüzt, bzw. ich weiß nicht ob das im Linux Sub System von Windows läuft.

Wie das so ist, ist mensch an einem Thema erst mal dran, lässt es einen auch nicht mehr los.
Bei dem ganzen Suchen, Lesen und Installieren, bin ich bei Nerdmind auf eine schöne Blog-Serie zum Thema SearX gestoßen.
Darin wird die Installation, das einrichten als Dienst, die Konfiguration & Verwendung von Apache oder nginx als Reverse-Proxy und das Umleiten der Suchanfragen über Tor erklärt.

!!! Jetzt nicht von Fachbegriffen abschrecken lassen !!!

Die einzelnen Schritte sind mit Copy & Paste einfach abzuarbeiten.
Wer mehr interesse hat, kann aus den Artikeln entnehmen was noch zu Lesen wäre. 🤓

Viel Spaß beim aufsetzten!


#searx #suchmaschiene #uwsgi #apache #nginx #tor #installation #install #linux #debian #bullseye #nerdmind #it #diy

schestowitz@joindiaspora.com

Ending the war should be a priority; boycotting #Nginx, boycotting hardware support, banning developers, banning users, and even banning gamers isn’t going to accomplish this • Techrights ⚓ http://techrights.org/2022/03/03/accomplishing-nothing-for-a-good-feeling/#Techrights #GNU #Linux #FreeSW | ♾ Gemini address: gemini://gemini.techrights.org/2022/03/03/accomplishing-nothing-for-a-good-feeling/

bkoehn@diaspora.koehn.com

Alright, after a bit more puttering about I've got my #k3s #Kubernetes cluster networking working. Details follow.

From an inbound perspective, all the nodes in the cluster are completely unavailable from the internet, firewalled off using #hetzner's firewalls. This provides some reassurance that they're tougher to hack, and makes it harder for me to mess up the configuration. All the nodes are on a private network that allows them to communicate with one another, and that's their exclusive form of communication. All the nodes are allowed any outbound traffic. The servers are labeled in Hetzner's console to automatically apply firewall rules.

In front of the cluster is a Hetzner firewall that is configured to forward public internet traffic to the nodes on the private network (meaning the load balancer has public IPv4 and IPv6 addresses, and a private IPv4 address that it uses to communicate with the worker nodes). The load balancer does liveness checks on each node and can prevent non responsive nodes from receiving requests. The load balancer uses the PROXY protocol to preserve source #IP information. The same Hetzner server labels are used to add worker nodes to the load balancer automatically.

The traffic is forwarded to an #nginx Daemonset which k3s keeps running on every node in the cluster (for high availability), and the pods of that DaemonSet keep themselves in sync using a ConfigMap that allows tweaks to the nginx configuration to be applied automatically. Nginx listens on the node's private IP ports and handles #TLS termination for #HTTP traffic and works with Cert-Manager to maintain TLS certificates for websites using #LetsEncrypt for signing. TLS termination for #IMAP and #SMTP are handled by #Dovecot and #Postfix, respectively. Nginx forwards (mostly) cleartext to the appropriate service to handle the request using Kubernetes Ingress resources to bind ports, hosts, paths, etc. to the correct workloads.

The cluster uses #Canal as a #CNI to handle pod-to-pod networking. Canal is a hybrid of Calico and Flannel that is both easy to set up (basically a single YAML) and powerful to use, allowing me to set network policies to only permit pods to communicate with the other pods that they need, effectively acting as an internal firewall in case a pod is compromised. All pod communication is managed using standard Kubernetes Services, which behind the scenes simply create #IPCHAINS to move traffic to the correct pod.

The configuration of all this was a fair amount of effort, owing to Kubernetes' inherent flexibility in the kinds of environments it supports. But by integrating it with the capabilities that Hetzner provides I can fairly easily create an environment for running workloads that's redundant and highly secure. I had to turn off several k3s "features" to get it to work, disabling #Traefik, #Flannel, some strange load balancing capabilities, and forcing k3s to use only the private network rather than a public one. Still, it's been easier to work with than a full-blown Kubernetes installation, and uses considerably fewer server resources.

Next up: storage! Postgres, Objects, and filesystems.

katzenjens@pod.tchncs.de

Ob das mal gutgeht?

Ich bin heute dann mal in #Docker eingestiegen. Was soll ich am besten als Reverse-Proxy nehmen? #Nginx, #Traefik oder was gibt es da sonst so? Am besten etwas, was einem möglichst viel Arbeit abnimmt und dass man die Container ohne große Aufregung umtopfen kann. Sinn ist es, erstmal lokal alles auszuprobieren um es erst dann auf einen Produktivserver zu schieben, dort aber wenig bis gar nix tweaken müssen. Und wie das mit den verschiedenen Netzwerken so läuft, muss ich auch noch eruieren. Später möchte ich lieber eigene Container bauen anstatt mich auf Fertigkost verlassen zu müssen, welcher man nicht unbedingt trauen kann...

danie10@squeet.me

Reverse Proxy with Nginx for Improved Security, Performance and SSL Termination: A Step-by-Step Setup Guide

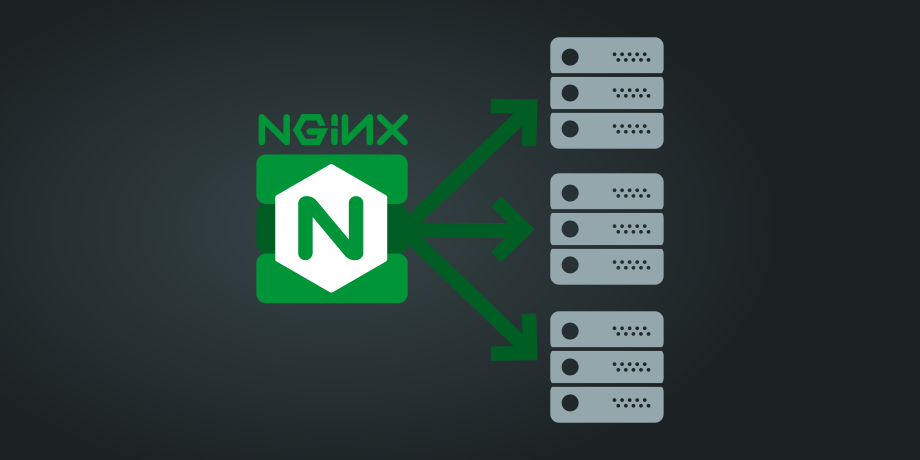
A reverse proxy is a server that sits between internal applications and external clients, forwarding client requests to the appropriate server. The reverse proxy service acts as a front-end and works by handling all incoming client requests and distributing them to the back-end web, database, or other servers. Then it forwards the response back to the client.

If you're hosting from home, you certainly want something like this running in front of all your services. My home router points all open ports to my reverse proxy, and any known URLs get defaulted to my external website to handle. If the command line is too daunting, you could consider checking my YouTube or Odysee channels where I also showed a GUI version running in a Docker container, with external subdomain names working for different services.

See Reverse Proxy with Nginx: A Step-by-Step Setup Guide

#technology #reverseproxy #security #selfhosting #nginx

Image/photo

step-by-step tutorial is going to show you how you can easily set up a reverse proxy with Nginx to improve security and performance.


https://gadgeteer.co.za/reverse-proxy-nginx-improved-security-performance-and-ssl-termination-step-step-setup-guide