update 2022-06: hardkernel.com how to install xfce4 on ODROID XU4 can do 1080p Youtube and Super Mario Kart@50fps on 8x ARM7 (32Bit) - basic setup - cpu tuning and monitoring
update: 2022-06
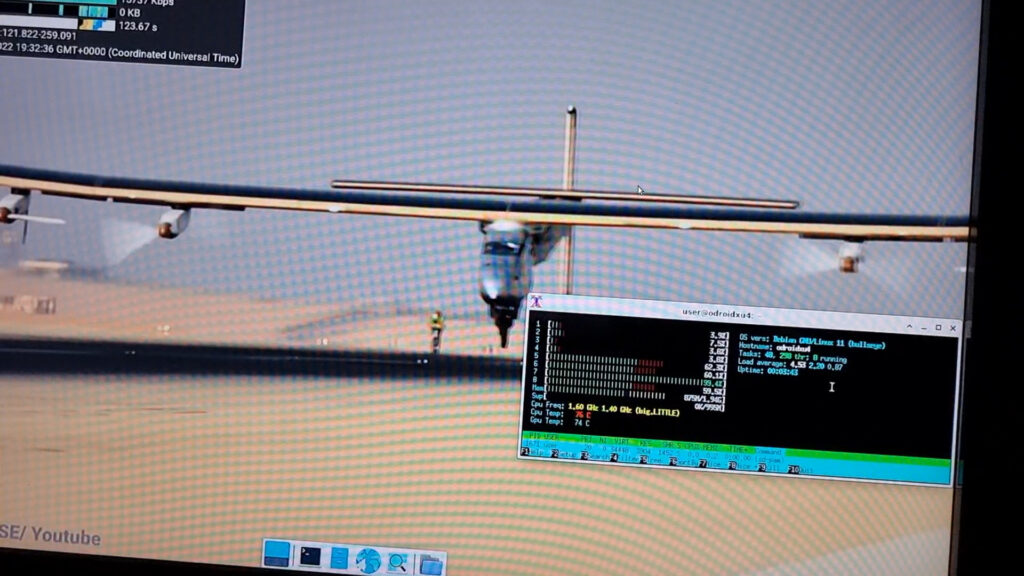
- by now under xfce4 (+lightdm + firefox) it can do 720p and 1080p Youtube (see below screenshots and video)
- with passive cooling ARM CPU getting very hot rendering:
- 720p Youtube video 70C (158F)
- 1080p Youtube video 80C (176F)
- active cooling recommended, preferably with a quiet fan (default odroid fan is said to be noisy)
720p

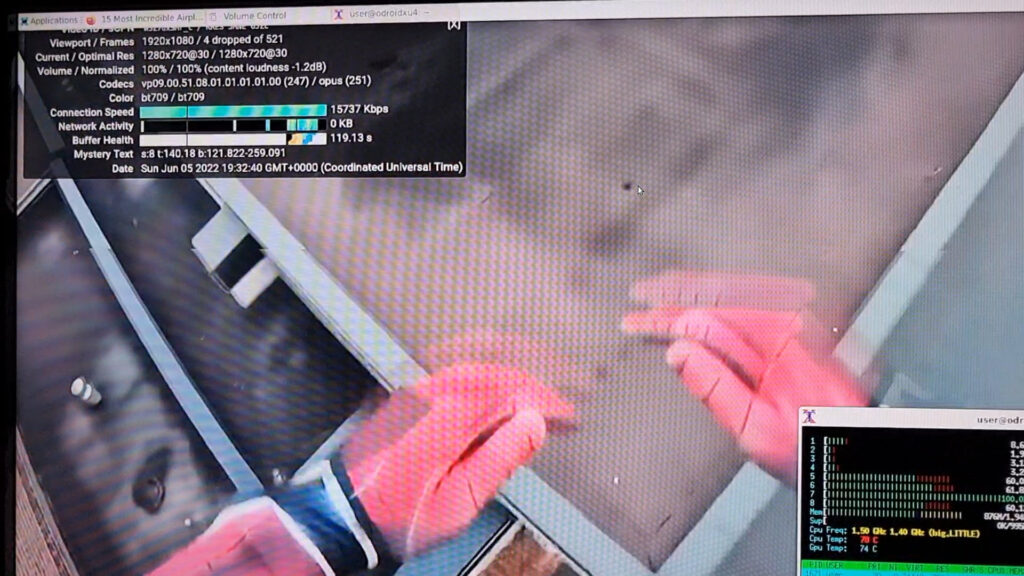
1080p
[video width=”742″ height=”436″ mp4=”https://dwaves.de/wp-content/uploads/2017/12/ODROID\_XU4\_Youtube\_1080p\_Screenshot-at-2022-06\_works\_but\_running\_80C\_hot.mp4″\]\[/video\]
how to install xfce4 on odroid XU4
make sure network connectivity is established:
<span style="color: #00ffff;">su - root</span><span style="color: #00ffff;">apt update</span>
# install basics
<span style="color: #00ffff;">apt install console-data ssh rsync</span>

# did not quiet do it
<span style="color: #00ffff;">apt install armbian-bullseye-desktop-xfce</span>

# should do it
<span style="color: #00ffff;">apt install xfce4 lightdm xorg tango-icon-theme gnome-icon-theme firefox-esr pavucontrol pulseaudio</span>
update: 2019-10: what it does:
- one can install a very decent Debian and have okay working speed so yes it can be seen as a very energy efficient (5V based) and still usable (definately faster than pi2) desktop system (99% of all packages available
- clock for performance: one can manually set the CPU to “performance” with the tool:
<span style="color: #00ffff;">gksu odroid-cpu-control</span>
or
<span style="color: #00ffff;">/usr/local/sbin/odroid-cpu-control</span>
(maximum clock speed at all times) but then things get very fast but also 90°C and more hot (very very hot) so not recommended, so better to select “ondemand” and “from 200 Mhz to 1400 or 2000 Mhz
- if one needs maximum performance consider installing active cooling fan and set clock to permanent maximum.
Super Mario Kart (retroarch) can be played pretty smooth (50-60fps at about 60-75°C) with a little cpu tuning.

this blog post update is written on the xu4 Debian Jessie 8 (Game Station Turbo Image, (direct download link) then recommended to download 500MBytes of updates then firefox stable) and Firefox 60.9.0esr (32-bit)
one is pretty new to Kodi (it comes with older version Javis) can’t really say anything about it… have never used it.
odroid@gamestation-turbo:~$ <span style="color: #00ffff;">hostnamectl</span>
   Static hostname: <a href="https://forum.odroid.com/viewtopic.php?t=7322">gamestation-turbo</a>
         Icon name: computer
           Chassis: n/a
  Operating System: Debian GNU/Linux 8 (jessie)
            Kernel: Linux 3.10.106+
      Architecture: arm
what it does not:
- it does not 1080p full hd with 100 frames
- it is okay at 720p but still one is wondering: where is the GPU hardware acceleration? the 8x ARM CPUs seem to do all the work on Firefox playing Youtube on Debian 8 (hd is stuttering)
- kodi (latest version on android) plays stuff fine
- netflix.com refused to work (well this guy has managed to even on an older C1)
tried all possible variants (if one got it working let me know)
suspected problem: no Widevine Support? (Google Chrome will drop 32-bit machines but Chromium is still going. (Source))
so this could be the problem… that 32Bit ARM is simply not supported by Widevine?
(Raspberry Pi 3 can run it… the older Raspberries seem too slow for the job)
neither Debian 8 (Jessie) Firefox (60.9 esr) nor Android + NetFlix App (won’t install straight from Play Store because it says “hardware not supported” but even when one exports the App via AppExtractor from a Android Phone and installs it on Android on xu4 Netflix refuses to work 🙁
who needs netflix if one can have Scott Manley’s Youtube Channel about Space stuff? HURRAY 🙂 (one is serious about this… really love it)
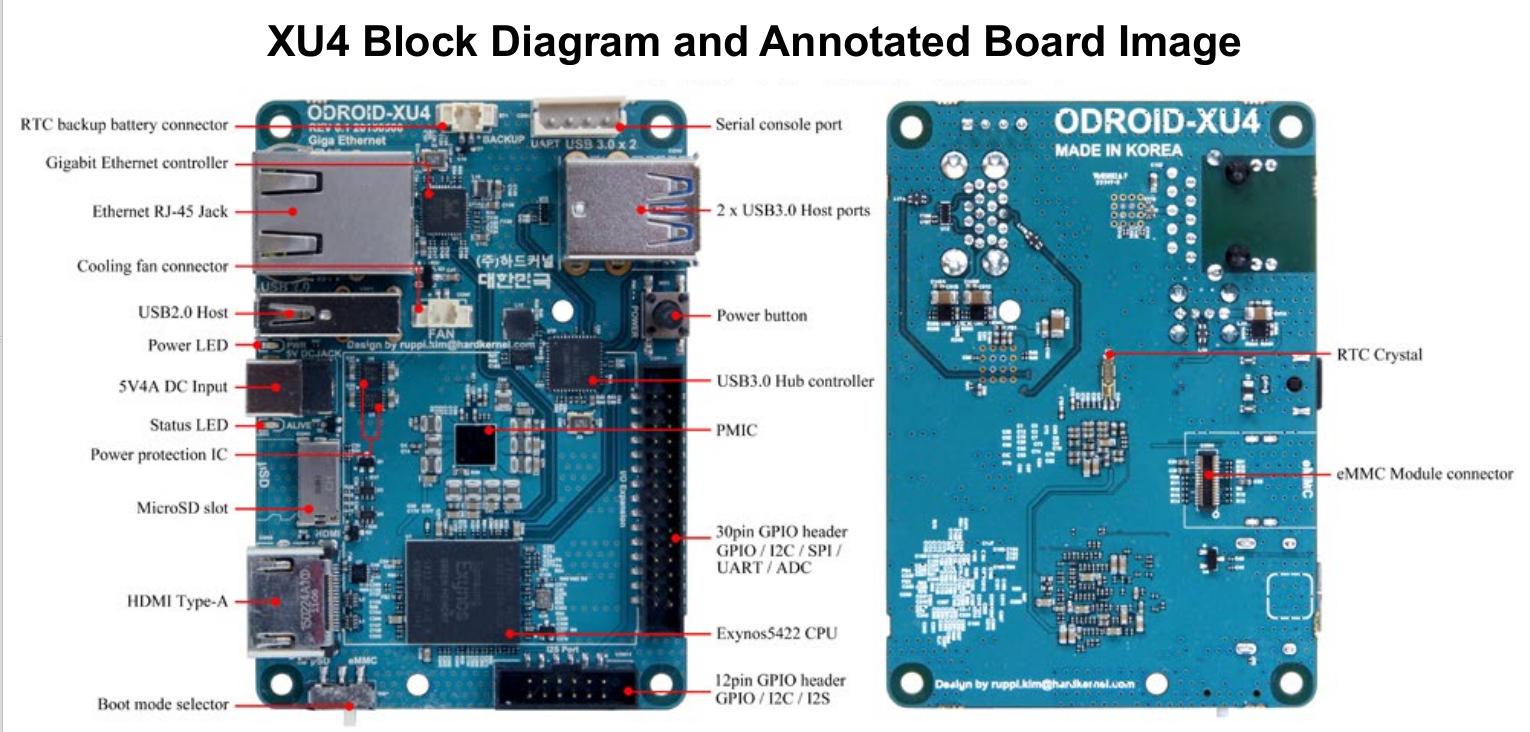
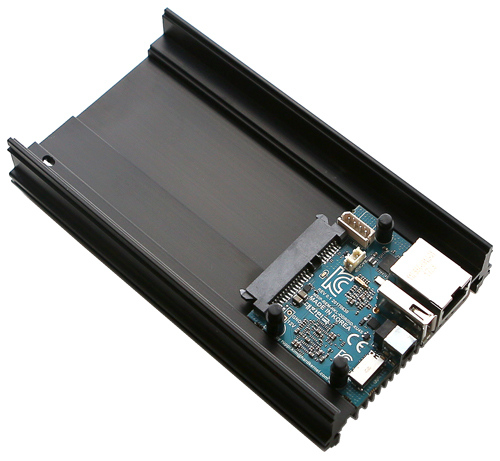
the hardware

you can get the ODROID with HDMI (monitor/screen with audio) output:
“The Odroid XU4 comes outfitted with 2GB of DDR3 RAM, and an Samsung Exynos 5422 CPU, the Odroid beat out many SBCs including the ultra-popular Pi 3 in benchmark tests from Love Our Pi.”
(2.1GHz Quad-Core (Cortex®-A15 (32Bit)) + 1.4GHz Quad-Core (Cortex®-A7 (32Bit)))
with active cooling: https://www.pollin.de/p/odroid-xu4-einplatinen-computer-samsung-exynos-5422-2-gb-2x-usb-3-0-810409
with passive cooling: https://www.pollin.de/p/odroid-xu4q-einplatinen-computer-samsung-exynos-5422-2-gb-2x-usb-3-0-810750
for 80€
bootup dmesg output of recent Armbian:
odroid.xu4.dmesg.txt
odroid.xu4.lsusb.txt
recommended addons:
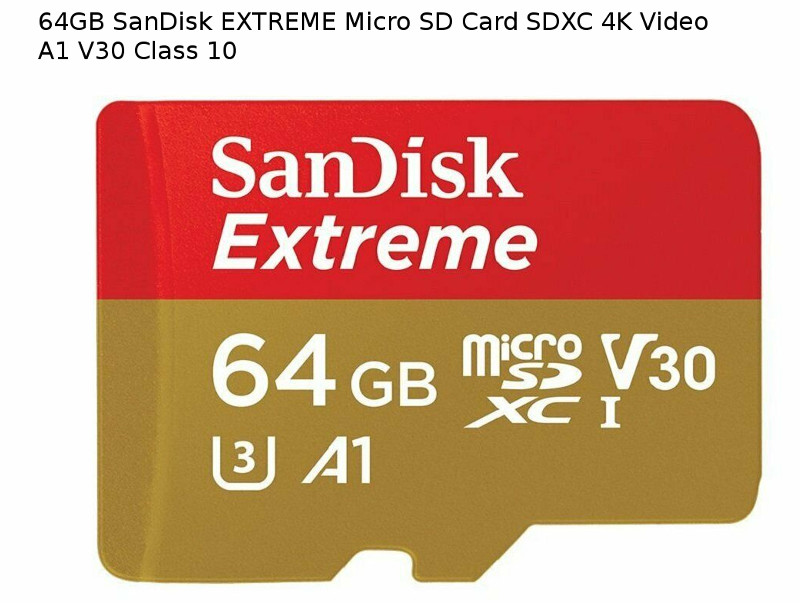
- a fast microsd card with 64GBytes of storage

- a USB Hub (will run out of ports (only 3x) fast (mouse, keyboard, wifi stick, joypad1 and joypad2)
usb wifi adapter like 148f:5572 Ralink Technology, Corp. RT5572 Wireless Adapter
<span style="color: #00ffff;">apt-get install firmware-ralink</span>
In Debian 9: Install the firmware-misc-nonfree package:
<span style="color: #00ffff;">apt install firmware-misc-nonfree</span>
<span style="color: #00ffff;">lsusb</span>
Bus 006 Device 002: ID 0bda:8153 Realtek Semiconductor Corp.
Bus 006 Device 001: ID 1d6b:0003 Linux Foundation 3.0 root hub
Bus 005 Device 001: ID 1d6b:0002 Linux Foundation 2.0 root hub
Bus 004 Device 002: ID 05e3:0616 Genesys Logic, Inc.
Bus 004 Device 001: ID 1d6b:0003 Linux Foundation 3.0 root hub
Bus 003 Device 006: ID 0079:0011 DragonRise Inc. Gamepad
Bus 003 Device 005: ID 046d:c00e Logitech, Inc. M-BJ58/M-BJ69 Optical Wheel Mouse
Bus 003 Device 004: ID 1a40:0101 Terminus Technology Inc. 4-Port HUB
Bus 003 Device 003: ID 0461:0010 Primax Electronics, Ltd HP Keyboard
Bus 003 Device 002: ID 05e3:0610 Genesys Logic, Inc. 4-port hub
Bus 003 Device 001: ID 1d6b:0002 Linux Foundation 2.0 root hub
Bus 002 Device 001: ID 1d6b:0001 Linux Foundation 1.1 root hub
Bus 001 Device 002: ID <span style="color: #ff9900;"><strong>148f:5572 Ralink Technology, Corp. <a href="https://www.ebay.de/sch/i.html?_from=R40&_trksid=m570.l1313&_nkw=RT5572+Wireless+Adapter&_sacat=0">RT5572 Wireless Adapter</a></strong></span>
Bus 001 Device 001: ID 1d6b:0002 Linux Foundation 2.0 root hub
lsmod|grep rt28
rt2800usb 17720 0
rt2800lib 75674 1 rt2800usb
rt2x00usb 10723 1 rt2800usb
rt2x00lib 43390 3 rt2x00usb,rt2800lib,rt2800usb
mac80211 567210 3 rt2x00lib,rt2x00usb,rt2800lib
dmesg|grep rt2x
[ 23.250784] [c6] ieee80211 phy0: rt2x00_set_rt: Info - RT chipset 5592, rev 0222 detected
[ 23.286987] [c6] ieee80211 phy0: rt2x00_set_rf: Info - RF chipset 000f detected
[ 24.978846] [c4] ieee80211 phy0: rt2x00lib_request_firmware: Info - Loading firmware file 'rt2870.bin'
[ 25.010855] [c4] ieee80211 phy0: rt2x00lib_request_firmware: Info - Firmware detected - version: 0.29
dmesg|less
# then search for /ieee80211
[ 23.250784] [c6] ieee80211 phy0: rt2x00_set_rt: Info - RT chipset 5592, rev 0222 detected
[ 23.263058] [c5] cfg80211: (57240000 KHz - 63720000 KHz @ 2160000 KHz), (N/A, 0 mBm), (N/A)
[ 23.286987] [c6] ieee80211 phy0: rt2x00_set_rf: Info - RF chipset 000f detected
[ 23.296854] [c6] ieee80211 phy0: Selected rate control algorithm 'minstrel_ht'
[ 23.298225] [c6] usbcore: registered new interface driver rt2800usb
[ 24.958894] [c4] IPv6: ADDRCONF(NETDEV_UP): eth0: link is not ready
[ 24.978846] [c4] ieee80211 phy0: rt2x00lib_request_firmware: Info - Loading firmware file 'rt2870.bin'
[ 25.010855] [c4] ieee80211 phy0: rt2x00lib_request_firmware: Info - Firmware detected - version: 0.29
cpu frequency clock speed mhz monitoring script: (works on intel x86 CPUs as well)
==================================================================================

this will monitor “on demand” changes to cpu clock in real time… (1 sec interval)

vim /scripts/mon\_cpu.sh
while true; do
echo "===== arm based cpu frequency monitoring ====="
sort /proc/cpuinfo | uniq
for d in /sys/devices/system/cpu/cpu* ; do
if [ -f "$d/cpufreq/scaling_cur_freq" ]
then
echo "$d";
cat $d/cpufreq/scaling_cur_freq;
fi
done
sleep 1; clear; done
```
sample output:
===== arm based cpu frequency monitoring =====
/sys/devices/system/cpu/cpu0
300000
/sys/devices/system/cpu/cpu1
300000
/sys/devices/system/cpu/cpu2
800000
/sys/devices/system/cpu/cpu3
800000
/sys/devices/system/cpu/cpu4
600000
/sys/devices/system/cpu/cpu5
600000
/sys/devices/system/cpu/cpu6
600000
/sys/devices/system/cpu/cpu7
600000
what does it look like?

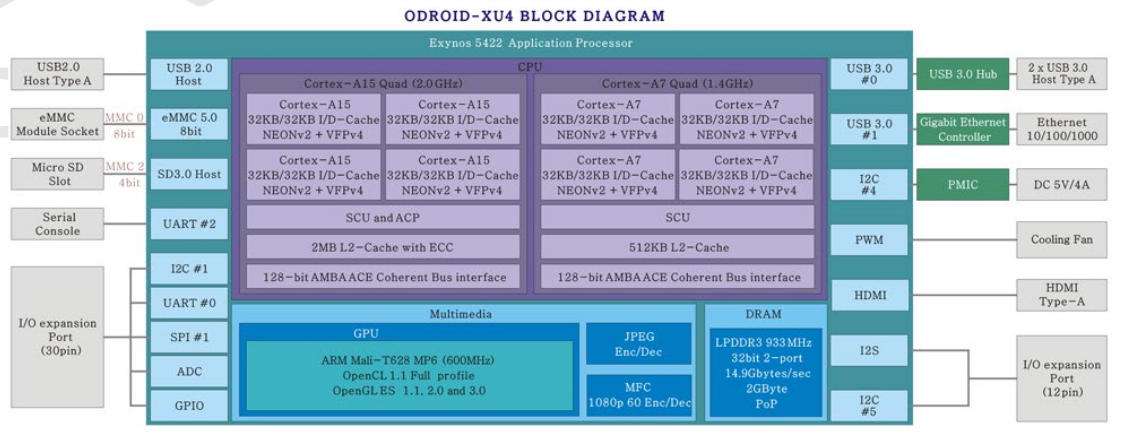
What SoC are you using?
The SoC is a Samsung Exynos5422 Octa.
What GPU does it include?
An ARM Mali-T628 6 Core.
heat
Complex components such as the XU4 processor may reach temperatures as high as 95°C. At high temperatures, the processor will throttle itself and operate slower so that temperatures do not continue to increase.
robotics
The 30-pin GPIO port can be used as GPIO/IRQ/SPI/ADC, and the 12-pin GPIO port can be used as GPIO/I2S/I2C for electronics and robotics. The GPIO pins on an ODROID-XU4 are a great way to interface with physical devices like buttons and LEDs using a lightweight Linux controller. If you’re a C/C++ or Python developer, there’s a useful library called WiringPi that handles interfacing with the pins, which is described in Chapter 4. Note that all of the GPIO ports are 1.8Volt, and the ADC inputs are limited to 1.8Volt. If a sensor or peripheral
needs higher voltage, the GPIO ports may be level-shifted to 3.3V or 5V using the XU4 Level Shifter Shield.
Serial console port
Connecting to a PC gives access to the Linux console. You can monitor the boot process, or to log in to the XU4 to perform root maintenance.
Note that this serial UART uses a 1.8 volt interface, and it is recommended to use the USB-UART module kit available from Hardkernel.
A Molex 5268-04a (2.5mm pitch) is mounted on the PCB, and its mate is Molex 50-37-5043 Wire-to-Board Crimp Housing.
RTC (Real Time Clock) backup battery connector
If you want to add a RTC functions for logging or keeping time when offline, just connect a Lithium coin backup battery (CR2032 or equivalent). All of the RTC circuits are included on the ODROID-XU4 by default. It connects with a Molex 53398-0271 1.25mm pitch Header, Surface Mount, Vertical type (Mate with Molex 51021-0200).
Gigabit Ethernet
The Realtek RTL8211F is a highly intergrated 10/100/1000M Ethernet transceiver that complies with 10Base-T, 100Base-TX, and 1000Base-T IEEE 802.3 standards.
USB MTT hub controller
The Genesys GL3521 is a 2-port, low-power, and configurable
USB 3.0 SuperSpeed hub controller.
documentation
community support forum: https://forum.odroid.com/
https://wiki.odroid.com/odroid-xu4/odroid-xu4
https://wiki.odroid.com/odroid-xu4/application_note/software/headless_setup
https://magazine.odroid.com/wp-content/uploads/odroid-xu4-user-manual.pdf
download images firmware os software
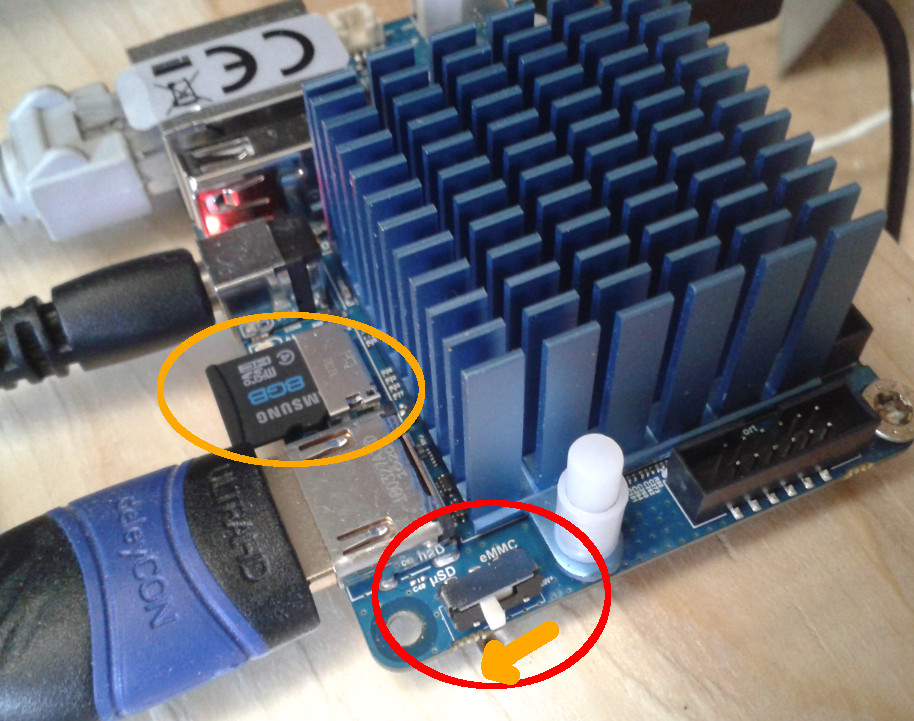
first of all if you want to use the MicroSDCARD you will have to flip the switch to the left:
android 4.4.4
https://wiki.odroid.com/odroid-xu4/os_images/android/android
debian “armbian”
i used this image of stretch (debian9): https://forum.odroid.com/viewtopic.php?f=96&t=30552
https://www.armbian.com/odroid-xu4/
overall the xu4 is more powerful hence a better better/ quicker desktop replacement than raspberry pi 2 (did not test version 3) but it is not perfect.
You can clearly feel a lack of computing power and speed when you fire up gimp to “quickly” edit some screenshots – it works – but even 8x
model name  : ARMv7 Processor rev 3 (v7l)
BogoMIPS    : 36.00
cpuinfo.txt + SANDISK Ultra microSDXC 64 GB MicroSD card as “harddisk” can not compete with i5+SSD.

<span style="color: #00ffff;">hostnamectl</span>
Static hostname: odroid
Icon name: computer
Operating System: Debian GNU/Linux 9 (stretch)
Kernel: Linux 4.14.81+
Architecture: arm

<span style="color: #00ffff;">uname -a</span>
Linux odroid 4.14.81+ #1 SMP PREEMPT Fri Nov 16 14:06:58 UTC 2018 armv7l GNU/Linux
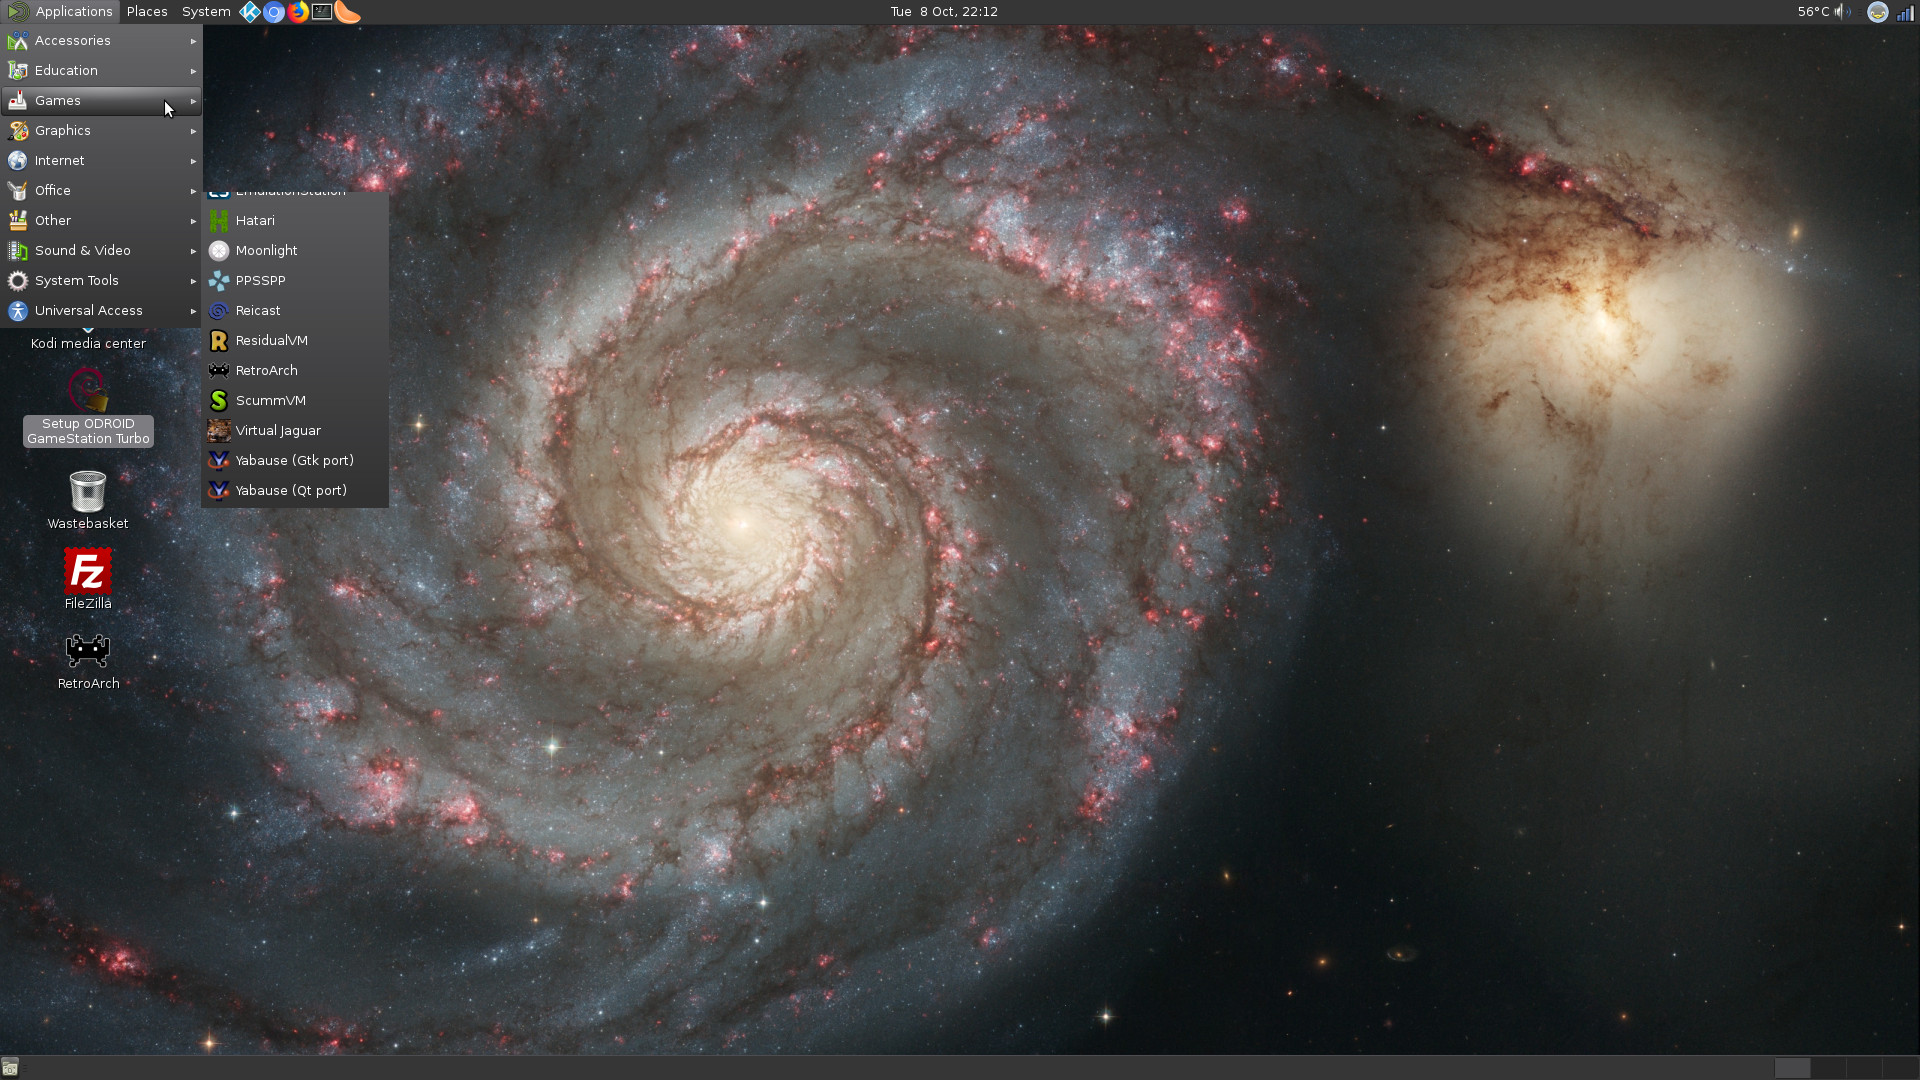
games:
some really manage to turn this thing into a major gaming emulator machine 🙂 nice job!
ODROID GameStation Turbo https://magazine.odroid.com/article/os-spotlight-odroid-gamestation-turbo/
https://forum.odroid.com/viewtopic.php?f=98&t=7322
ubuntu
http://com.odroid.com/sigong/blog/blog_list.php?tag=ODROID-XU4
leads to:
warning! POTENTIAL DATALOSS! selecting the wrong device can OVERWRITE DATA ON YOUR COMPUTER ATTACHED HARDDISKS!
insert sdcard into your sdcard reader..
<span style="color: #00ffff;">wget http://de.eu.odroid.in/ubuntu_16.04lts/ubuntu-16.04.3-4.14-minimal-odroid-xu4-20171213.img.xz</span>; # download image<span style="color: #00ffff;">
lsblk</span>; # make sure you identify the right hardware.
NAME MAJ:MIN RM SIZE RO TYPE MOUNTPOINT
sda 8:0 0 119.2G 0 disk
├─sda1 8:1 0 49G 0 part /projects
├─sda5 8:5 0 67.4G 0 part /
└─sda6 8:6 0 2.9G 0 part [SWAP]
sr0 11:0 1 1024M 0 rom
<span style="color: #ff6600;">mmcblk0</span> 179:0 0 14.9G 0 disk
└─mmcblk0p1 179:1 0 14.9G 0 part
# mmcblk0p1 is the first partition on device <span style="color: #ff6600;">mmcblk0 (the sdcard)
</span><span style="color: #00ffff;">apt-get install xz-utils</span>; # install maybe missing unpacking software <span style="color: #00ffff;">md5sum ubuntu-16.04.3-4.14-minimal-odroid-xu4-20171213.img.xz</span>; # check if md5sum matches <span style="color: #00ffff;">unxz ubuntu-16.04.3-4.14-minimal-odroid-xu4-20171213.img.xz</span>; # unpack the image
<span style="color: #00ffff;">umount /dev/mmcblk0p1</span>; # unmount sdcard time
# write directly
<span style="color: #00ffff;">md5sum -c ubuntu-16.04.3-4.14-minimal-odroid-xu4-20171213.img.xz.md5sum</span>; # verify downloaded file has no errors
<span style="color: #00ff00;">ubuntu-16.04.3-4.14-minimal-odroid-xu4-20171213.img.xz: OK
</span>
# two possible ways to continue
# write directly unpack on the fly<span style="color: #00ffff;">
xzcat /download/folder/ubuntu-16.04.3-4.14-minimal-odroid-xu4-20171213.img.xz | sudo dd bs=41 of=/dev/mmcblk0
watch kill -USR1 $(pgrep ^dd)</span>; # watch progress, it will copy 1.8GByte
<span style="color: #00ffff;">sync</span>; # run this to write disk cache to disk

# or
# unpack first<span style="color: #00ffff;">
unxz ubuntu-16.04.3-4.14-minimal-odroid-xu4-20171213.img.xz</span>; # unpack 1.8GByte
# possibly this tool was called un-xz, if unxz does not work try un-xz?

# umount the sdcard
<span style="color: #00ffff;">umount /dev/mmcblk0*
</span># write the image<span style="color: #00ffff;">
dd bs=1M if=/download/folder/ubuntu-16.04.3-4.14-minimal-odroid-xu4-20171213.img of=/dev/mmcblk0</span>; # write image to sdcard
<span style="color: #00ffff;">watch kill -USR1 $(pgrep ^dd)</span>; # watch progress, it will copy 1.8GByte <span style="color: #00ffff;">
sync</span>; # run this to write disk cache to disk

<span style="color: #ff0000;"># NOTE!</span>
# during first boot it sits for 3-5 minutes on this message:
<span style="color: #ffff00;"># "random crng init done"</span>
# it then reboots and sits again on this message...
# this is <span style="color: #ffff00;">NORMAL! it does some partition resizing! this takes time.</span>
# (using the full size of the sdcard)
# please wait paitently.
# if one hour later nothing has changed
# and you do not see a login screen
# restart try again...
# or
# either powersupply is insufficient
# or
# sdcard has problems, check it for bad sectors and/or exchange
<span style="color: #00ffff;">umount /dev/mmcblk0*
badblocks -n -v /dev/mmcblk0</span>
setup
depending on if you can connect a monitor or not:
- insert micro sdcard…
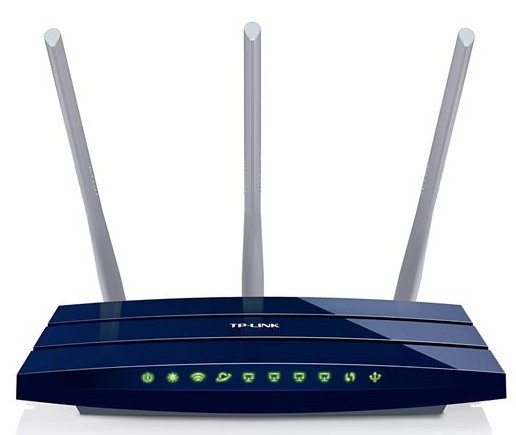
- LAN connect ODROID XU4 to a DHCP-server ((DSL) router/fritzbox with DHCP enabled)
- LAN connect PC/Laptop to the same DHCP-server
- start wireshark on your laptop and power on ODROID XU4.
networking: dhcp and finding odroid’s ip
can be a little pain in the a….fternoon.
the ubuntu ODROID XU4 image does not come with a fixed IP, so you will have to connect it to some sort of DHCP-server (router) in order to ssh into it, or install the dhcp-server-service under debian 8. (maybe as VirtualBox VM).
you can also use wireshark and to listen to network activity related to the odroid (dhcp-offer) and find it’s IP this way.
you are looking for simething like:
15 2.286036000 <span style="color: #ff0000;">Wibrain_</span>30:cf:9b Broadcast ARP 60 Who has 192.168.0.1? Tell <span style="color: #ff0000;">192.168.1.101</span>
or use nmap network scanner to find it’s ip…
nmap -n -v -p 1-255 -n -sS 192.168.<span style="color: #ff0000;">10</span>.0/24
Initiating SYN Stealth Scan at 22:21
Scanning <span style="color: #ff0000;">192.168.10.10</span> [255 ports]
Discovered open port 22/tcp on 192.168.10.1
modify the above line depending in what kind of subnet your router is operating. (192.168.XXX.XXX)
ssh into it
usr: root / usr: odroid
pwd: odroid

root@odroid:~# hostnamectl
   Static hostname: odroid
         Icon name: computer
  Operating System: Ubuntu 16.04.3 LTS
            Kernel: Linux 4.14.5-92
      Architecture: arm
CONGRATULATIONS! YOU LOGGED IN SUCCESSFULLY THE FIRST TIME TO YOUR EMBEDDED POWERHOUSE!
fix the ip
to not have to hassle with dhcp servers again one can change the ip to fixed via:
<span style="color: #00ffff;">nano /etc/network/interfaces</span>
fill it with this content:
# The loopback network interface
auto lo
iface lo inet loopback

# The primary network interface
auto eth0
iface eth0 inet static
address 192.168.<span style="color: #ff6600;">0.111</span>
netmask 255.255.255.0
gateway 192.168.<span style="color: #ff6600;">0.1</span>
dns-nameservers 192.168.<span style="color: #ff6600;">0.1
</span>
modify the orange parts so it fits your LAN settings – then type:
<span style="color: #00ffff;">reboot
</span>
if everything went straight… you should be able to ping the odroid on 0.111 and ssh into it on 0.111
messing with the odroid
the first thing you probably do with a new system is check for updates…
if your network settings are correct your odroid should be able to access the internet.
<span style="color: #00ffff;">ping yahoo.com</span>; # check if internet is working
<span style="color: #00ffff;">apt update</span>; # update package index
Hit:1 http://ports.ubuntu.com/ubuntu-ports xenial InRelease
Hit:2 http://ppa.launchpad.net/saiarcot895/myppa/ubuntu xenial InRelease
Get:3 http://ports.ubuntu.com/ubuntu-ports xenial-updates InRelease [102 kB]
Hit:4 http://deb.odroid.in/5422-s xenial InRelease
Get:5 http://ports.ubuntu.com/ubuntu-ports xenial-backports InRelease [102 kB]
Get:6 http://ports.ubuntu.com/ubuntu-ports xenial-security InRelease [102 kB]
Get:7 http://ports.ubuntu.com/ubuntu-ports xenial-updates/main Sources [286 kB]
Get:8 http://ports.ubuntu.com/ubuntu-ports xenial-updates/main armhf Packages [587 kB]
Get:9 http://ports.ubuntu.com/ubuntu-ports xenial-updates/universe armhf Packages [499 kB]
Fetched 1678 kB in 2s (667 kB/s)
Reading package lists... Done

<span style="color: #00ffff;">apt upgrade</span>; # upgrade system
The following packages have been kept back:
 linux-image-xu3
0 upgraded, 0 newly installed, 0 to remove and 1 not upgraded.

<span style="color: #00ffff;">apt install linux-image-xu3</span>; # force upgrade of this package

# what follows is this scary message that one accepts by selecting "No"
<a href="https://dwaves.de/wp-content/uploads/2017/12/odroid-scary-kernel-upgrade-yes-no-question-screen.png"><img alt="" class="alignnone wp-image-12775 size-full" height="246" src="https://dwaves.de/wp-content/uploads/2017/12/odroid-scary-kernel-upgrade-yes-no-question-screen.png" width="1677"></img></a>

# then an <a href="https://dwaves.de/wp-content/uploads/2017/12/apt-install-linux-image-xu3-output.txt">output like this should follow...</a>

<span style="color: #00ffff;">apt autoremove</span>; # remove packages that have become obsolete

<span style="color: #00ffff;">reboot</span>; # reboot now to load new kernel
Connection to 192.168.0.111 closed by remote host.
Connection to 192.168.0.111 closed.
<span style="color: #00ffff;">ping 192.168.0.111</span>; # after round about 30 seconds the odroid xu4 should have rebooted and respond to your pings
PING 192.168.0.111 (192.168.0.111) 56(84) bytes of data.
64 bytes from 192.168.0.111: icmp_seq=27 ttl=64 time=1.12 ms
64 bytes from 192.168.0.111: icmp_seq=28 ttl=64 time=0.513 ms
64 bytes from 192.168.0.111: icmp_seq=29 ttl=64 time=0.480 ms

<span style="color: #00ffff;">apt install htop vim rsync</span>; # install cool software task monitor htop, vim, rsync
<span style="color: #00ffff;">htop</span>; # and start it
<a href="https://dwaves.de/wp-content/uploads/2017/12/Screenshot_odroid-xu4-htop-task-monitoring.jpg"><img alt="" class="alignnone wp-image-12778 size-full" height="552" src="https://dwaves.de/wp-content/uploads/2017/12/Screenshot_odroid-xu4-htop-task-monitoring.jpg" width="1024"></img></a>
# as you can see the 8x CPUs of the odroid xu4 are pretty bored right now
cpu benchmarking:
<span style="color: #00ffff;">apt install sysbench</span>; # let's install them some work
<span style="color: #00ffff;">mkdir /scripts</span>
<span style="color: #00ffff;">vim /scripts/bench_cpu.sh
</span>
#!/bin/bash

NUM_CORES=$(grep -c ^processor /proc/cpuinfo)

echo "============ CPU MIPS and FLOPS"

cat /proc/cpuinfo | grep -ie hardware;
cat /proc/cpuinfo | grep -ie model;
cat /proc/cpuinfo | grep -ie mips;
cat /proc/cpuinfo | grep -ie flops;

echo "============ CPU BENCHMARK"

sysbench --test=cpu --cpu-max-prime=20000 run --num-threads=$NUM_CORES
:wq save and quit or download it.
<span style="color: #00ffff;">wget <a href="https://dwaves.de/wp-content/uploads/2017/05/bench_cpu.sh_.txt">https://dwaves.de/wp-content/uploads/2017/05/bench_cpu.sh_.txt</a></span>; # download script<span style="color: #00ffff;">
mv bench_cpu.sh_.txt bench_cpu.sh</span>; # rename<span style="color: #00ffff;">
chmod +x /scripts/bench_cpu.sh</span>; # make script executable
<span style="color: #00ffff;">/scripts/bench_cpu.sh</span>; # run it

============ CPU MIPS and FLOPS
Hardware : ODROID-XU4
model name : ARMv7 Processor rev 3 (v7l)
model name : ARMv7 Processor rev 3 (v7l)
model name : ARMv7 Processor rev 3 (v7l)
model name : ARMv7 Processor rev 3 (v7l)
model name : ARMv7 Processor rev 3 (v7l)
model name : ARMv7 Processor rev 3 (v7l)
model name : ARMv7 Processor rev 3 (v7l)
model name : ARMv7 Processor rev 3 (v7l)
============ CPU BENCHMARK
sysbench 0.4.12: multi-threaded system evaluation benchmark

Running the test with following options:
Number of threads: 8

Doing CPU performance benchmark

Threads started!
Done.

Maximum prime number checked in CPU test: 20000

Test execution summary:
total time: 37.4554s
total number of events: 10000
total time taken by event execution: 299.4689
per-request statistics:
min: 23.26ms
avg: 29.95ms
max: 44.59ms
approx. 95 percentile: 40.59ms

Threads fairness:
events (avg/stddev): 1250.0000/327.26
execution time (avg/stddev): 37.4336/0.01
so the benchmark ran in 37 seconds. (rerun with the debian jessie 8 turbo game station image and performance governer: execution time (avg/stddev): 56.9216/0.01…)
on an QuadCore Intel(R) Core(TM) i5-4200U CPU @ 1.60GHz the benchmark run in 14.60 seconds.
so the 8x core ODROID X4U is 2.5 times slower than the 4x core i5 at 1.60 GHZ using all available cores.
while doing this
<span style="color: #00ffff;">vim /scripts/cpu_temp.sh</span>
#!/bin/bash

while true ; do

cpu_temp=$(< /sys/class/thermal/thermal_zone0/temp)
cpu_temp=$(($cpu_temp/1000))
echo $cpu_temp C

sleep 1;
clear;

done # executes COMMAND every second
i monitored the temp of the cpu for around 30minutes while running all 8 cores full speed.
the system is PASSIVELY cooled and seems to throttles the CPUs automatically when 80 degrees Celsius are reached.
maximum measured temp was 82 Celsius (179.6 F).
the passively cooled case got warm but not uncomfortably hot. i have heard raspberry had problems with heat.
when the benchmark was over the temps dropped instantly to 53 C.
Introduction Videos:
https://youtu.be/xxl4ORk4SJo
https://www.youtube.com/watch?v=wtqfC9v0xB0
https://www.youtube.com/watch?v=lUchfyTpOjU
Real Time Clock: RTC
just as the Raspberry pi, the odroid needs a battery to keep clock when it is turned off.
https://www.hardkernel.com/main/products/prdt_info.php?g_code=G137508214939
ODROID-HC1 no HDMI but SATA version
there is/was a NAS/SATA variation (headless, no GPU, no HDMI, no screen/monitor) : https://www.pollin.de/p/odroid-hc1-einplatinen-computer-fuer-nas-und-cluster-anwendungen-810766 for 60€.
#linux #gnu #gnulinux #opensource #administration #sysops #hardware #odroid #embedded #desktop #desktopreplacement #mariokart #snes #segamegadrive #genesis #sega #sonic #mario #game #games #retrogames #retroarch #debian #hardkernel
Originally posted at: https://dwaves.de/2017/12/19/update-2022-06-hardkernel-com-how-to-install-xfce4-on-odroid-xu4-can-do-1080p-youtube-and-super-mario-kart50fps-on-8x-arm7-32bit-basic-setup-cpu-tuning-and-monitoring/