Remember Monkey Island and Tomb Raider 1? yeah… wanna play it on GNU Linux? yeeeessss!
over 1600 FREE DOS GAMES! -> https://www.dosgames.com/
and also this goody:
i-war: why this game is a genius space flight and fight sim
gate jump: from earth to jupiter (?)
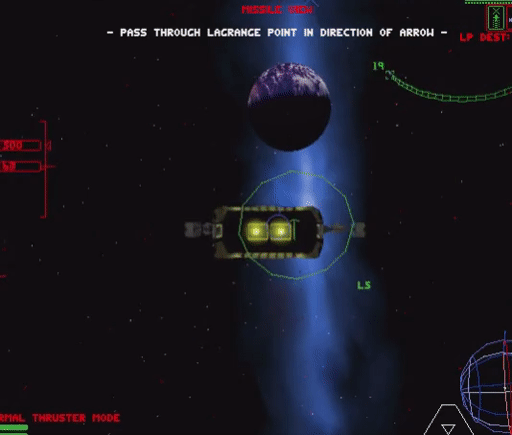
check out the the 3rd trainings mission: docking with containers (fast) and throwing them through a ring X-D
[video width=”746″ height=”560″ mp4=”https://dwaves.de/wp-content/uploads/2022/04/i-war-pc-game-1997-independence-war-mission-docking-with-crates-and-throwing-them-through-a-ring-creativity-and-beauty-in-game-design-genious-autopilot-almost-messes-up.mp4″\]\[/video\]
… this could make for an interesting ship space soccer game… X-D (dock with the ball… and inertia throw it through the goal of the enemy X-D)
- it simulates realistic inertia
- it simulates the loss of subsystems (tactics: make sure attacking enemies are always behind the upper or lower shield that is currently not down, if propulsion is damaged – drifting through space, if weapons are damaged…)
- the SOUND of the game is incredible 🙂
- U for docking 🙂
- weapons systems:
- laser guns can also fire backwards
- attacking missiles can be fenced off with flares
- very cool ship designs that actually make some sense
- holy crap it has an up to 8x players online MULTIPLAYER mode (very revolutionary for 1997) (probably involves advanced insecure self hosted servers with port-forwardings that is not provided by valve-steam thus: UNTESTED!)
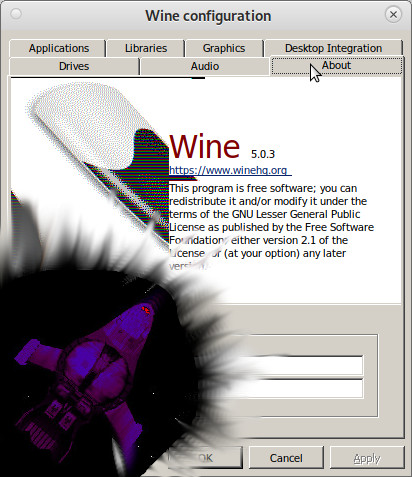
wine
[video width=”638″ height=”428″ mp4=”https://dwaves.de/wp-content/uploads/2022/04/i-war-running-inside-gnu-linux-debian-11-via-wine.mp4″\]\[/video\]

wine: what works?
- the setup
- nGlide setup
- the game itself EVEN in 3DFx-Voodoo-nGlide in full screen mode 🙂 (CONGRATZ ALL INVOLVED! GREAT JOB!)
wine: what does not work?
- in-game menus
- instructors sound output (might be a game “can’t find cdrom drive” related issue)
- it crashes on the end of a mission, but the progress is still saved… so simply restart the game after every mission and should be good
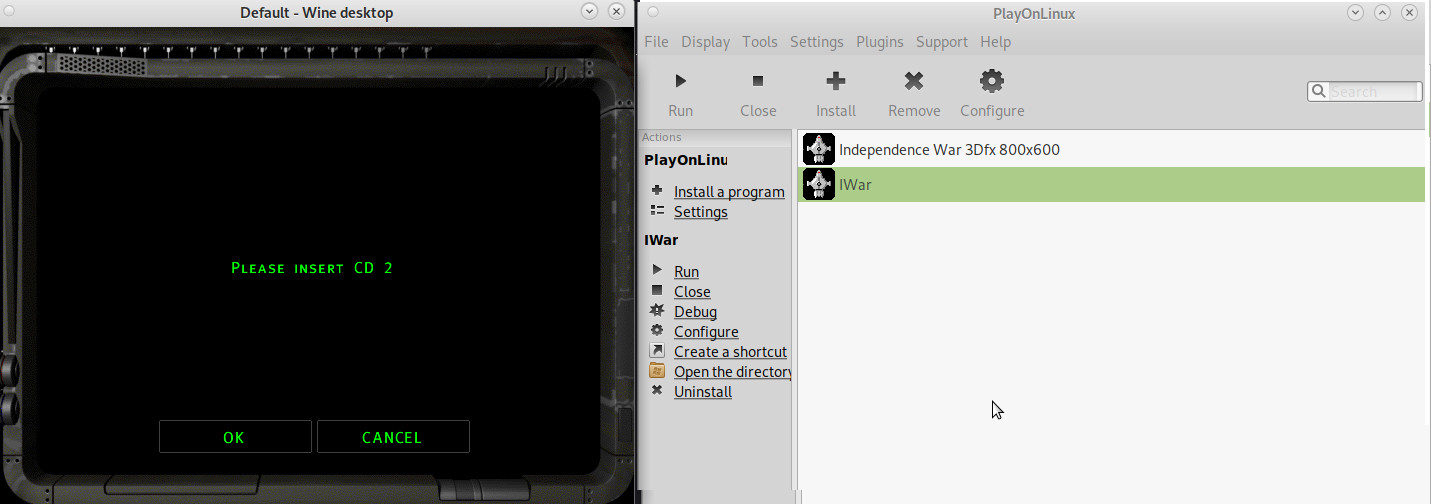
- possible problems: does not detect the CD-ROM drive (even when it is mounted and files are clearly accessible)
- possible workaround: copy the CD1 CD2 CD3 CD4 content simply into the game folder….
nice!
wine per default creates an folder called
/home/user/.wine/drive_c
which resembles the C:\ drive while installing, it will store files there.
install:
<span style="color: #00ffff;">su - root</span>
<span style="color: #00ffff;">apt update</span>
<span style="color: #00ffff;">apt install wine winetricks
</span># start the config tool<span style="color: #00ffff;">
winecfg
</span># start the config tool
# <a href="https://github.com/Winetricks/winetricks">https://github.com/Winetricks/winetricks</a><span style="color: #00ffff;">
winetricks
winetricks --optout
</span>
# mount cd image iso
<span style="color: #00ffff;">mkdir /media/user/cdrom</span>
<span style="color: #00ffff;">mount -t iso9660 -r -o loop /path/to/iwar-cd1.iso /media/user/cdrom

</span># wine setup, this will create a "prefix" "iwar"
# (aka a alias under which to store-remember the settings for this game)
<span style="color: #00ffff;">WINEPREFIX=${HOME}/games/iwar WINEARCH=win32 winecfg</span>
# in the dialogue
<a href="https://dwaves.de/wp-content/uploads/2022/04/winecfg_select_windows_98se.png"><img alt="" class="alignnone size-full wp-image-25717" height="696" src="https://dwaves.de/wp-content/uploads/2022/04/winecfg_select_windows_98se.png" width="607"></img></a>
# Applications → Windows Version → Windows 98 (hit apply)
<a href="https://dwaves.de/wp-content/uploads/2022/04/winecfg-graphics-emulate-a-virtual-desktop-enabled.png"><img alt="" class="alignnone size-full wp-image-25718" height="506" src="https://dwaves.de/wp-content/uploads/2022/04/winecfg-graphics-emulate-a-virtual-desktop-enabled.png" width="591"></img></a>
# Graphics → Emulate a virtual desktop → Desktop size: 1024x786

# not sure if this is actually needed
<a href="https://dwaves.de/wp-content/uploads/2022/04/winecfg-cdrom-drive-d.png"><img alt="" class="alignnone size-full wp-image-25719" height="513" src="https://dwaves.de/wp-content/uploads/2022/04/winecfg-cdrom-drive-d.png" width="612"></img></a>

# install game setup
<span style="color: #00ffff;">WINEPREFIX=${HOME}/iwar wine /media/user/cdrom/SETUP.EXE
</span>
<a href="https://dwaves.de/wp-content/uploads/2022/04/iwar_setup.jpg"><img alt="" class="alignnone size-full wp-image-25655" height="906" src="https://dwaves.de/wp-content/uploads/2022/04/iwar_setup.jpg" width="1219"></img></a>
# the installer should come up and just work fine
# leave it at default install path

# try to start<strong> THE GAME :)</strong>
<span style="color: #00ffff;">cd "${HOME}/iwar/drive_c/Program Files/Particle Systems/Independence War"</span>
<span style="color: #00ffff;">WINEPREFIX=${HOME}/iwar wine IWar.exe</span>

<strong><a href="https://dwaves.de/wp-content/uploads/2022/04/i-war-gnu-linux-debian-11-wine-working-nice1-software-rendering-mode.jpg"><img alt="" class="alignnone size-full wp-image-25720" height="522" src="https://dwaves.de/wp-content/uploads/2022/04/i-war-gnu-linux-debian-11-wine-working-nice1-software-rendering-mode.jpg" width="761"></img></a>
 <a href="https://dwaves.de/wp-content/uploads/2022/04/i-war-gnu-linux-debian-11-wine-working-nice2-software-rendering-mode.jpg"><img alt="" class="alignnone size-full wp-image-25721" height="511" src="https://dwaves.de/wp-content/uploads/2022/04/i-war-gnu-linux-debian-11-wine-working-nice2-software-rendering-mode.jpg" width="753"></img></a>

NICE! :) Space Pilots! ENGAGE!

<a href="https://duckduckgo.com/?q=star+trek+lower+decks&t=ffab&ia=web"><img alt="" class="alignnone wp-image-25735 size-full" height="500" src="https://dwaves.de/wp-content/uploads/2022/04/star-trek-lower-decks-marvel-at-the-stars.jpg" width="889"></img></a>

</strong><strong>the menus are still a bit glitchy but...
true space pilots are not scared by that
there are only 4 symbols:
<a href="https://dwaves.de/wp-content/uploads/2022/04/i-war-gnu-linux-debian-11-wine-menus-not-working-properly-yet-1.jpg"><img alt="" class="alignnone size-full wp-image-25734" height="502" src="https://dwaves.de/wp-content/uploads/2022/04/i-war-gnu-linux-debian-11-wine-menus-not-working-properly-yet-1.jpg" width="641"></img></a>

<a href="https://dwaves.de/wp-content/uploads/2022/04/i-war-options-screenshot.png"><img alt="" class="alignnone size-full wp-image-25733" height="501" src="https://dwaves.de/wp-content/uploads/2022/04/i-war-options-screenshot.png" width="636"></img></a></strong>
- this is “software rendering” mode (glad old games such as Half Life 1 had em… as backup modes if 3D acceleration (smoother grafix) does not work)
- 3DFx/Voodoo mode would be started like:
<span style="color: #00ffff;">WINEPREFIX=${HOME}/iwar wine "IWar.exe" -b -16 800x600 -english</span>- but it quits with “Failure: Could not reference image glide2x” - tried to install http://www.zeckensack.de/glide/ - http://www.zeckensack.de/glide/archive/GlideWrapper084c.exe - tried to install https://www.zeus-software.com/downloads/nglide - https://www.zeus-software.com/downloads/nglide/d-1.html - the way to do this is like this: -<span style="color: #00ffff;">mkdir /home/user/iwar/drive_c/software/</span> <span style="color: #00ffff;">cd /home/user/iwar/drive_c/software/</span> <span style="color: #00ffff;">wget https://www.zeus-software.com/downloads/nglide/d-1.html</span>- then: -<span style="color: #00ffff;">cd "${HOME}/iwar/drive_c/Program Files/Particle Systems/Independence War"</span> <span style="color: #00ffff;">WINEPREFIX=${HOME}/iwar wine explorer</span>- then: -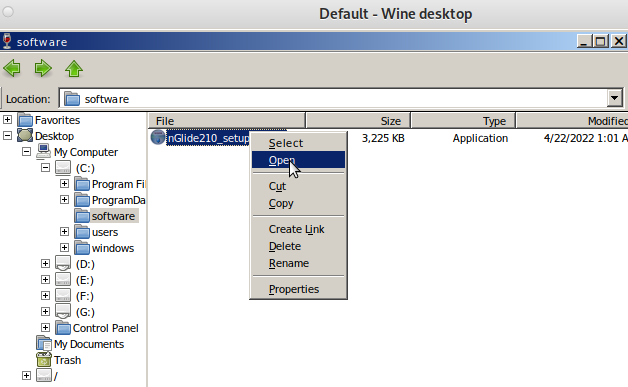 - then: start the game like this:
-
- then: start the game like this:
- <span style="color: #00ffff;">cd "${HOME}/iwar/drive_c/Program Files/Particle Systems/Independence War"</span>-<span style="color: #00ffff;">WINEPREFIX=${HOME}/iwar wine "IWar.exe" -b -16 800x600 -english</span>-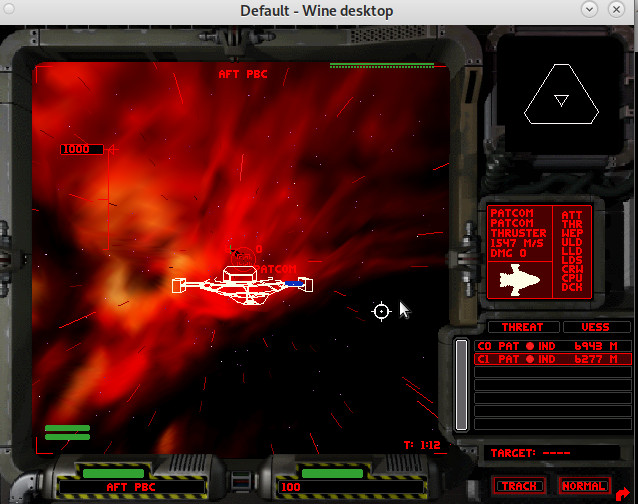 - AND IT WORKS! 🙂
- CrossOver is a polished version of Wine provided by CodeWeavers. CrossOver makes it easier to use Wine and CodeWeavers provides excellent technical support to its users.
- https://linuxconfig.org/configuring-wine-with-winecfg
- nGlide support also coming to GNU LINUX 🙂
- should work in WHINE? https://appdb.winehq.org/objectManager.php?sClass=version&iId=9586
- https://wiki.winehq.org/Wine_User%27s_Guide
- https://www.winehq.org/news/
- https://wiki.winehq.org/Winetricks
- http://www.boxedwine.org/downloads/
- https://forum.winehq.org/viewforum.php?f=8
- https://wiki.winehq.org/FAQ#What_is_the_difference_between_Wine.2C_CrossOver.2C_and_Cedega.3F
- AND IT WORKS! 🙂
- CrossOver is a polished version of Wine provided by CodeWeavers. CrossOver makes it easier to use Wine and CodeWeavers provides excellent technical support to its users.
- https://linuxconfig.org/configuring-wine-with-winecfg
- nGlide support also coming to GNU LINUX 🙂
- should work in WHINE? https://appdb.winehq.org/objectManager.php?sClass=version&iId=9586
- https://wiki.winehq.org/Wine_User%27s_Guide
- https://www.winehq.org/news/
- https://wiki.winehq.org/Winetricks
- http://www.boxedwine.org/downloads/
- https://forum.winehq.org/viewforum.php?f=8
- https://wiki.winehq.org/FAQ#What_is_the_difference_between_Wine.2C_CrossOver.2C_and_Cedega.3F
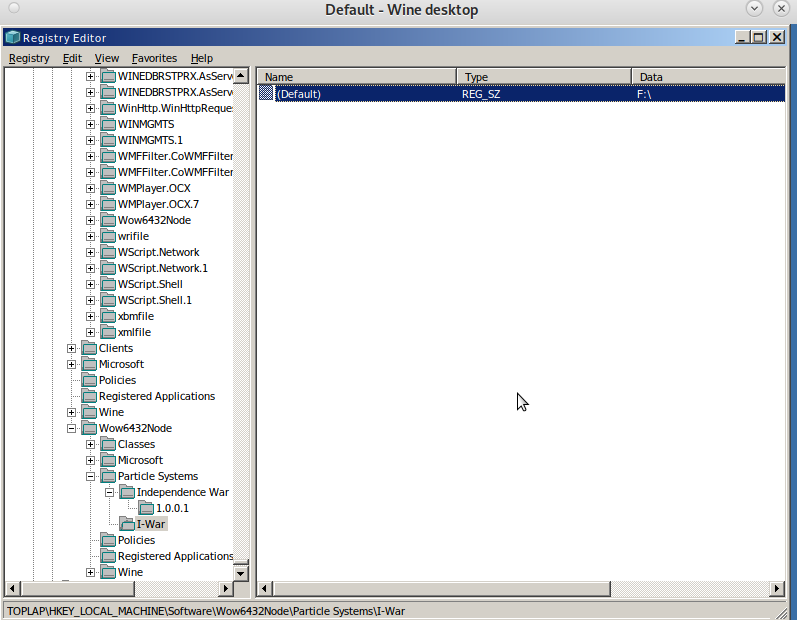
just4info:
i-war stored the path to the setup cdrom in the registry here…
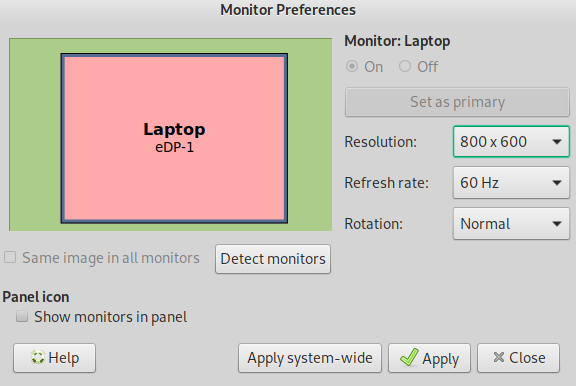
nice 🙂 now what about full screen?
the workaround is like this:
- set monitor to 800×600
- config wine
- ``` WINEPREFIX=${HOME}/iwar winecfg
# create a new start.bat in the same folder as the IWar.exe
echo "IWar.exe -b -16 -800x600 -english" > "~/iwar/drive_c/Program Files/Particle Systems/Independence War/start.bat"
# start the game via wine explorer
cd "${HOME}/iwar/drive_c/Program Files/Particle Systems/Independence War"
WINEPREFIX=${HOME}/iwar wine explorer
```
4. search for the start.bat -r-click-> open & enjoy 🙂
playonlinux
it’s basically a gui for wine…
unfortunately same problem here… the game won’t detect CD change… possible workaround: copy the CD1 CD2 CD3 CD4 content simply into the game folder….
might also be interesting checking out:
https://www.playonlinux.com/en/
virtualbox.org?
while it is possible to run i-war in software rendering mode (not the smoother 3d accelerated mode that would be started with:
<span style="color: #00ffff;">"C:\Programme\Particle Systems\Independence War\IWar.exe" -b -16 -800x600 -english</span>
within a windows xp vm (set RAM to 256MBytes!)
there will probably be (never?) be proper 3DFx / nGlide / Voodoo support… https://www.virtualbox.org/ticket/7828
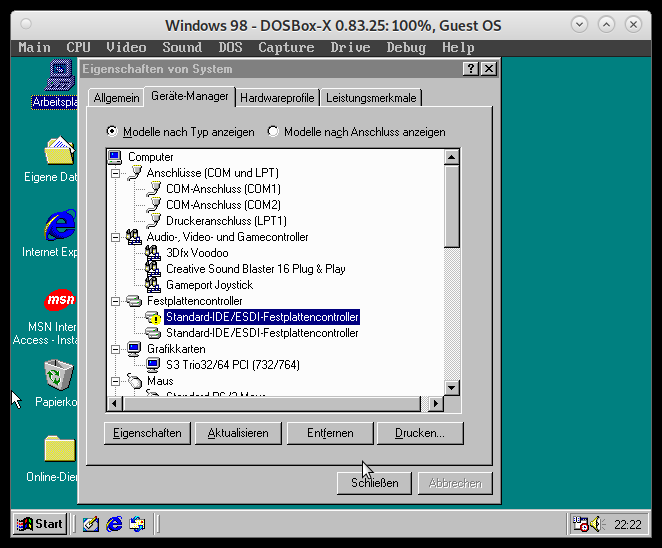
dosbox-x:
managed to install win 98 se… but was not able to mount any disk-image.iso (no kidding! it is a major hazzle!
and the documentation does not check out, sorry guys)
if no windoowze is needed to play the game… even BETTER! 🙂
as penguins try to win the war for independence from closed source 🙂
https://dosbox-x.com (NOT based on wine!)
- “running Linux in an x86 or x86-64 PC … can also try running Windows games and applications using Wine.”
- “Especially 32-bit Windows games and applications, typically work quite well, and this may be an easier and faster solution and provide better integration with your desktop environment.”
- “16-bit or mixed 16/32-bit Windows games and applications are more problematic with Wine as modern 64-bit Linux distributions typically have the required kernel functionality for running 16-bit code (e.g.,
X86_16BITandMODIFY_LDT_SYSCALL) disabled at kernel compile time.” (src)
compile instructions can be found here: https://github.com/joncampbell123/dosbox-x/blob/master/BUILD.md
<span style="color: #00ffff;">lsb_release -a</span>
No LSB modules are available.
Distributor ID: Debian
Description:    Debian GNU/Linux 11 (bullseye)
Release:    11
Codename:   bullseye

<span style="color: #00ffff;">su - root</span>
<span style="color: #00ffff;">apt search dosbox</span>
# installs old version
dosbox/stable<span style="color: #ff6600;"> 0.74-3-3</span> amd64
  x86 emulator with Tandy/Herc/CGA/EGA/VGA/SVGA graphics, sound and DOS

# to install latest version compile from src: <a href="https://github.com/joncampbell123/dosbox-x/">https://github.com/joncampbell123/dosbox-x/</a>
<span style="color: #00ffff;">su - root
apt update
</span>
# install requirements
<span style="color: #00ffff;">apt install automake gcc g++ make libncurses-dev nasm libsdl-net1.2-dev libsdl2-net-dev libpcap-dev libslirp-dev fluidsynth libfluidsynth-dev libavdevice58 libavformat-dev libavcodec-dev libavcodec-extra libavcodec-extra58 libswscale-dev libfreetype-dev libxkbfile-dev libxrandr-dev
</span>
# clone dosbox source to local machine
<span style="color: #00ffff;">git clone https://github.com/joncampbell123/dosbox-x.git</span>

# compile as non-root
<span style="color: #00ffff;">Ctrl+D</span> - log out root
<span style="color: #00ffff;">cd dosbox-x
./build-debug</span>
# install binaries as root
<span style="color: #00ffff;">su - root
make install</span>

# run as non-root
<span style="color: #00ffff;">Ctrl+D</span> - log out root
<span style="color: #00ffff;">dosbox-x</span>

# it is located here
<span style="color: #00ffff;">/usr/bin/dosbox-x</span>

# alternative: snapd setup
<span style="color: #00ffff;">apt install snapd
snap install core
snap install dosbox-x
</span>
snap remove dosbox-x
congratz! 🙂

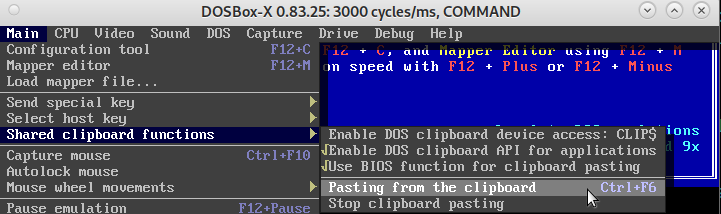
first problems: keyboard / some keys “:” not working
for example with older version it was no problem typing “ö” and getting (US-KeybLayout) a “:”
to work around this problem, open a terminal type “:”, copy it to clipboard, start dosbox-x and hit Ctrl+F6 to paste it in
How to install Windows 98 SE?
https://dosbox-x.com/wiki/Guide%3AInstalling-Windows-98#_installation_method_2
when the user wants to install windows 98 se
can get it from here: https://archive.org/details/win98se_201801
(but the serial is missing?)
- rename the iso to win98se.iso and put it into the user’s home directory
- create config file (also in user’s home directory):
<span style="color: #00ffff;">cd ~
wget <a href="https://dwaves.de/wp-content/uploads/2022/04/win98.conf_.txt">https://dwaves.de/wp-content/uploads/2022/04/win98.conf_.txt</a></span>
<span style="color: #00ffff;">mv -v win98.conf_.txt win98.conf
</span>
3. start it like this: -<span style="color: #00ffff;">dosbox -conf win98.conf</span>
the Ctrl+F6 hotkey comes in handy in the next steps, so simply copy and paste those instructions line by line:
# IMGMAKE hdd.img -t hd_8gig
<span style="color: #00ffff;">IMGMAKE hdd.img -t hd -size 16384 -force
IMGMOUNT C hdd.img
IMGMOUNT D win98.iso
</span># copy CD content to C: because during setup it will ask for more files from the CD
<span style="color: #00ccff;">XCOPY D:\WIN98 C:\WIN98 /I /E</span>
<span style="color: #00ffff;">IMGMOUNT A -bootcd D BOOT A:
BOOT A:</span>
https://dosbox-x.com/wiki/Guide%3AInstalling-Windows-98#_installation_method_2
When the Windows installer reboots, and your back at the DOSBox-X Z:\> prompt. Close DOSBox-X and edit your win98.conf config file, and add the following lines in the [autoexec] section at the end of the file:
IMGMOUNT C hdd.img
IMGMOUNT D win98.iso
BOOT C:
hotkeys / shortcuts: Special Keys
These are the default keybindings. They can be changed using the keymapper.
Note: If you’re using a Mac and are having trouble with the function keys, you may need to set your F keys to function as function keys. You can do this by going to System Preferences > Keyboard, going to the Keyboard area, and checking the “Use all F1, F2, etc” box.
KeyAction*ALT-ENTERSwitch to full-screen (and back).ALT-PAUSE (ALT-F16 on OS X)Pause emulation.CTRL-F1Show the keymapper configuration screen,CTRL-F4Update cached information about mounted drives. Useful if you changed something on a mounted drive outside of DOSBox. Also cycles through disk images mounted using IMGMOUNT.CTRL-F5Save a screenshot (goes to capture folder).CTRL-ALT-F5Start/Stop recording of AVI video. NOTE: You may well have some problems with this, please see Recording Video for more information.CTRL-F6Start/Stop recording sound output to a wave file (goes to capture folder).CTRL-ALT-F7Start/Stop recording of OPL commands.CTRL-ALT-F8Start/Stop the recording of raw MIDI commands.CTRL-F7Decreases frameskip.CTRL-F8Increases frameskip.CTRL-F9Kill (close) DOSBox.CTRL-F10Capture/Release the mouse (if you need to use the mouse within DOSBox).CTRL-F11Decrease DOSBox cycles (slows down the emulation).CTRL-F12Increase DOSBox cycles (speeds up the emulation).ALT-F12*Unlock speed (turbo button).These default bindings are also documented in the README file accompanying the software.
Language Keys
When a keyboard layout is loaded:
CTRL+ALT+F2Switch between foreign layout and US layout.LEFT-ALT+RIGHT-SHIFTActivate dual layouts (for some keyboards, e.g. GK codepage 869 and RU codepage 808).LEFT-ALT+LEFT-SHIFTDeactivate dual layouts.For OS X you have to use additionally + [Applekey] for the same result
INS key is [Fn] + M on OS X.
For Linux you have to use additionally + [win] for the same result
src: https://www.dosbox.com/wiki/Special_Keys
creditz:
Links:
thanks for inspiration: https://darrengoossens.wordpress.com/2021/01/20/dosbox-x-on-debian-10-compiling-and-running/
https://snapcraft.io/install/dosbox-x/debian
https://dosbox-x.com/wiki/Guide%3AInstalling-Windows-98
https://www.dosgames.com/game/duke-nukem-3d/ <- for the nerds that enjoyed this reckless guy
#linux #gnu #gnulinux #opensource #administration #sysops #wine #games #gnu-linux #game #iwar #space #simulator #spaceship
Originally posted at: https://dwaves.de/2022/04/21/gnu-linux-i-war-running-inside-gnu-linux-debian-11-via-wine-run-old-dos-games-and-windows-games-from-wine-to-dosbox-x-how-to-compile-from-latest-src-first-problems-keyboard-some-keys/